 English
 Arabic
 Danish
 Dutch
Dutch
 Finnish
 French
 German
 Hebrew
 Italian
 Japanese
 Norwegian
 Polish
 Portuguese
 Spanish
 Swedish
 Russian
How to Curve Text in Gimp With Paths Tool Like a Pro
Hello designers, Did you notice? From badges, posters and logos to social media, all are using circular and curved text. Why? Because our eyes like to see simple yet visually interesting texts.
So, you need to up your game and learn how to curve texts to grab the attention of the customers. You can do it in GIMP with just a few clicks. GIMP is a free image editing software. There, you can compose your image with ease, with various fonts.
With this article, learn how to curve text in GIMP and make your text designs shine.
How to Curve Text in Gimp
First, open GIMP. I will show you exactly the process I follow to make curve texts on gimp.
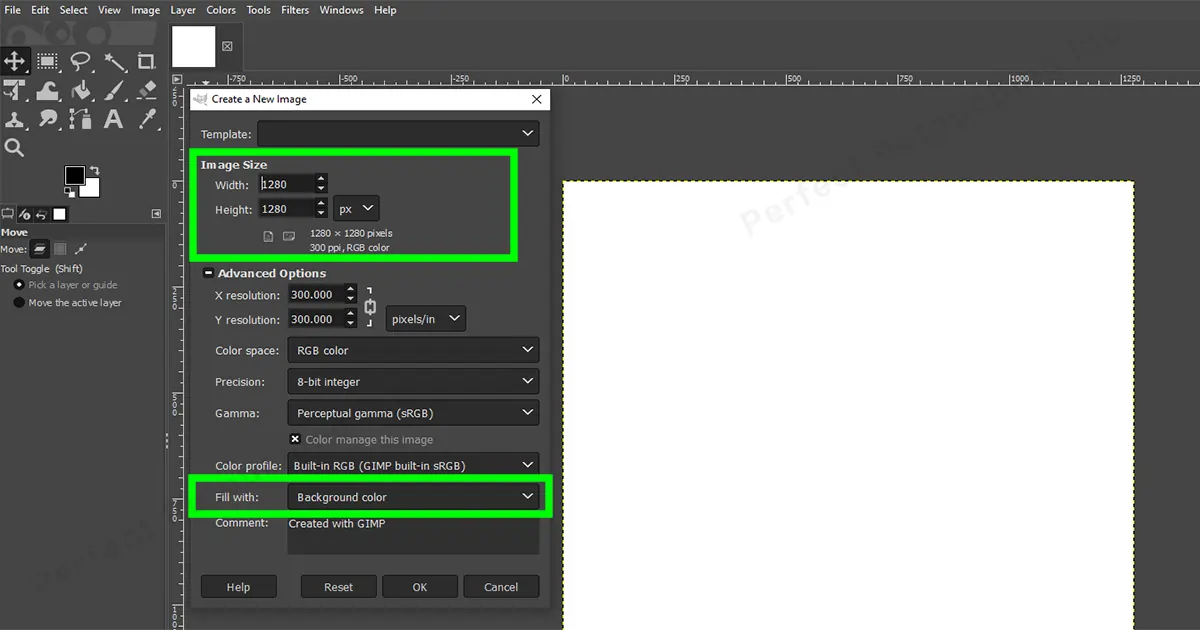
1. Create New File & Select Image Size
- Click Ctrl+N or go to File>New to create a new image. A dialog box will appear on the screen.
- Choose image size from the dialog box. Such as, image size, height- 1280 and width- 1280.
Note: choose the image size based on your client or your preference. - For safety, check advanced options’ fill with section. If the “fill with” section has background color in there, you are good to go.
- Select “OK” to create a new image file.
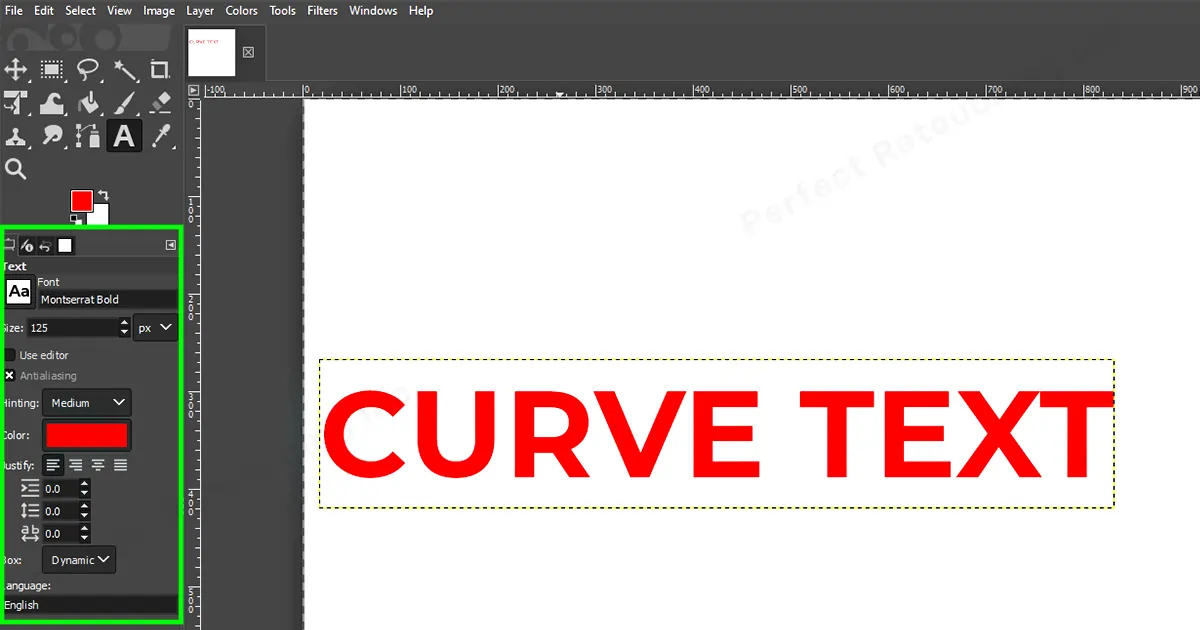
2. Add Text to the Image
- If your image file is created, check for background color. If you need white background or gray background to make a banner or poster, choose according to that.
Note: If you need only the text, do not mind the background and work on white background for ease. - Select the Text Tool From the Tool box- type Text Size, 120/125- Click on Background layer to write the text.
Note: If you need all words capital letters, write it with Caps Lock on. - Select the Font from the Text Box. I usually experiment with new fonts to see which looks better. You can also choose any font such as Montserrat Bold.
- Click on the image file and a box will appear. Write the text in that box.
Note: To change font, click Ctrl+A to select the text, then change font from Aa. - Click on the move tool to select a new tool.
Note: Move tool is used as a stop. If you click on the move tool, the text tool will be removed. If you want to use the text tool again, you will have to click on it.
3. Set the Text in Center
- Select Move Tool from the tools options. There should be two options, move tool and alignment tool. From there, click alignment and from the below box, change Relative to and choose image.
- Click on the Text Box and the box will change. If the squares appear in the box, it worked.
- Now, from the Relative to- Choose the “Align center of target” symbol and choose “Align middle of target” symbol. The text came in the middle.
- Click on the Move Tool to remove alignment tool and select paths tool.
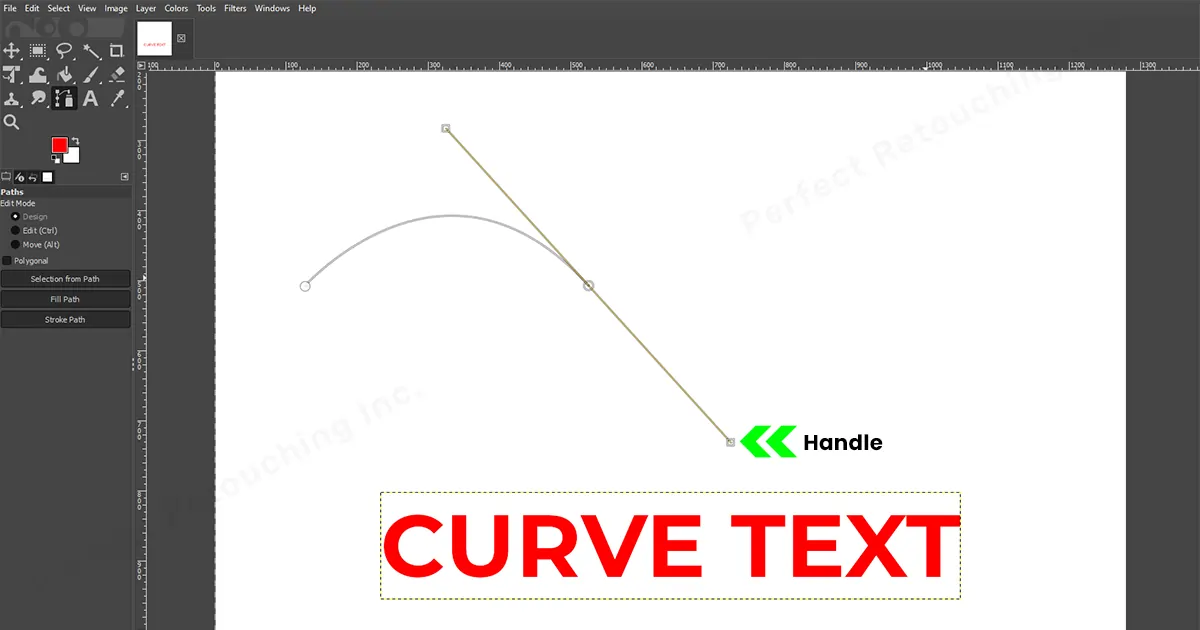
4. Select the Paths Tool to Create the Curve
- Go to the Tool Box- click on Paths Tool.
- You can see above the background layer, another layer appeared called add text along the path.
- Now, click on the image to create a node- click and drag another node on the place you want. You can see handles on the second node, use those handles to set the curves the way you want.
- Click on the handle. Move it upward or downward to get less or more curve. With the cursor on the handle, Hold Shift key to adjust both handles.
- Adjust the curve the way you want. Release the handle and the curve is set.
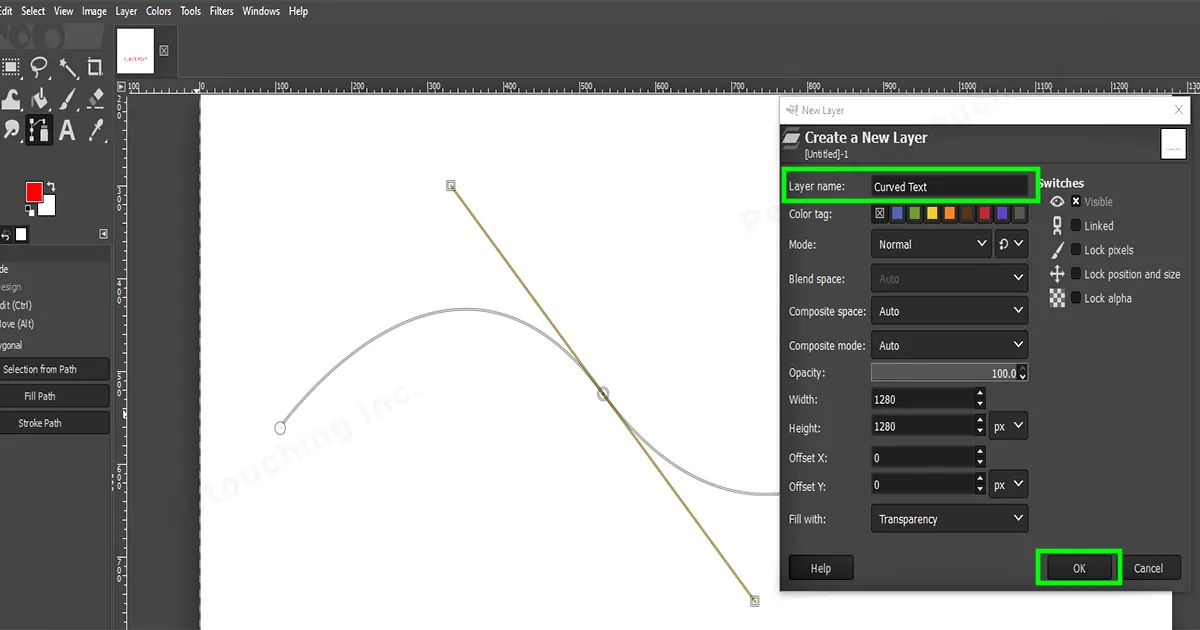
5. Place the Text Along the Curve
- Create a new layer from the Layer’s menu.
Name the layer in the “layer dialog box”- arched text/ curved text.
Check “Fill With” in the layer dialog box- Transparency.
Click OK and a new layer has been created.
Go to Add text along the path, click the right button on the mouse- a box will appear and choose Text along path from there. It will directly add the text on the image.
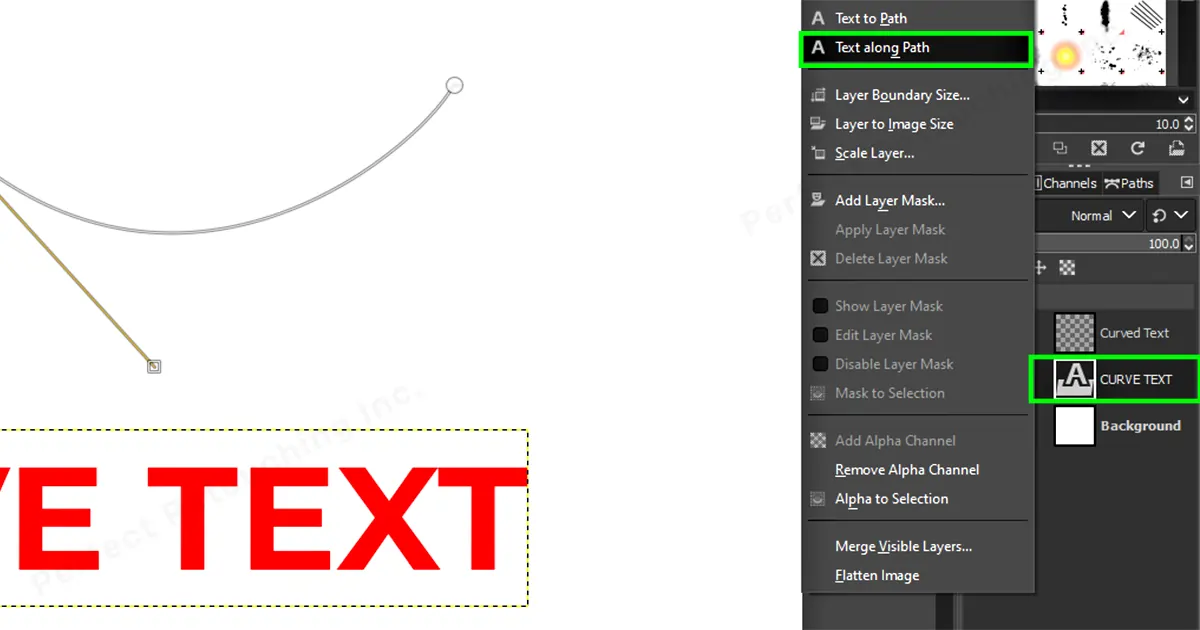
Go to the Curved Text layer and choose it. Choose Fill Path and a dialog box will appear. From the dialog box, select solid color and click fill. Change the foreground color to your desired color and it will cover the text path.
The text that appeared on the curve is with nodes. So, to remove nodes, click the move tool or click “M”.
Go to Paths and hide the path by “hit on the eye beside the section”.
Note: the eye beside the section is very important to keep or remove the layer. If you hide the eye, the layer will be gone. Add it again, the layer will appear.Go to layers- select Curved text/Arched text. If you are unable to move texts freely. Go to Layers from the Menu Bar- choose crop to text- now click on the curved text and you can move it freely from place to place.
To set the curved text in the middle, again click on the move tool- choose the alignment. From relative to- Click the Align center of target and Align middle of target. The curved text will appear in the middle.
Hide the first straight text by hiding the eye from add text along a path. Position the curved text according to your preference. And Hooray! You have curved the image in GIMP successfully.
Note: Take detailed instructions from your client and follow it. If they are making the poster for social media or shop. For editing photos, take professional help, if you need.
You just need to do one more thing. You need to save the image so that later, you can successfully upload it or print it.
6. Save and Export the Image
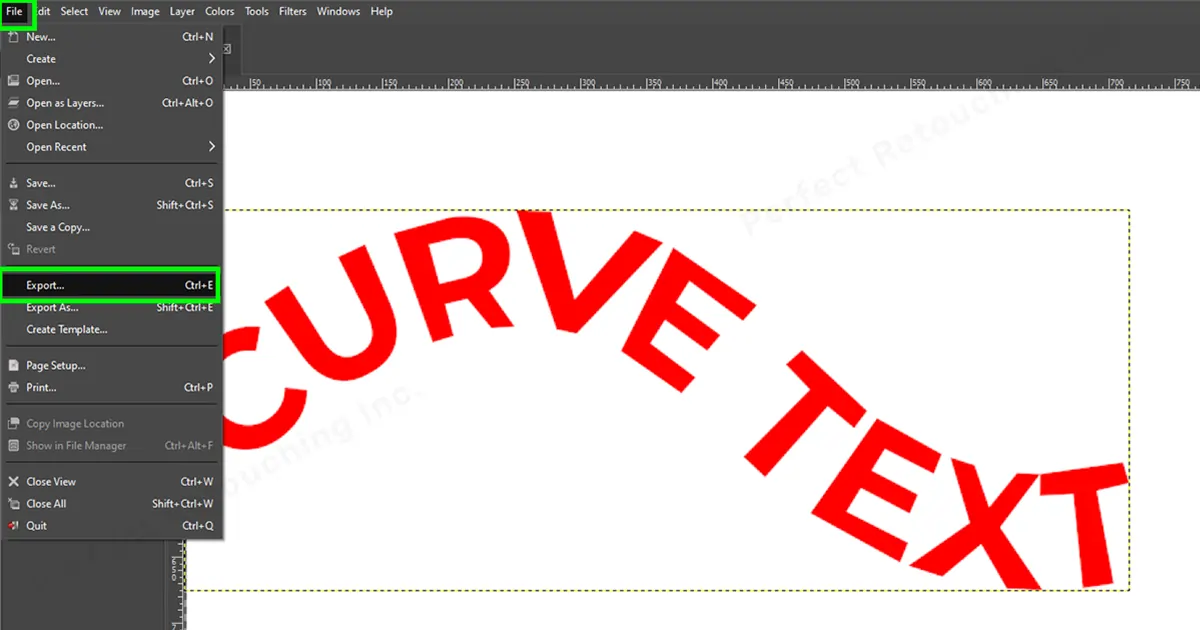
If you want to save an image in a png, jpg or jpeg file, you can not save it in GIMP with save or save as. You need to use another method.
-
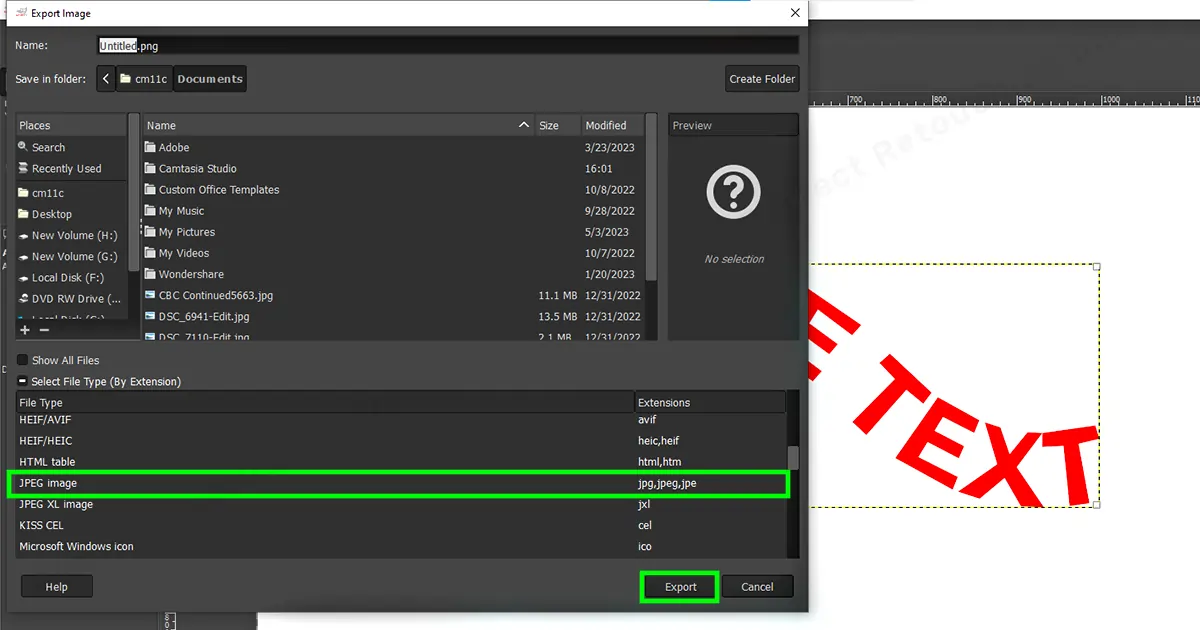
Go to files- select export as- select file type option (by extension)- choose jpg, png or jpeg- click on export.
- An export dialog will open. You need to choose the quality from there. Choose from 80-90% to keep the original image the same and click Export. Now your image is saved perfectly to the file.
Final Verdict
Wasn’t this tutorial on how to curve text in GIMP with paths tool easy? It may seem a bit hard for long descriptions but it is really not. It is quite easy. Just try it.
I recommend GIMP for beginners because it is a free software and editing text images is easy there. Practice curving the text in as many angles as possible. Through experiment and practice, you can edit text images easily and flawlessly.


