 English
 Arabic
 Danish
 Dutch
Dutch
 Finnish
 French
 German
 Hebrew
 Italian
 Japanese
 Norwegian
 Polish
 Portuguese
 Spanish
 Swedish
 Russian
Master Photoshop Bracelet Jewelry Retouching with These Simple Steps in 2025
Trying to fix Photoshop techniques for jewelry retouching can sometimes feel like trying to solve a puzzle with a few pieces missing, doesn’t it? Way too frustrating and slow! I literally used to spend hours tweaking every little detail, trying to make the bracelet shine just right, but unfortunately, it always seemed to fall a bit flat. Here’s a fun fact for you: studies show that high-quality product photos can increase jewelry sales by up to 30%!
Isn't that a huge difference just from making your images look better? Absolutely!
Over time, I discovered some simple tricks that not only made my overall process faster but also gave my photos that professional sparkle buyers love. And as you're already here, I believe you're up for doing it as well.
Trust me, you can do it only with some simple Photoshop bracelet jewelry retouching techniques throughout this blog. From smoothing metals to boosting gemstone colors, these steps helped me save time and get better results.
So now let me walk you through these easy techniques so you can turn your bracelet photos from “okay” to “wow” without the headache!
Understanding Bracelet Jewelry Photo Editing In Photoshop
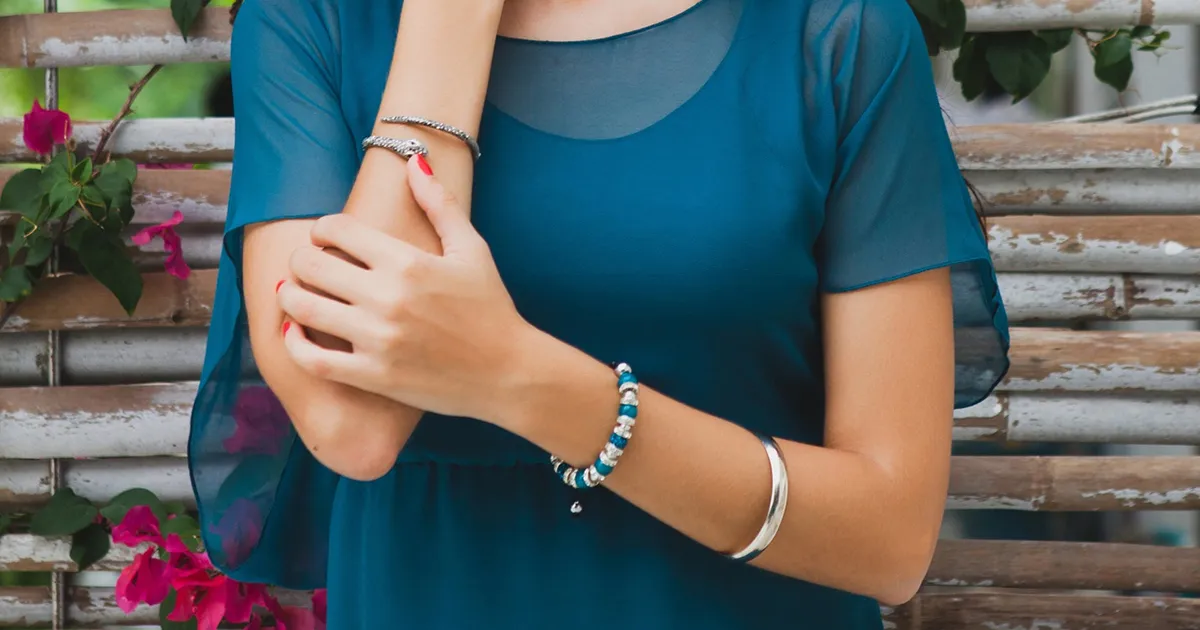
Cameras often distort reality because harsh lighting can make silver sometimes look gray, or your bracelets' diamonds’ sparkle might get lost in shadows. So in this case, Photoshop bracelet retouching is the secret sauce that turns ordinary jewelry photos into sales magnets.
But it’s not just about looks, always. As we already know, online buyers rely solely on visuals, so here a retouched image doesn’t just show a product, but instead builds trust. For instance, a gold bracelet with accurate warm tones feels tangible, even through a screen, right?
That’s why Photoshop techniques for jewelry retouching ensure your jewelry looks as breathtaking online as it does in real life, turning skepticism into confidence and clicks into purchases.
Why Photoshop Bracelet Jewelry Retouching is Essential?
In this world of luxury jewelry, consistency of retouching in your bracelet jewelry photos isn’t just about aesthetics but the foundation of a long-term relationship with customers.
So let’s find out how Photoshop bracelet jewelry retouching services ensure cohesive branding and customer confidence:
Uniform Lighting & Color Accuracy
Studio setups often create inconsistent lighting, making bracelets appear different across photos.
With Photoshop tools for jewelry editing, such as color correction in Photoshop for jewelry and Photoshop metal polishing for bracelets, retouchers standardize brightness, shadows, and colors to capture the same luxurious look every always.
For instance, a rose gold bracelet taken in warm and cool lighting may be adjusted to match the trademark rosy colour of your brand, therefore removing any differences that perplex consumers.
Cohesive Visual Identity
Another crucial benefit of professional bracelet image retouching is that it guarantees all product photos fit your company’s aesthetic.
Whether your brand’s style is simple and elegant, like Sonia Sartre's monochrome elegance, or vibrant and textured, just like Tiffany & Co.’s consistent editing styles, using Photoshop layers for jewelry retouching and Photoshop masking for bracelet jewelry.
Retouching jewellery images ultimately helps your website, social media, and marketing materials present a unified look that customers remember
Professionalism & Craftsmanship
Retouching is used by high-end companies like Adorna Luxury Jewellery to precisely emphasise complex details—prongs, engravings, and gemstone facets.
Using advanced Photoshop techniques for jewelry retouching, such as jewelry photo cleanup and metal retouching in jewelry photos, ensures sharpness and shadow depth that reveal the fine workmanship behind each piece. Most importantly, it reassures consumers that they are purchasing premium goods.
Trust Through Reliability
Inconsistent jewelry photography editing simply breeds doubt. Jewelry bracelet photo retouching erases variables like uneven backgrounds or lighting shifts, creating a seamless shopping experience.
For instance, a bracelet shot against wrinkled fabric can be placed on a clean white backdrop, using Photoshop bracelet background removal and clipping path for bracelet jewelry techniques, creating a polished look similar to brands like Cartier
Brand Recall & Loyalty
Repetition of visual elements or approaches, like specific angles or editing styles, can be achieved through perfect jewelry image editing services and product photo retouching. This strengthens consumers' memories and creates a distinct brand style for a particular company. So when every retouched image follows the same guidelines (e.g., gemstone vibrancy, metal luster), customers associate your brand with reliability, fostering loyalty.
Essential Photoshop Tools For Jewelry Editing
Jewelry retouching can be done easily with the right tools. So here’s a breakdown of must-have Photoshop tools for flawless bracelet photo editing, with price ranges to help you plan accurately:
- Spot Healing Brush: Quickly remove dust, scratches, and tiny imperfections, and it’s ideal for beginners who need fast fixes without manual sampling.
- Clone Stamp Tool: Sample clean areas to cover flaws like fingerprints or reflections. You might use 50-70% opacity for natural blending on gemstones.
- Pen Tool: Create precise selections for cutting out jewelry or refining edges. This tool is best for chains, engravings, and intricate designs.
- Dodge & Burn Tools: Enhance highlights (Dodge) and deepen shadows (Burn) for 3D depth. You can try out subtle exposure (5-12%) to avoid over-editing.
- Hue/Saturation Adjustment Layers: To edit bracelet jewelry images, correct color casts in metals (e.g., yellow gold → rose gold) and boost gemstone vibrancy.
- High Pass Filter: Sharpen details like prongs or engravings. You can keep the settings in 1.2- 2.5px radius for subtle clarity.
- Smart Sharpen Filter: Final touch-up for web-ready images. Presets for the best result can be amount (70-90%), radius (0.8- 1.2px).
Cost Considerations:
- Photoshop Subscription: $20.99-$54.99/month (via Adobe Creative Cloud).
- Freelancers: $5-$50/image for basic retouching; $100-$300/image for high-end editorial work.
- Plugins: $50-$200 (e.g., Nik Collection for advanced sharpening/color tools).
Step by Step Photoshop Techniques For Jewelry Retouching
Using the right Photoshop techniques can help you make your bracelet appealing to customers, therefore improving all its qualities. Knowing these approaches can help you, whether you are a professional photographer or a company owner, accurately and artistically present your work in the best light. Let's look at some basic, useful Photoshop methods to make your jewellery images shine like never before.
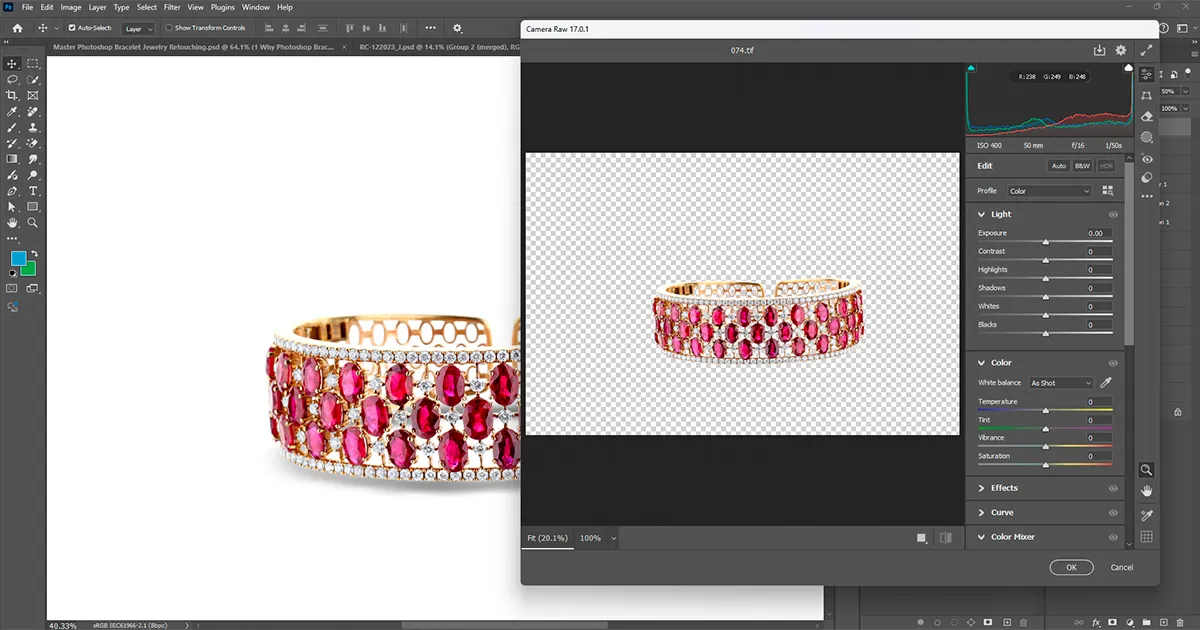
Preparing Your Bracelet Images for Editing
Start by importing high-quality RAW files to retain every detail of the bracelet before delving into changes.
Begin with Photoshop layers for jewelry retouching, and separate changes like exposure fixes and color corrections into discrete layers in your workspace. This non-destructive method guarantees that you may subsequently adjust parameters without sacrificing the original image.
Early on, then, use the clipping path for bracelet product photo retouching to separate the object from its backdrop, therefore facilitating exact retouching. Good planning maintains your workflow and saves hours of backtracking.
Clean Up All the Dust, Scratches, & Smudges
Unexpectedly, even the most carefully shot bracelets get dirt or scratches. To remove scratches from bracelet images, little flaws like lint on gemstones or smudges on metal surfaces, use the Spot Healing Brush in Content-Aware mode.
For more significant defects, such as chain link scratches, use the Clone Stamp Tool to sample clean areas for flawless blending of patches. Advanced users can utilize Frequency Separation to separate texture from color layers, therefore removing scratches without changing the bracelet's inherent tones. This stage of bracelet image cleanup in Photoshop guarantees your jewelry is not synthetic but rather perfect.
Boost the Sparkle and Glow
To make gemstones and metals shine, use the Dodge Tool set to Highlights mode (5-12% exposure) to brighten facets and edges, mimicking natural light reflections.
While jewelry polishing in photo editing, adjust midtones with Curves to add luminosity, making your bracelet appear as if it’s catching sunlight. Don’t overdo saturation—subtly increase vibrance to enhance colored gemstones without turning gold into neon yellow.
These tweaks transform dull bracelets into eye-catching pieces that scream luxury.
Get the Colors Just Right
Studio lighting can distort colors, making your rose gold bracelet look pinkish or sapphires appear washed out. So, correct this with Hue/Saturation Adjustment Layers, tweaking sliders until metals match their real-world counterparts.
Properly apply the White Balance Eyedropper on neutral metal areas to auto-cast unwanted tints, then refine with Color Balance to neutralize stubborn blue or green shadows. Accurate colors build trust, assuring customers the bracelet they see online is the one they’ll receive.
Bring Out the Details
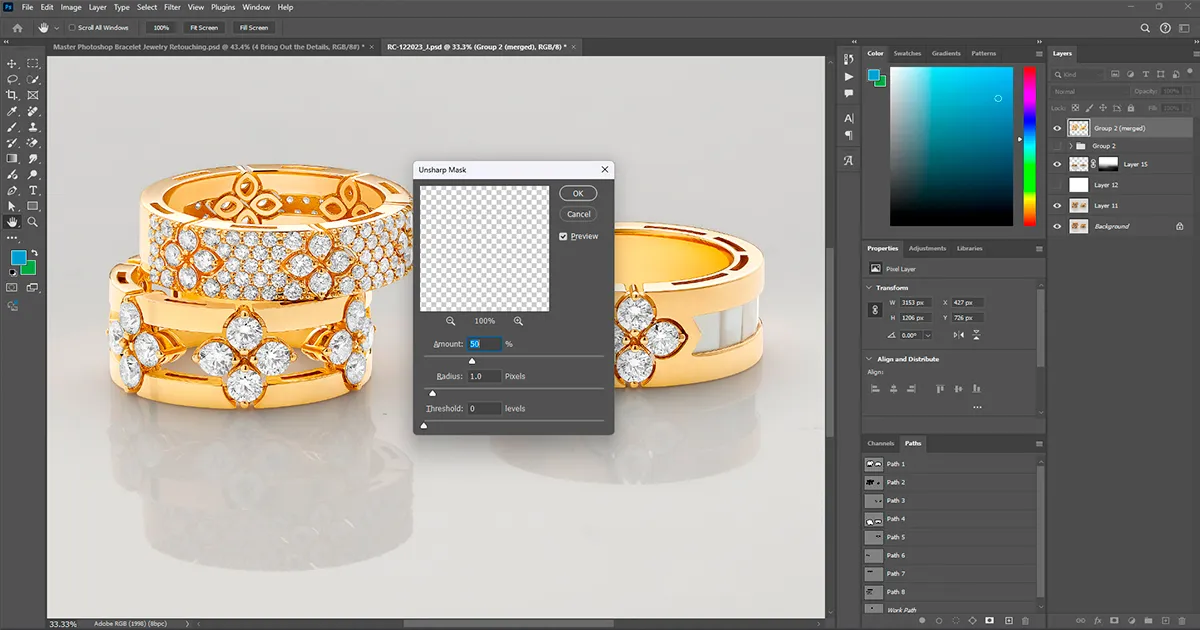
Zoom in to highlight intricate engravings or prong settings. Apply the High Pass Filter (1.2- 2.5px radius) in Overlay mode to sharpen details without introducing noise. Follow this with Smart Sharpen (70-90% amount) for web-ready crispness, ensuring even tiny links in chains look defined.
Use Dodge/Burn Layers to add depth to gemstone settings, creating a 3D effect that mimics professional product photography to ensure your bracelet looks handcrafted, not mass-produced.

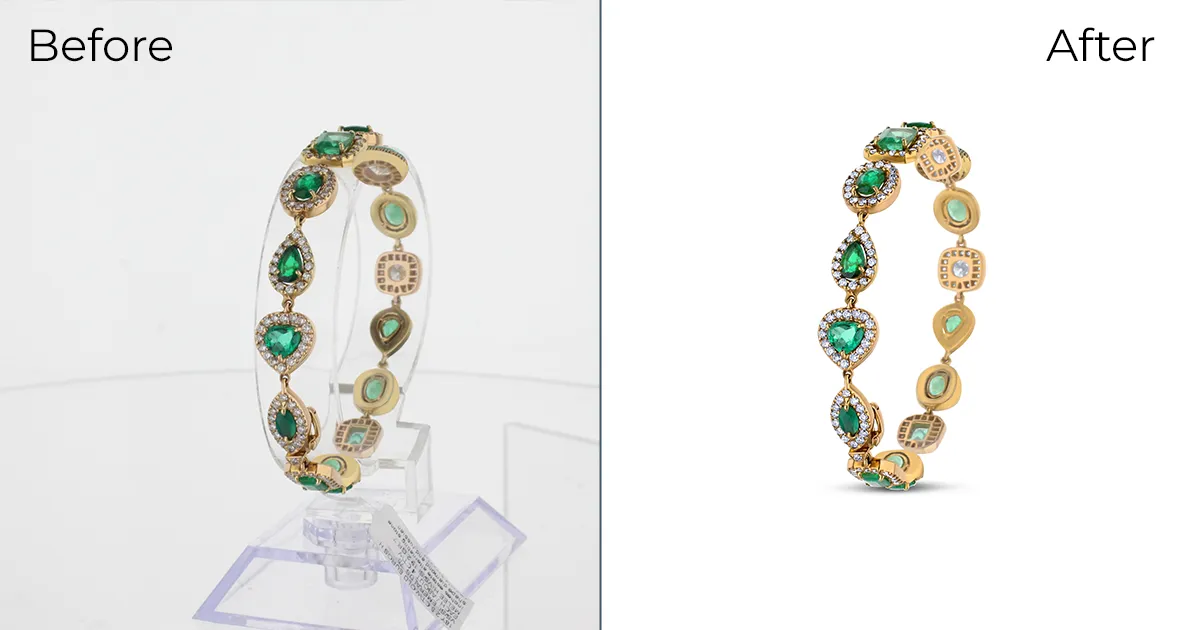
Keep Background Clean & Simple
A messy backdrop can quickly divert the viewers' attention from the jewellery. To isolate the bracelet for placing on either textured backdrops like velvet or marble or pure white (#FFFFFF), use the Pen Tool to make exact clipping paths.
Layer Masks help blend reflections naturally, while hand-painted shadows add subtle depth. This minimalist approach keeps the focus on the bracelet, aligning with high-end eCommerce standards.
Final Touches & Export
Now add a slight vignette with the Lens Correction Filter to draw the eye toward the bracelet. Zoom to 200% to check for missed dust or uneven sharpness. Finally, export as sRGB JPEG (80-90% quality) for web use or TIFF for print, applying Smart Sharpen as the last step to ensure crispness across devices.
These final tweaks to retouch bracelet photos for eCommerce guarantee your bracelet looks polished and professional, ready to captivate shoppers.
Speed Up Your Work With These Photoshop Tips for Bracelet Photography
Retouching bracelet jewelry can be a detailed and time-consuming task, but with a few smart tricks, you can speed things up without sacrificing quality or too much time. So all these quick pro tips will help you work more efficiently to help you spend less time behind the screen and more time showcasing your beautiful pieces.
- Use Non-Destructive Workflows: Always work with Photoshop layers for the best sort of jewelry retouching. Create adjustment layers for exposure and color corrections, and use layer masks to isolate edits. This lets you tweak settings later without harming the original image.
- Do Precise Background Removal: Use the Pen Tool to draw a clipping path for bracelet jewelry first. This isolates the bracelet instantly, making Photoshop bracelet background removal faster. Then, apply layer masks to refine edges or replace backgrounds with solid white or textures.
- Remove Scratches Like a Pro: Grab the Spot Healing Brush and set it to Content-Aware mode. Zoom in and zap dust or tiny scratches on metals and gemstones. For deeper flaws, switch to the Clone Stamp Tool at 50-70% opacity to sample clean areas and blend repairs naturally.
- Polish Metals with Dodge/Burn: Create a new layer, set it to Overlay mode, and paint with the Dodge Tool (Highlights) and Burn Tool (Shadows) at 5-12% exposure. This enhances shine on chains and adds depth to engravings without overdoing it.
- Correct Colors Accurately: Add a Hue/Saturation Adjustment Layer and tweak sliders to fix color casts (e.g., yellow gold looking too warm). Use the White Balance Eyedropper on a neutral metal area to auto-correct lighting issues in seconds.
- Sharpen Details Smartly: Duplicate your bracelet layer, go to Filter > Other > High Pass, and set the radius to 1.2- 2.5px. Change the blend mode to Overlay to sharpen engravings and gemstone facets. Follow this with Smart Sharpen (70-90% amount) for web-ready crispness.
- Save Time with Actions: Record repetitive tasks (like shine enhancement for bracelet images) in the Actions Panel. Hit “Play” to apply the same edits across multiple photos, perfect for retouching bracelet photos for eCommerce batches.
- Preserve Textures: Use Frequency Separation to split your image into color and texture layers. Retouch blemishes on the texture layer without altering the bracelet’s natural tones, ideal for metal retouching in jewelry photos.
- Export Like a Boss: When done, Save As sRGB JPEG at 80-90% quality for websites. Use Smart Sharpen as the final step to keep details crisp on all devices.
- Outsource When Overwhelmed: Stuck? Hire jewelry retouching services for high-end bracelet photo retouch work. They’ll handle jewelry photo cleanup and editing gemstone bracelets while you focus on shooting new designs.
- Tools to Master: Spot Healing Brush, Clone Stamp, Pen Tool, Dodge/Burn, Frequency Separation for faster edits, flawless metals, and gemstones that sparkle like the real thing!
Wrapping Up
Learning bracelet jewelry retouching in Photoshop isn't difficult. Just keep in mind that some of the simple procedures to make those gemstones pop: backdrop cleanup, shine enhancement, spot correction, and gemstone brightness restoration of any scratches or blebs.
Trust me; the more you work on and play around with these techniques, the more you will develop your style that distinguishes your jewelry. Exceptional photographs not only look good but also help your clients develop trust and greatly increase your sales. In fact, people feel secure buying from you when your pictures sparkle.
If you’re still worried, then we can assist you in saving time and obtaining excellent outcomes free from effort!
Contact Perfect Retouching for professional retouching techniques to make your jewelry sellable and glitter, and let us highlight your brand together!


