 English
 Arabic
 Danish
 Dutch
Dutch
 Finnish
 French
 German
 Hebrew
 Italian
 Japanese
 Norwegian
 Polish
 Portuguese
 Spanish
 Swedish
 Russian
How to Make a Dotted Line in Photoshop: 5 Quick & Easy Ways

In Photoshop, there's no direct option to create a dotted line. So, many designers have a hard time making it. However, you can create different types of dotted lines in Photoshop to decorate your design or break it up. So, today I am going to show you 5 techniques on how to make a dotted line in Photoshop. You will be able to learn how to create curved, straight, rectangular shapes, and multi-colored dotted lines. So, without further ado, let's start!
How to Make a Dotted Line in Photoshop (5 Ways)
Creating dotted lines in Photoshop is a bit tricky but with the pen tool and brush tool, you can create various types of dotted lines easily. Here are the Photoshop tutorial techniques you can use to draw amazing dotted lines in your designs.
2 Ways to Create Straight Dotted Line with Brush Tool
There are two ways you can draw a straight line easily. Try both methods and use the one that works best for you.
With the New Guide Layout from View
Step 1: Go to the top Menu and select View>New Guide Layout.
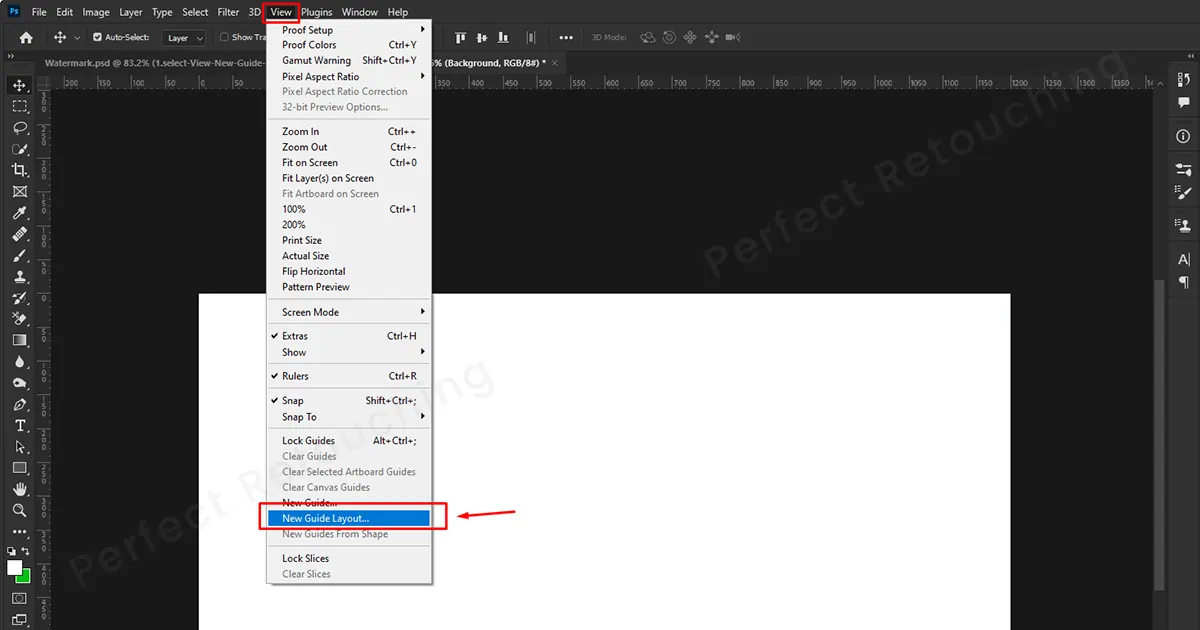
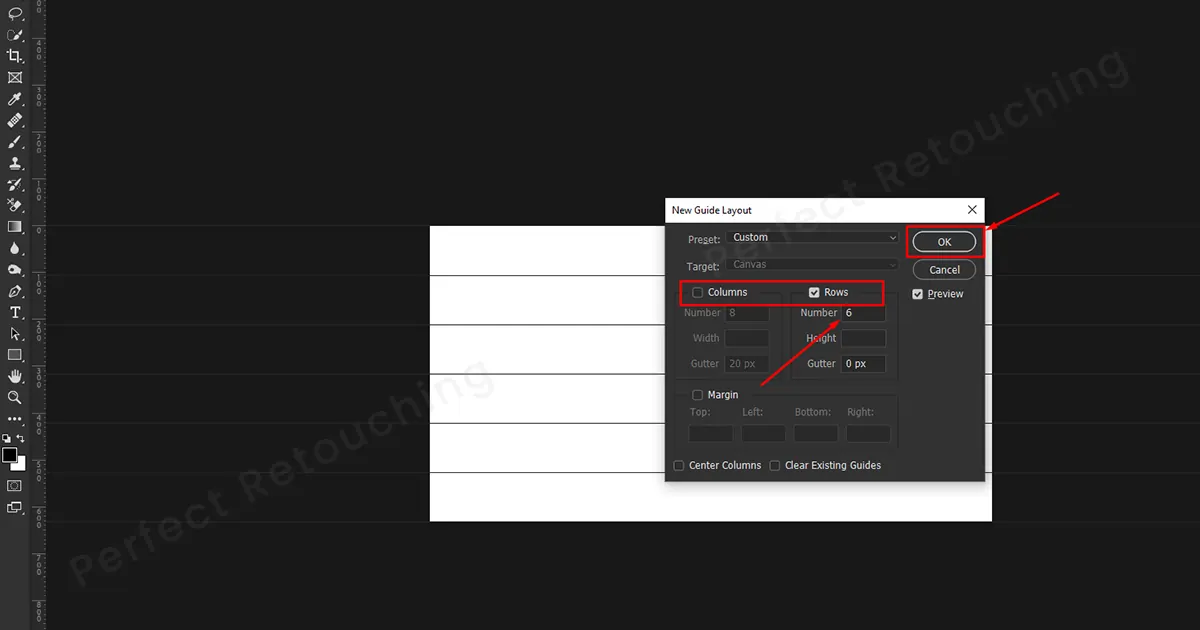
Step 2: A new guide layout dialog box will appear. Depending on whether you want to create a dotted line in a column or a row, checkmark them. Also, place a number in the number box on how many rows and columns you want. Click “OK”, and the lines will appear on the screen.
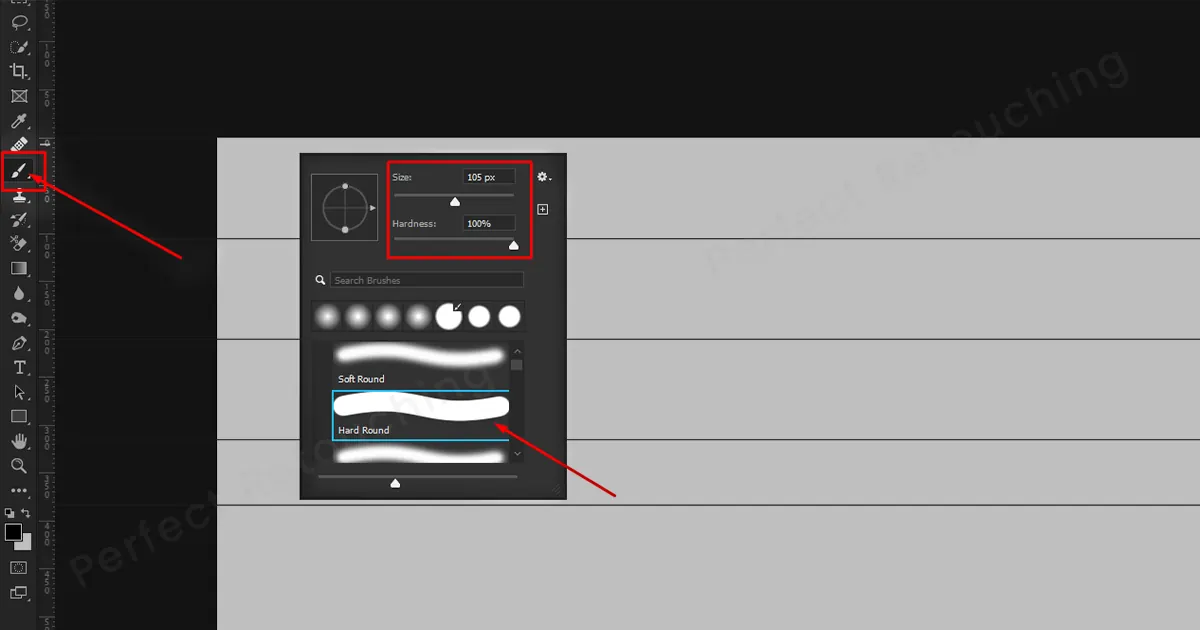
Step 3: Go to the toolbar- Select Brush Tool- Choose hard round brush, size, and hardness 100% from the brush preset picker. Select your desired color in the foreground. The selected color will appear in the dotted line.
Step 4: Go to any line and click a quick dot. Now, click and hold shift key and place another dot on the other side of the line. Your straight dotted line will be made.
Note: Without holding the shift key, just a dot will appear. So, remember to hold shift, when you second click on the line.
Step 5: After you are done placing the dots in your desired place, remove the lines. How? Select the move tool. Click view>rulers then drag the lines toward the rulers. It will be removed. Again, go to view and uncheck rulers. Your straight dotted lines will look perfectly natural.
With the “Shift” Key
In the first method, I showed you how to make a dotted line in Photoshop from the view. However, with this technique, you will be able to make a dotted line with just a shift key.
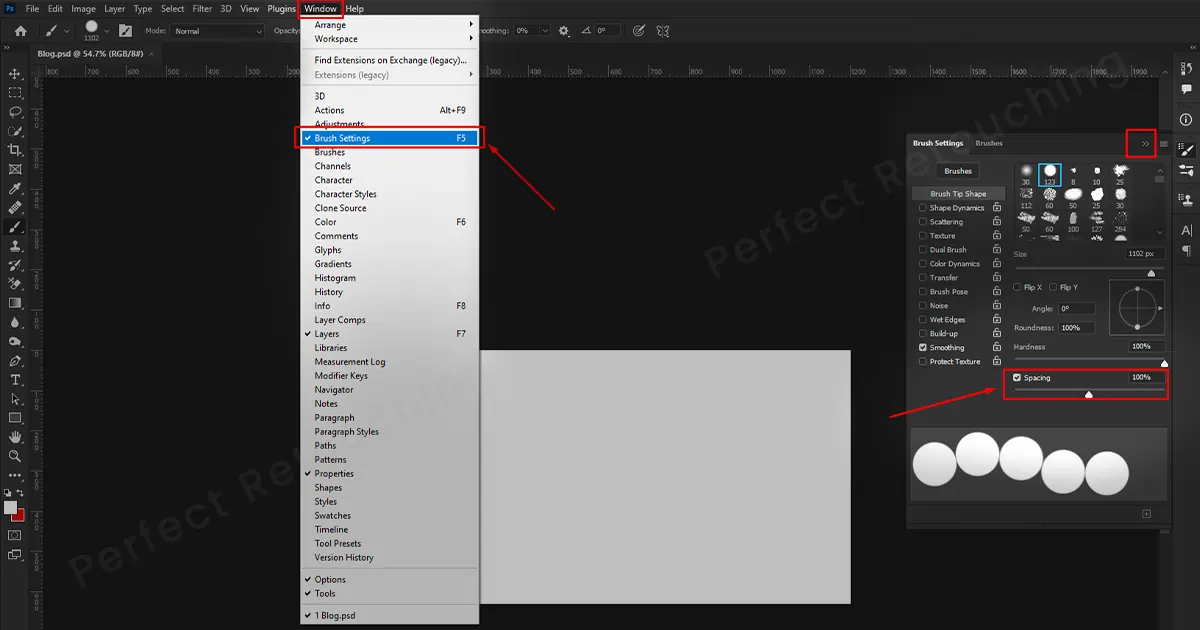
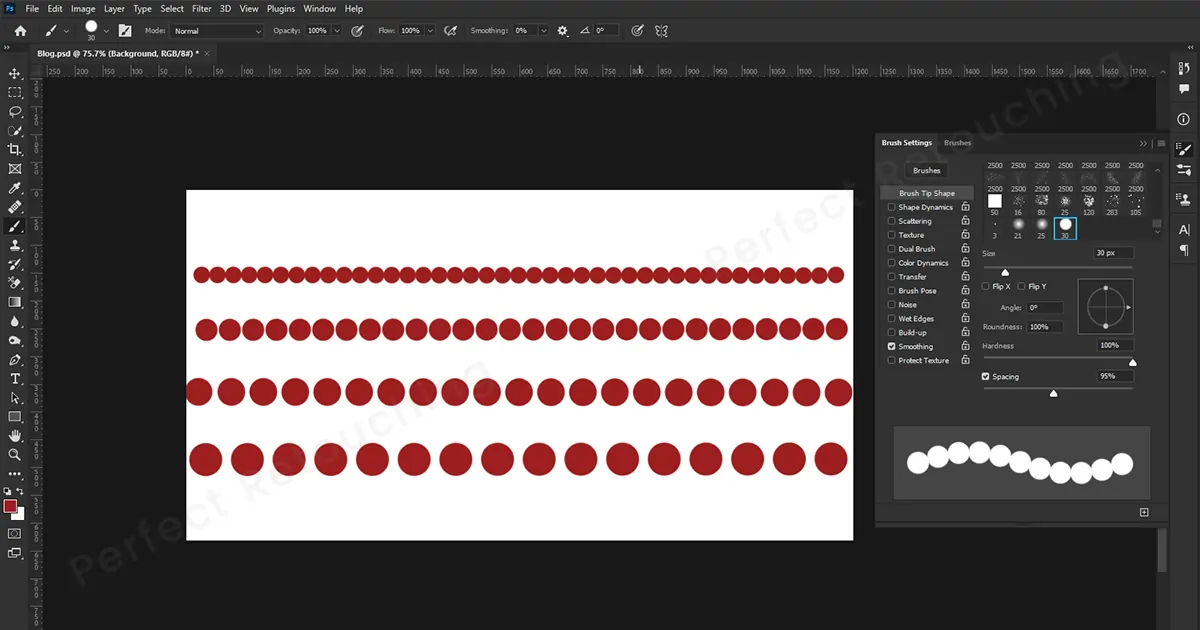
Step 1: Go to Windows>Brush Settings/Brush. A dialog box will pop up. Set the brush size and increase spacing by over 100% to create dots. Set it to the spacing you need and close the box.
Step 2: Set your desired color to the foreground.
Step 3: Click and hold on the first dot. Do not move the mouse. While holding on to the first dot, press the shift key and move your mouse. It will create a straight dotted line in Photoshop.
Curved or S-shaped Dotted Lines
To make curved or S-shaped dotted lines in Photoshop, you need to set the brush settings first so that after setting the curve, you can easily just place the dotted lines. So, just like the previous method, Go to Windows> Brush Settings/Brush. From the box, select a hard round brush, size, and increase the spacing to 100% or more. If you are done setting the brush, let’s see how to make a dotted line in Photoshop with the Pen Tool.
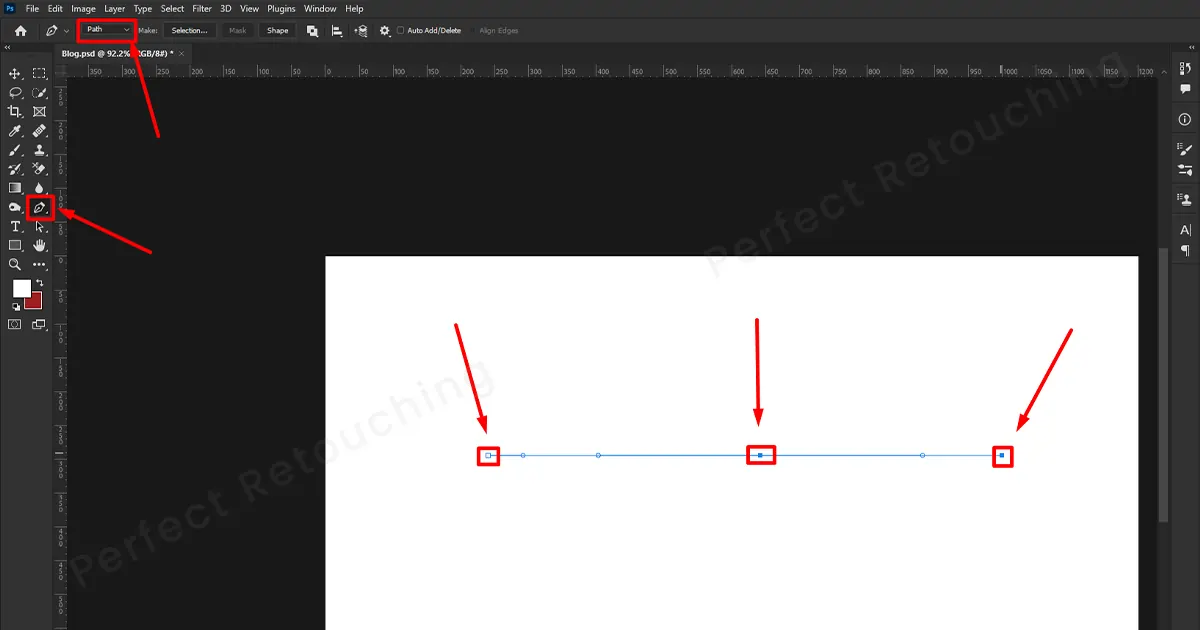
Step 1: Select the Pen Tool. Choose “Path” from the tool mode. Select anywhere on the canvas to create an anchor point. Now, hold shift key and click on another spot to create a second anchor point. It will draw a straight line.
Step 2: Take your cursor in the middle and create a third anchor point. You will notice it has two control points on both sides. It will help you to create a curve.
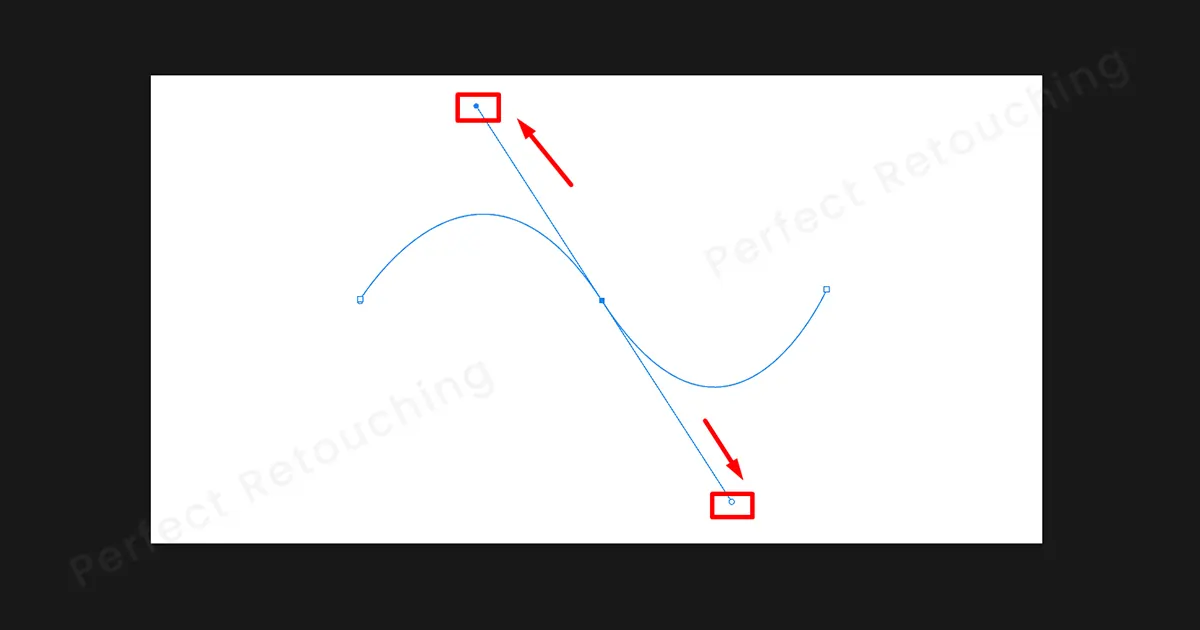
Step 3: While holding Ctrl, click on the left handle and drag it upward. The curve will expand upward. If you want to decrease the curve, drag it downward. Do the same with the right handle, while holding ctrl.
Step 4: If you are done adjusting the S-shaped curve, click “right” on the mouse and choose Stroke Path from the box.
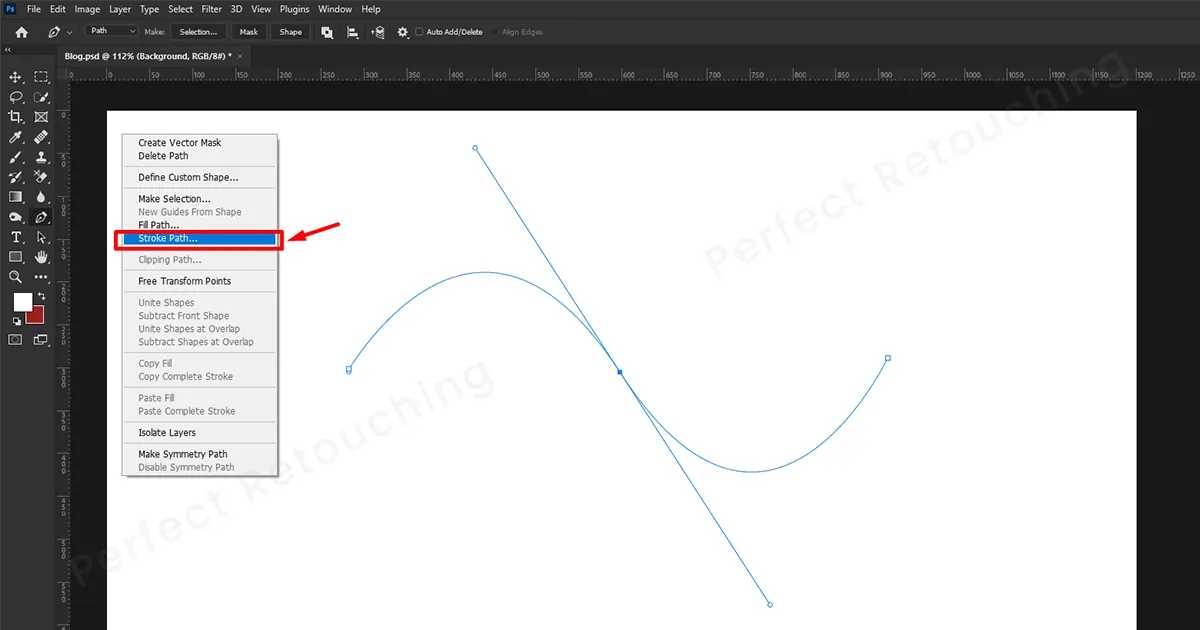
The stroke path dialog box will pop up. Choose “Brush” in the Tool and click OK.
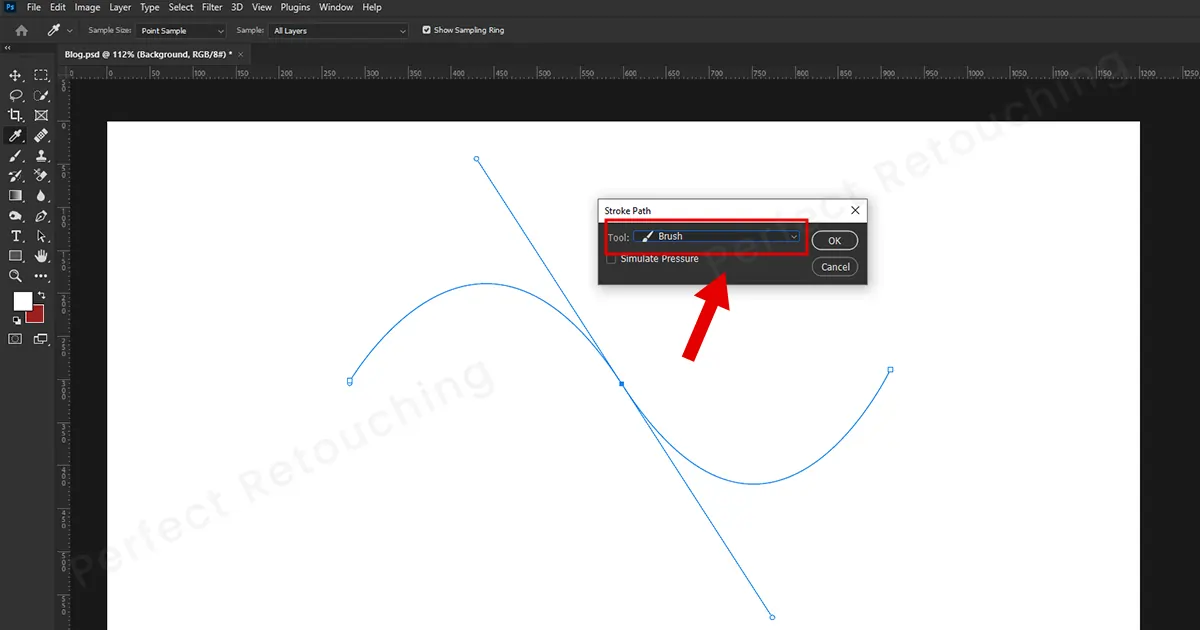
Hurray, a perfectly S-shaped dotted line will be created in Photoshop.
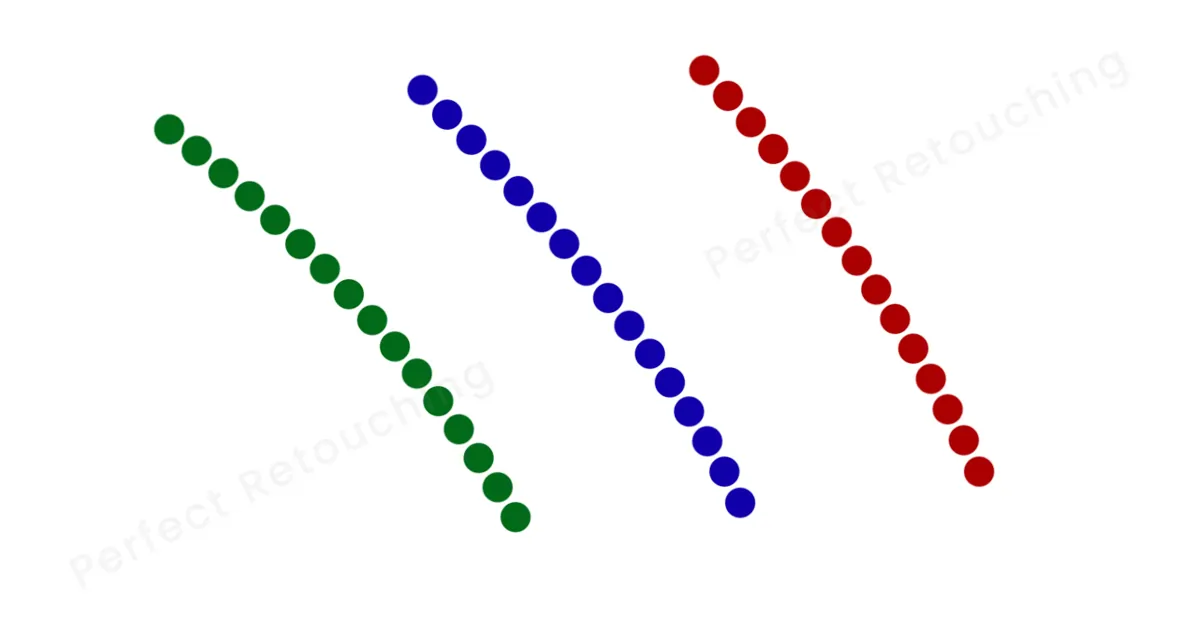
2 Ways to Draw a Diagonal Dotted Line
Often you need to put diagonal dotted lines before and after product photo retouching. It breaks the image into two parts. Also, it looks visually pleasing when you make a dotted line between two pictures. You can make diagonal dotted lines for other purposes as well. So, I will show the two ways you can make dotted line in Photoshop using the brush tool and pen tool easily.
Diagonal Dotted Line with Pen Tool
Step 1: Just like before, increase spacing, fix the brush size, and choose a hard round brush from the brush/brush preset. Also, choose your desired color in the foreground.
Step 2: Now, select the Pen tool. Click somewhere to create an anchor point and while holding the shift key, click on another place diagonally. It will create a diagonal line in Photoshop. Remember without holding shift, the line will not be straight.
Step 3: Right-click on the mouse and choose the stroke path. A stroke path dialog box will appear. Select Brush in the Tool option and click OK. The diagonally dotted line will be made automatically.

Diagonal Dotted Line with Brush Tool
Making a diagonal dotted line using a brush tool is very easy.
Step 1: Go to windows, select brush (F5) or brush preset. A brush dialog box will appear. Increase spacing by over 100% to create dots and fix the brush size. Close the dialog box.
Step 2: Select the brush tool and click where you want to start the dotted line. Do not click again. Hold shift and click on the place where you want to finish your dots. It will automatically create a diagonal dotted line. If you need to make more, follow the same method.
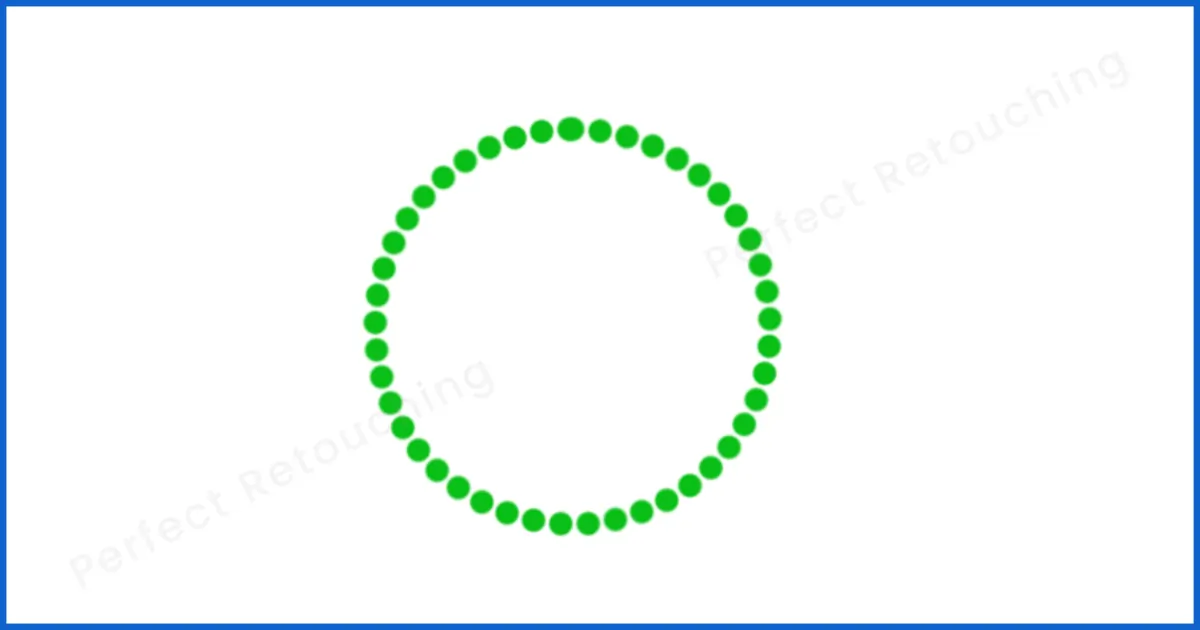
Add Dotted Lines to Rectangular/Elipse Shape
With this method, you will be able to draw dotted lines in Photoshop in shapes and in a more organized manner.
Step 1: Select the rectangular/ellipse tool from the toolbar. From the top left, select “Shape” from the tool modes. Hold Shift Key and draw the shape on the canvas. The color in the foreground has filled the shape. However, we want to add a dotted line in the shape so we will remove the colors.
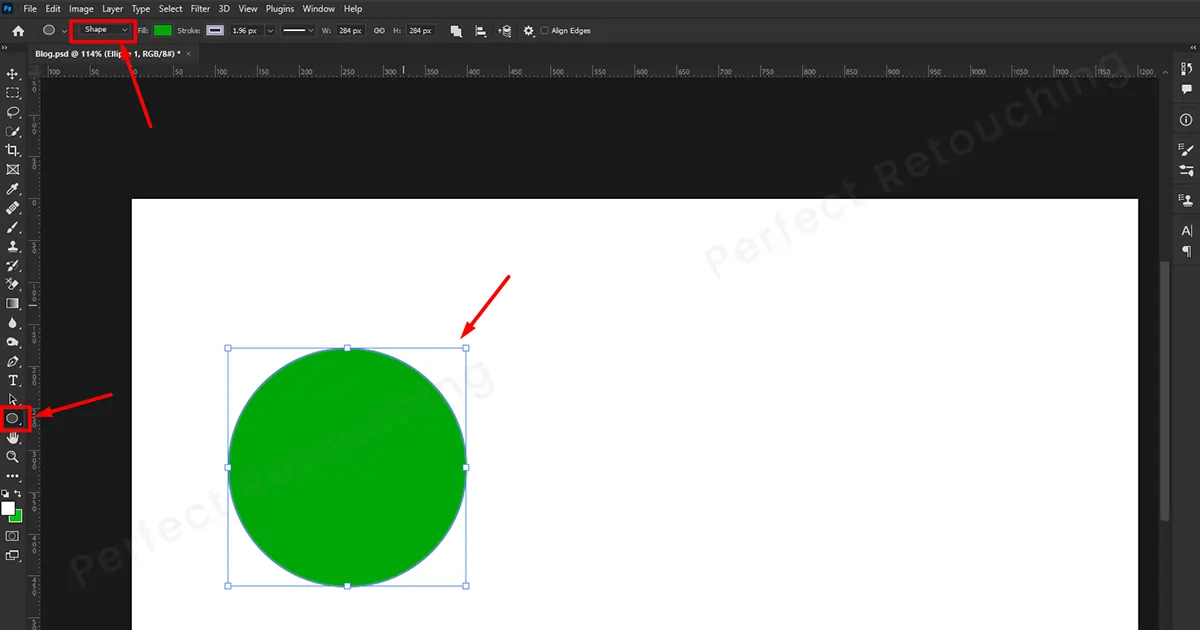
Step 2: Go to the tool options bar and select “shape fill” to none. The color in the shape will be erased. Select a “stroke color” and fix the “width” according to the dot size you need. Change the “Stroke Type” to Dotted Line.
Step 3: From the stroke type box, you can also choose how to align the dotted line in the shape. If you want your dots in the center, outside, or inside, choose the option you like. Play with it to see what dots look like in different positions.
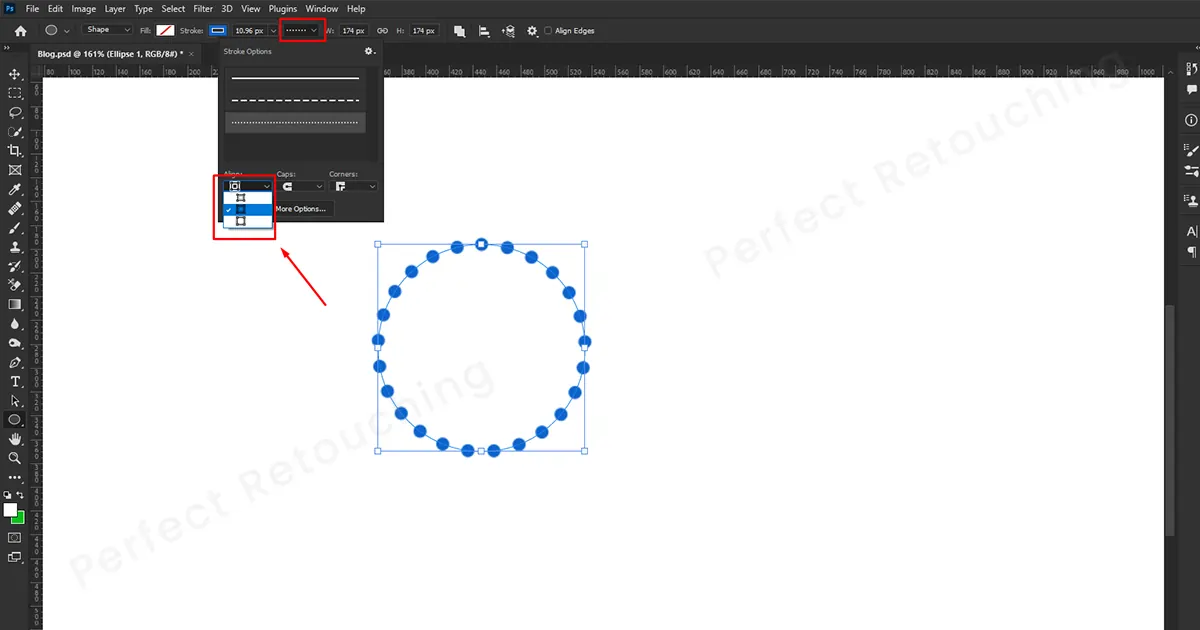
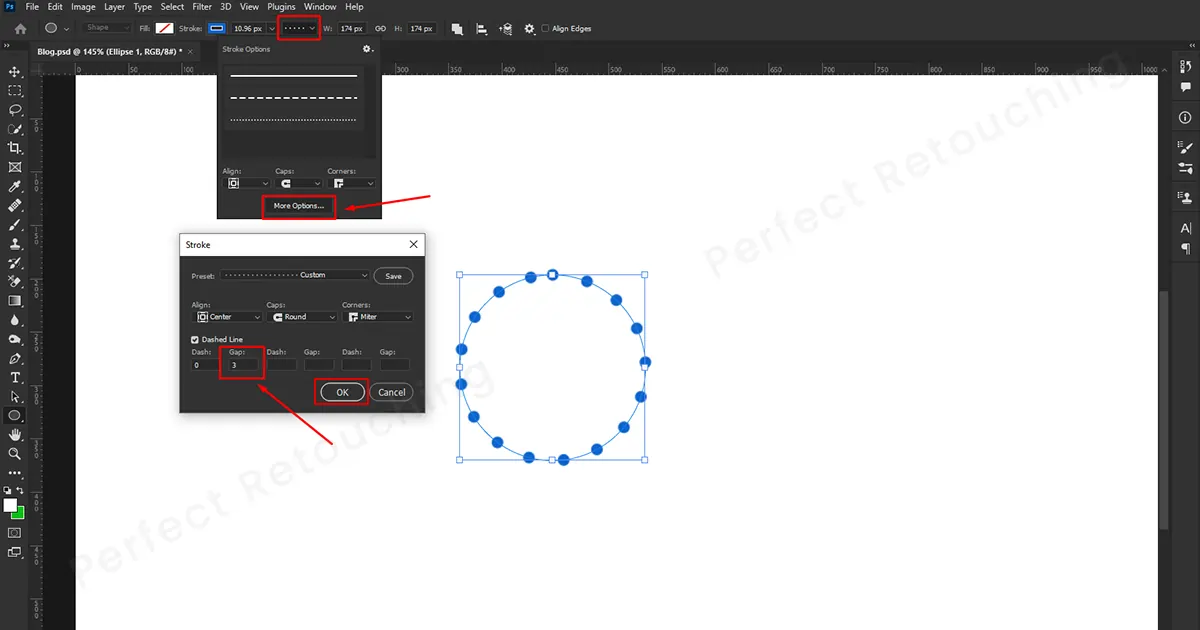
Step 4: If you see the dots are not placed evenly or are too close to each other, click on the more options and set the gap length. Click on the gap box and with the down and up arrow in the keyboard, adjust the spacing. When you adjust it, you will see the dots rearrangement. So, when the dots are evenly placed, click OK.
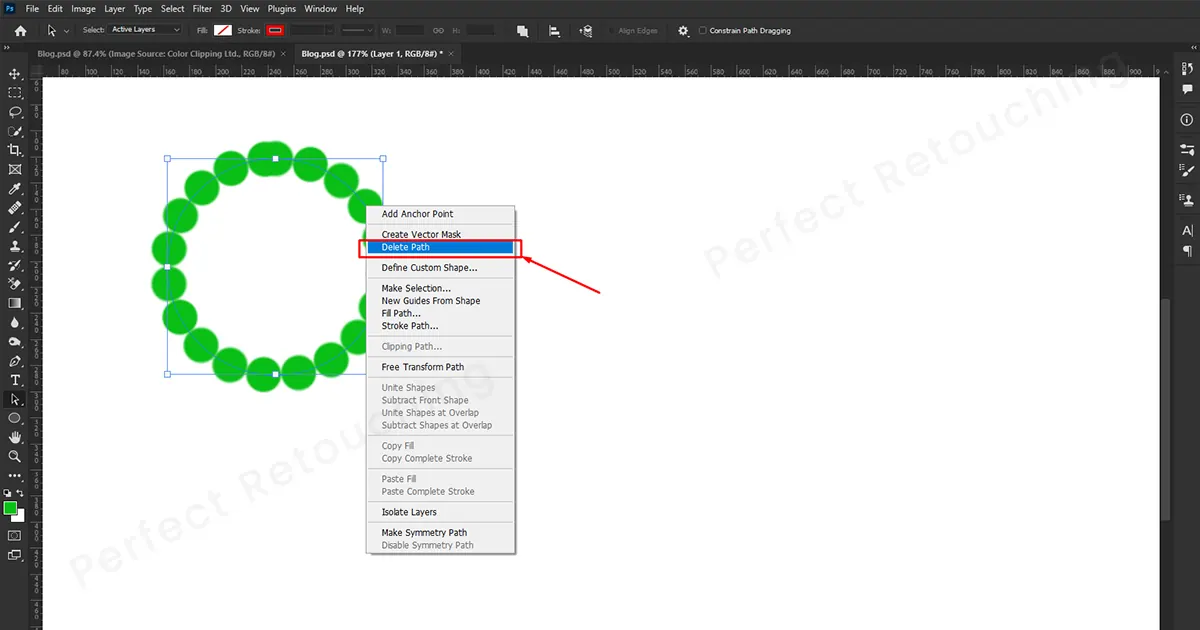
Step 5: When you are done editing the dotted line, you need to remove the shape. So, right-click on your mouse and select delete path from the box. The shape will be erased and it will look like a naturally shaped dotted line.
The Final Image after Edit Completion
Different Colored Dotted Lines in Photoshop
If you want to create color variation in Photoshop dotted line, follow this technique.
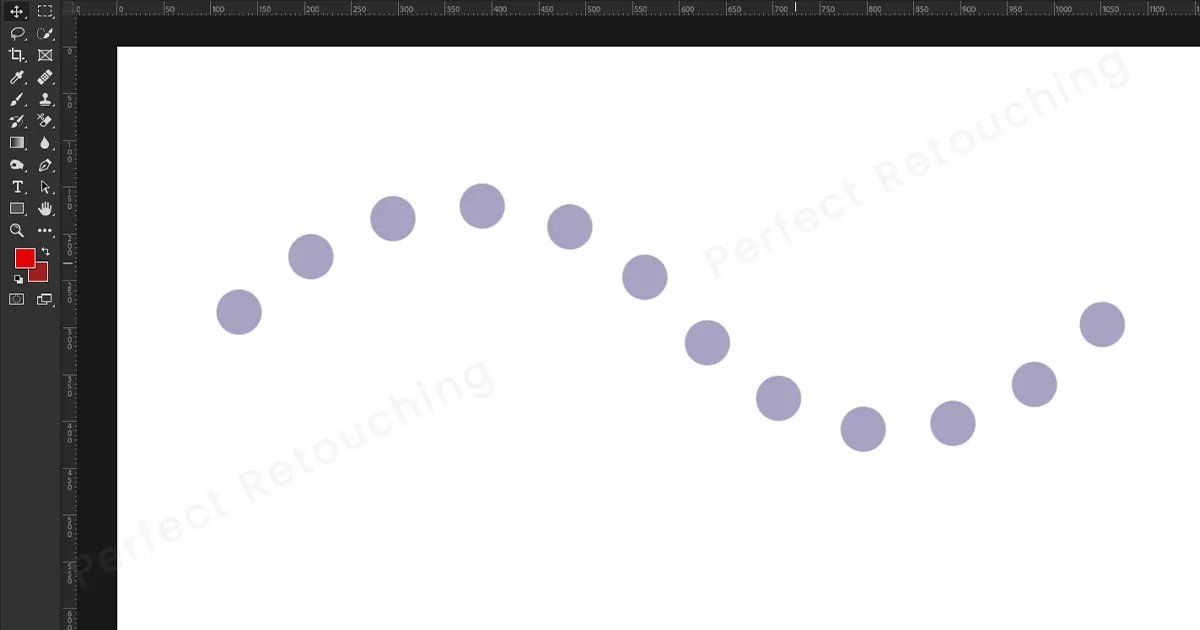
Step 1: Change the foreground and background color with the color you like. For example, I have chosen my foreground color as purple and the background color as white.
Step 2: Go to Brush Settings- Select Color Dynamics from the brush tip shape. Ensure “Apply per Tip” is check-marked and Foreground/background jitter- 100%. Also, make sure Hue, jitters, Saturation, Brightness, and Purity are on 0%. After you are done fixing the brush setting, close it.
Step 3: It is time to make the dots. Just like before, place a dot in any place then hold shift key, and draw another dot in the canvas. This time the dots will appear mixed with foreground and background color. Try different color combinations and use the one you like the most.

Final Thought
Creating a dotted line in Photoshop is a bit hard but once you know the techniques, they are the easiest things to make. Since all the methods follow quite the same pattern, practice them, and you will be able to create various types of dotted lines to beautify your pictures.
Hopefully, with our tutorial on how to make a dotted line in Photoshop, you were able to add a unique touch with beautiful dotted lines. Lastly, if you do not have enough time to edit your photos, take our jewelry image retouching service. Our professional retouchers ensure our clients get perfectly retouched images within the deadline. To check our image quality, take our free trial.


