 English
 Arabic
 Danish
 Dutch
Dutch
 Finnish
 French
 German
 Hebrew
 Italian
 Japanese
 Norwegian
 Polish
 Portuguese
 Spanish
 Swedish
 Russian
Photo Editing Basics : Top 05 Photo Editing Tips for Beginners

I know Photo Editing is a huge topic and there is no end of learning. But there is a beginning of everything. Usually, people take photo editing as a hobby first and as soon as they find their passion here, they take it as a profession. And the hobby also starts after getting inspired by some cool edited photos of professionals. Well, you might not get the exact same result after starting photo editing. It needs practice. But you can start after getting an idea of photo editing basics.
Photo Editing Basics for Beginners
Photo Editing for beginners might seem like a hustle. But a proper guideline will do the work. For today’s blog let’s focus on five basic editing tips for beginners.
To start photo editing, the first mandatory thing is photo editing software or apps. Any app or software will do the basic photo editing. Yet, it is wise to choose a software or app that you can also use for a long time and for professional purposes later on. So that when you decide to turn your hobby into passion then it doesn’t require much time. Adobe Photoshop, Adobe Lightroom, VSCO etc. are best at editing games. Go with what you are comfortable with.
For easy learning let’s divide the techniques into 5 easy steps. Take it as a basic photo editor's guide. These steps are so simple to do yet will give your photo a classy look.
1. Make a Copy of Your RAW Image
Don’t start editing directly on your raw image. Because it contains a high chance of messing up your raw files. And I ensure you, you don’t want that for your image. If you are editing an image in its raw file and you delete or edit the photo in not so well situated. Then you can not get back the original image.
Therefore, make copies of your images, and make mistakes. Because from mistakes you can learn. So, make mistakes wisely.
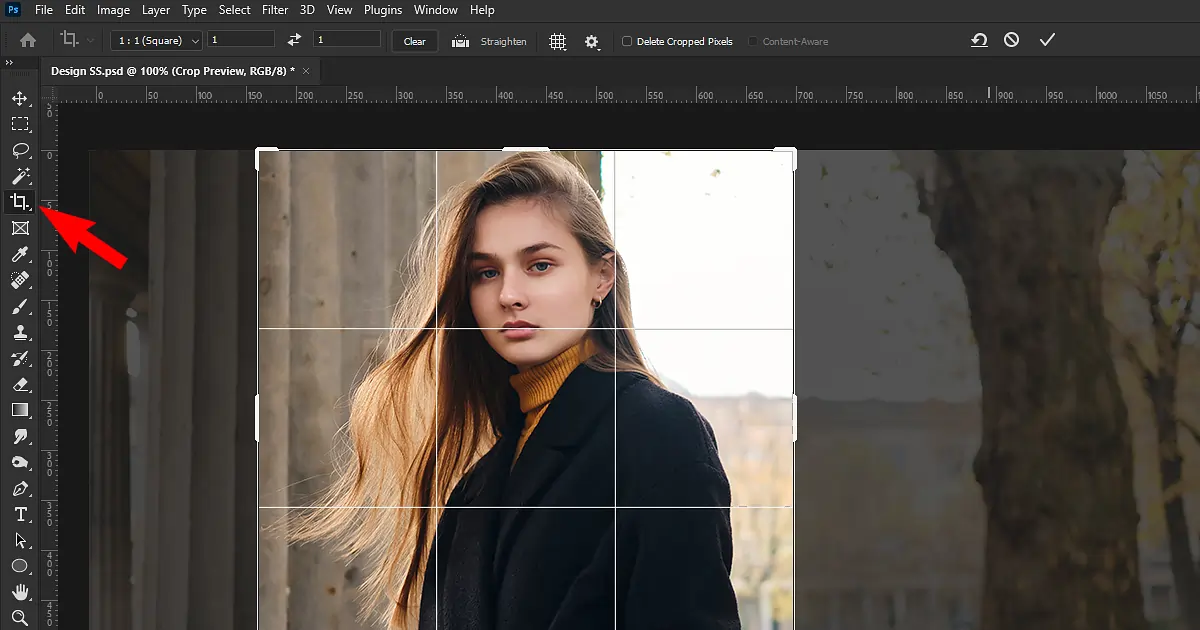
2. Cropping and Cleaning
The simplest and easiest editing in any photo editing software is Cropping. You will find the cropping tool in any editing software. Cut off the unnecessary parts or extensions of your image. While doing cropping, you have to remember that your pictures’ resolution has to be high. So that when you crop the photo, it doesn’t affect the quality of the image much.
3. Color Adjustment and Correction
From this step, you will actually find out if you have any passion for editing or not. If you have the eye of a photo editor or not. Color adjustment and correction includes
- Adjust the White Balance
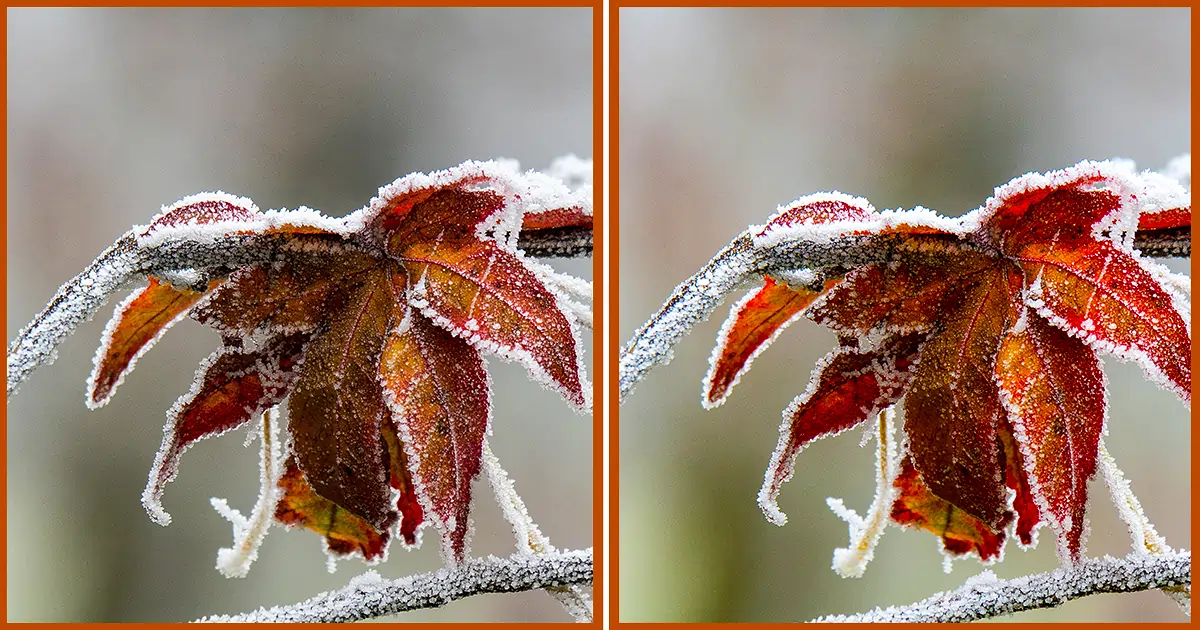
White Balance is also an important part of the color correction part. Most of the time while setting the lights for a photoshoot, the lights don’t reflect the way they should reflect. Or even in bright daylight. The colors of a picture don’t show up.
Even if you try to ignore the color mistakes, you can’t really ignore the White color balance.

If you look at these two photos closely, you will see none has the perfect white balance. One has a more warm undertone in it and one has a cooler undertone. None of them looks good. So, it’s very important that you create a proper color balance.
- Adjust Exposure and Contrast
Talking about the colors, in a picture. The picture doesn’t only need to focus on the white balance of it. It also needs attention to other color adjustments like Color Exposure, and color contrast.
Exposure indicates the brightness and darkness of an image. If any area is way darker or black then it is underexposed and if any area is way brighter or white then it is overexposed. You have to understand the exposure theory first to move on. There the exposure is needed and where it isn't needed.
Next is Color Contrast. To understand color contrast, you have to understand the color palette.
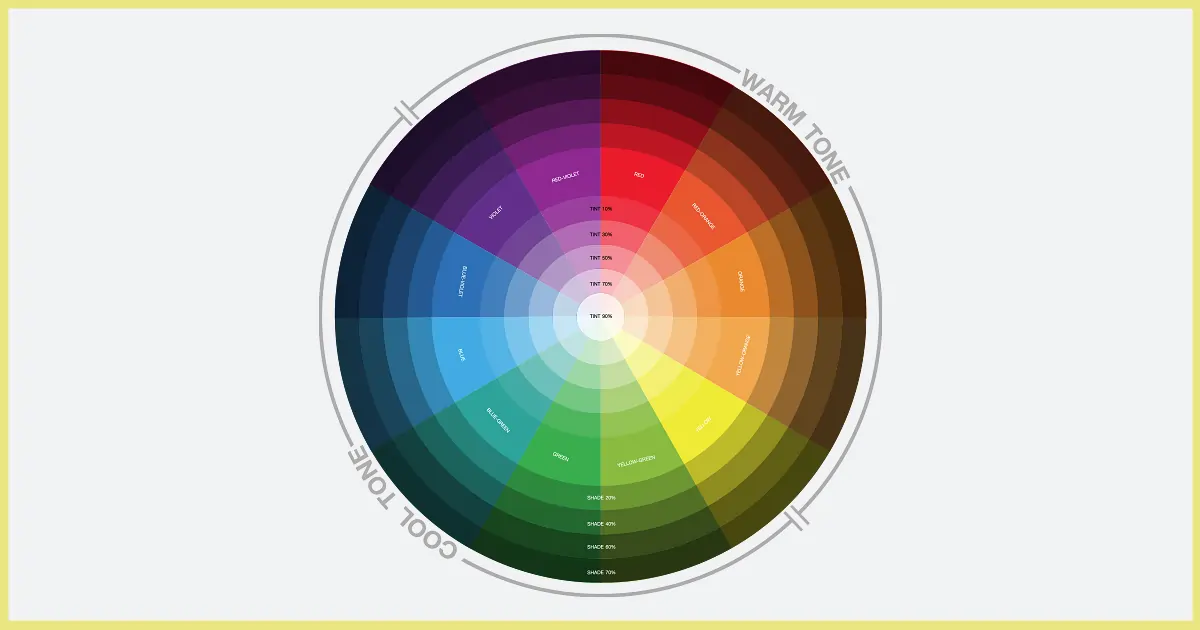
Color contrast is the color theory that mostly talks about the differences between two color hues. There are a few ways to understand this theory but I found it easier to find the contrast color with the help of a color wheel. If you look at the color palette closely then you will know how it works. Red’s color contrast is green. And Yellow’s color contrast is Purple. Orange’s color contrast is Blue. It works the opposite. A color’s color contrast will be the opposite color of the color wheel.
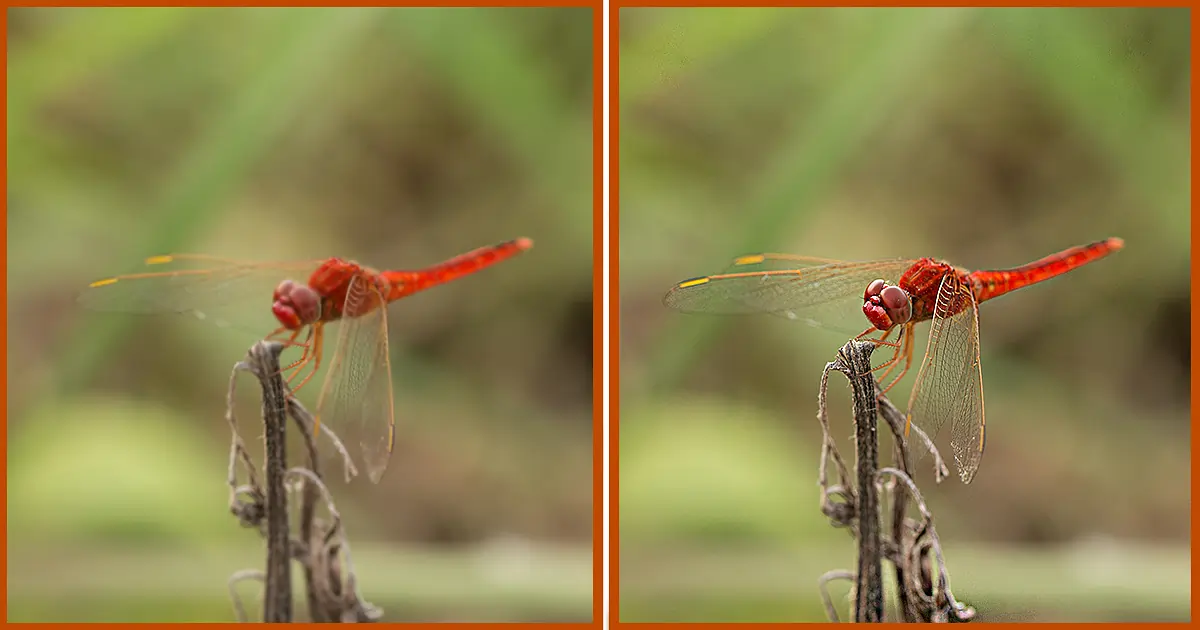
- Adjust Color Vibrancy and Saturation
Vibrancy and saturation are also very easy-to-use methods yet need practice a lot. Here the art lies in the editors’ eyes. It’s all about the way you see the world in a semi-literal sense. Does that make any sense? No! Okaiiee, let me explain…
Look at this picture. Which side looks more appealing to you? The right side, right? Because the right side is always right. Just kidding. It’s because the right side has been edited and the color saturation and vibrancy are on point. Now, when do you need to adjust the Saturation and Vibrancy? Honestly, it’s up to you. When you want to use it and where you want to use it. But if your picture has multiple colors and some are vibrant colors looking dull in the picture then you can take the help of Saturation and Vibrancy to pop up some colors. Through this process, you can give your image an eye-catching look.
Almost in every editing software and app, you will find this vibrancy and saturation adjustment tool. But you have to be careful while using it. Because adding too much Saturation and Vibrancy can ruin the look of an image. It can look disastrous. So, it’s good to take small steps at first.
Most of the above-mentioned photo editing tools are available in most of the editing software.
4. Adjust Noise and Sharpness
By saying adjust Noise and Sharpness I meant reducing the Noise and Increasing the Sharpness. (You would almost always need to follow these to make the picture clearer in the viewer’s eye unless your intentions are opposite).
Image noise reduction is also known as ‘denoise’. it is a process through which you can remove noise from digital pictures. Electronic and digital both can be the Noise in this case. Denoise creates a smooth layer over the noisy parts. It creates pixelated photos. Sometimes the pictures can get discolored and create a mess. Therefore, the denoise method is used.
Sharpness is almost the opposite of denoise. In denoise you make the rough parts look smooth. And Sharpness makes the details clearer. If you can notice the edges of a picture clearly then the picture’s sharpness acutance is high. If the edges are not that clear and difficult to spot then the picture’s sharpness acutance is low.
5. Finalize
Check the edit that you have done.Keep an eye out for anything that you might have missed. After that put everything aside. Take a break. Have a cup of coffee, take a nap, have chit-chat with friends, and then come back. Now, you will find that there are plenty of places to redo editing. (If not then good for you!). If you see mistakes or places of improvement then edit those parts.
Done with all of the steps? Great, congratulations! Now you can call yourself a basic picture editor.
Conclusion
This blog is for tips for editing photos. We have already discussed some basic editing. These tips will help you to start. There are way more techniques, patterns, and methods in this specific topic. For example, Calibrated monitor. The calibrated monitor is best for photo editing. It helps to see the colors more accurately. Which is a great help in editing. But I won’t suggest buying one, at the beginning of editing. Since that can be costly. So, start editing, and soon, as you grow, you will know what might work for you and what doesn't.


