 English
 Arabic
 Danish
 Dutch
Dutch
 Finnish
 French
 German
 Hebrew
 Italian
 Japanese
 Norwegian
 Polish
 Portuguese
 Spanish
 Swedish
 Russian
How to Change Canvas Size in Photoshop Fast & Easy
As a graphic designer, does it ever happen that you edited an image but you need to resize it again to fit social media formats? It happens to me many times. So, what I do is I edit the canvas size to avoid photos being stretched or cropped.
To both increase and decrease the canvas size, you can use the crop tool. Not only crop tool but also with many other methods you can change the canvas size in Adobe Photoshop.
So, in this article, I am going to explain the 5 easiest & fastest methods on how to change canvas size in Photoshop. Let’s have a look.
How to Change Canvas Size in Photoshop
There are many ways to change the canvas size without destroying the image quality. You can change the canvas size before choosing the photo and you can also change the canvas size after editing the photo. First, let’s see how to change the canvas size before selecting an image.
Method 1: Preset Your Canvas
If you know the height & width of your canvas, you can adjust canvas size in photoshop while creating a new document.
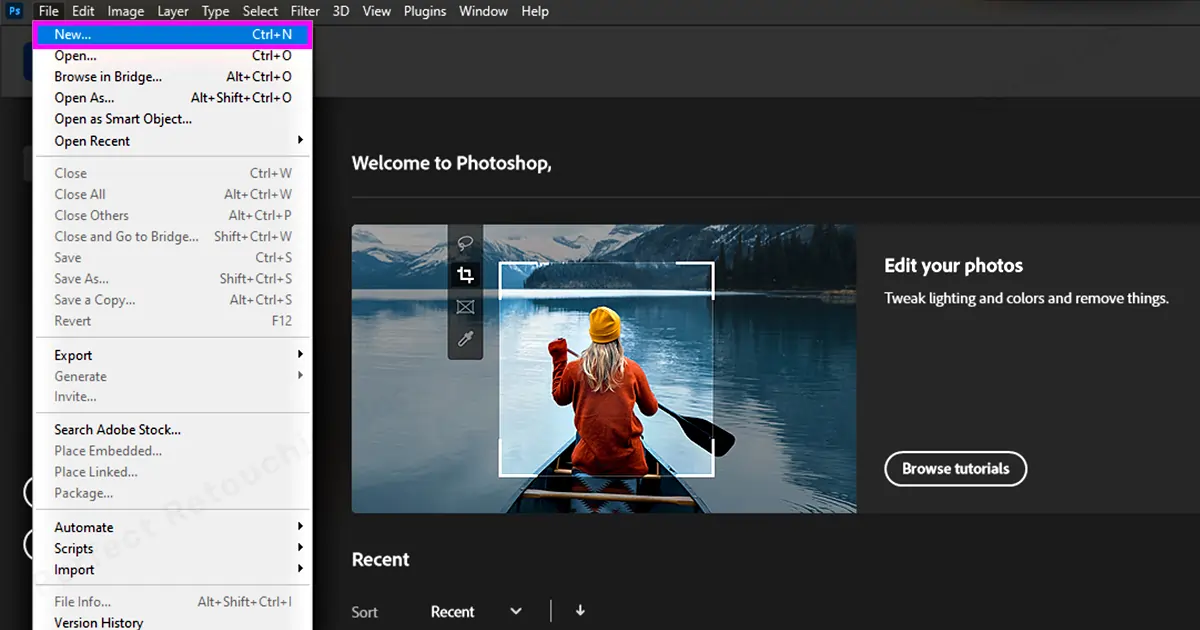
1. Click Ctrl+N or Go to File>New. A new document will appear where you can customize your canvas size.
Note: Do not click on open and choose an image, before creating a new document. If you edit the image, it will increase or decrease directly. Hence, the image quality will be destroyed.
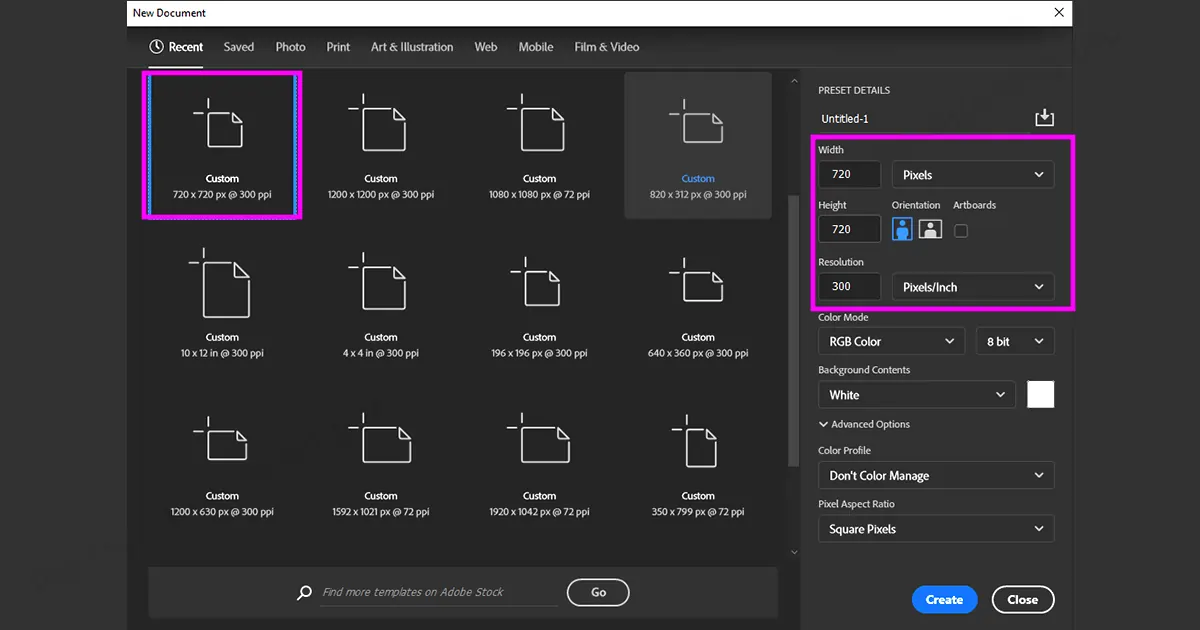
2. If you can find the customized sizes from these boxes according to your preference, choose it. If it is not there, you can customize sizes from the preset details box (It is on the right side).
- First, select Unit of measurement such as pixels, inch, centimeter or millimeter. According to your measurement unit selection, your height and width number will vary such as Pixels: 1080, Inch: 3.6 Centimeter: 9.14.
- Write height and width numbers according to your need. Choose Orientation such as portrait or landscape.
- Choose a resolution number. Resolution is usually measured in pixels/inch. Such as, if you choose 85 then it is 85 pixels per inch.
- Choose color mode: RGB color. There are also other options, if you need you can choose from them.
- Choose background contents. Such as transparent, white or background color. If you choose background color, you can set the background color from the ToolBar.
3. Click Create. Your customized canvas is created.
Change the Canvas Size While Working on a File
While working, you may need to extend or crop the canvas size to print it or upload it on social media. Well, how to change canvas size in photoshop while editing an image? Here are the ways.
Method 2: Change Canvas Size From Properties
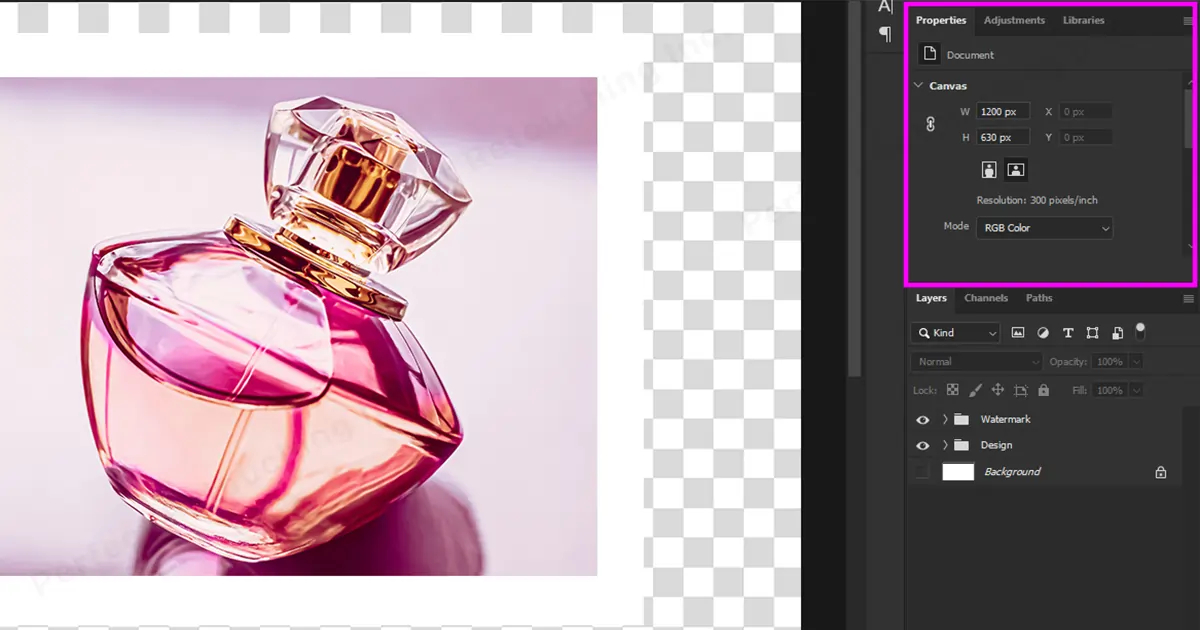
- Check the right side of your canvas- Under the Properties check Height & Width.
- If your canvas’s height and width number is okay, click the chain icon beside it to link it.
- If you want your height and width number different, write down the ratio separately in the height & width section. keep the chain icon unlinked.
- When you click OK, a dialog box will appear. There it will warn you that the new canvas size is bigger or smaller and it might affect the current canvas size. Regardless, click OK. Your canvas size will change.
Note: If the properties do not show up on the right side, go to Windows from Menu Bar- Click Properties- change height, width, resolution etc from the dialog box.
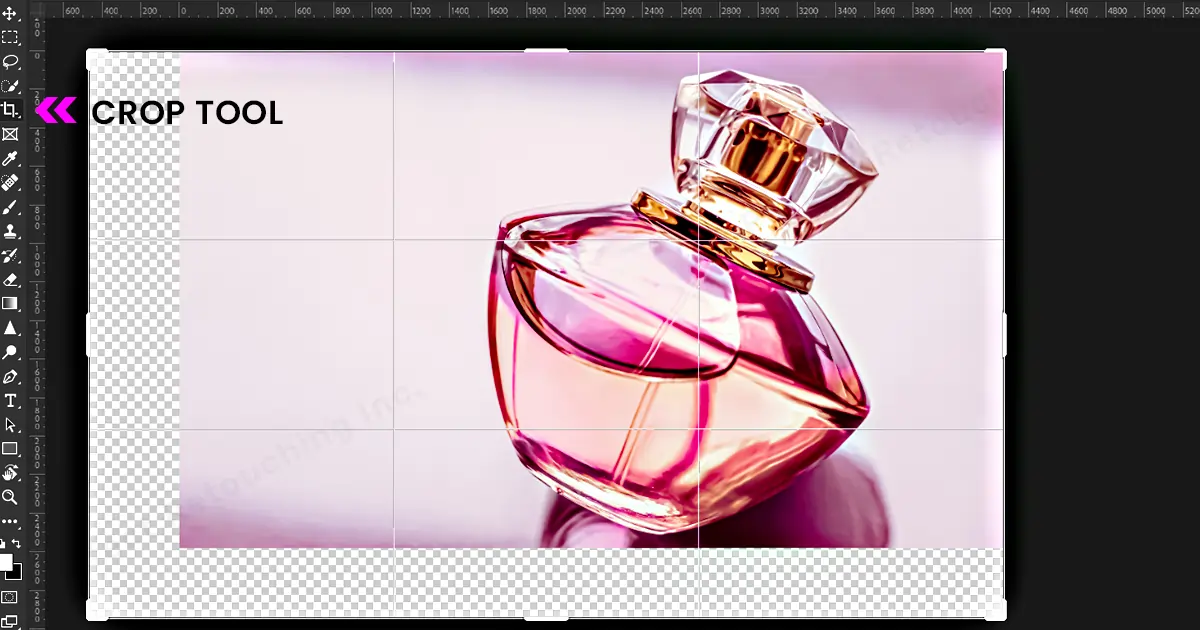
Method 3: Use Crop Tool to Extend Canvas Size
- Click Crop Tool or “C” Key from the Tool Box.
- Click on the side of the image you want to increase and drag it. You can expand the canvas size from any side.
- Click Enter. Your canvas size has increased.
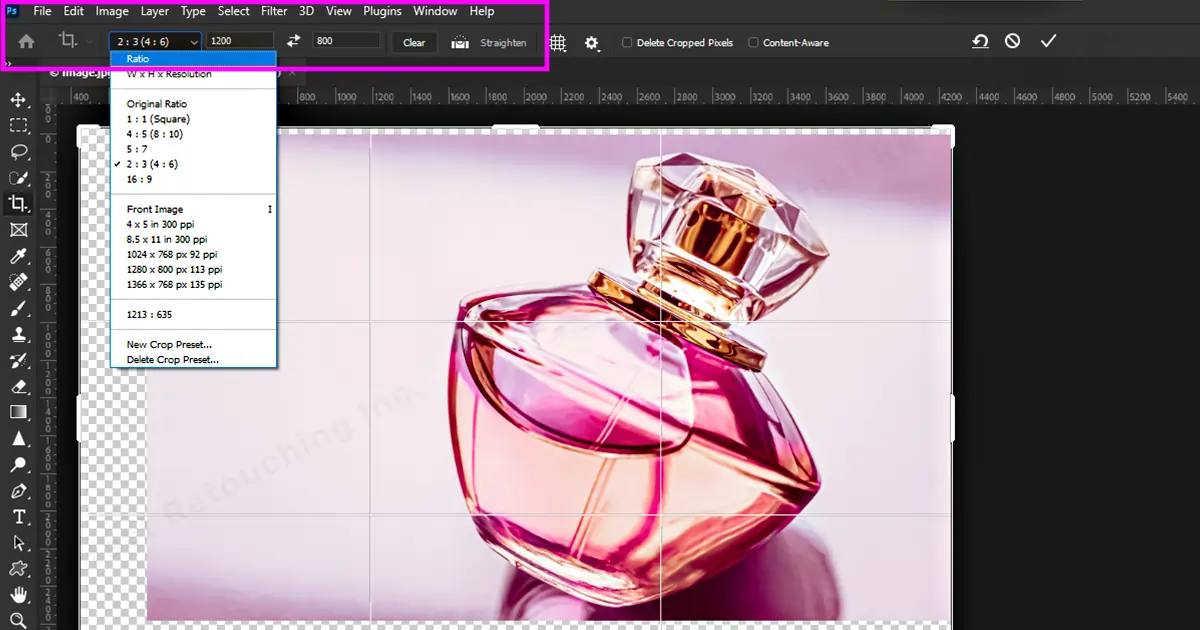
Use Crop Tool to Decrease the Canvas Size
The way you can increase canvas size with crop tool, you can also decrease canvas size with it. Just add your preferred ratio from the crop bar (Under the Menu bar).
- Choose Crop Tool- Select the ratio from the Preset aspect ratio.
- Or Customize the ratio from height and width box.
Note: when you customize it, horizontal and vertical lines will appear on the image. With the lines you will be able to understand how much area will be cropped in the image. - Once you are satisfied, click Enter.
- You can also undo it with Ctrl+Z.
Note: Until you save it, you can keep on cropping the image without worrying.
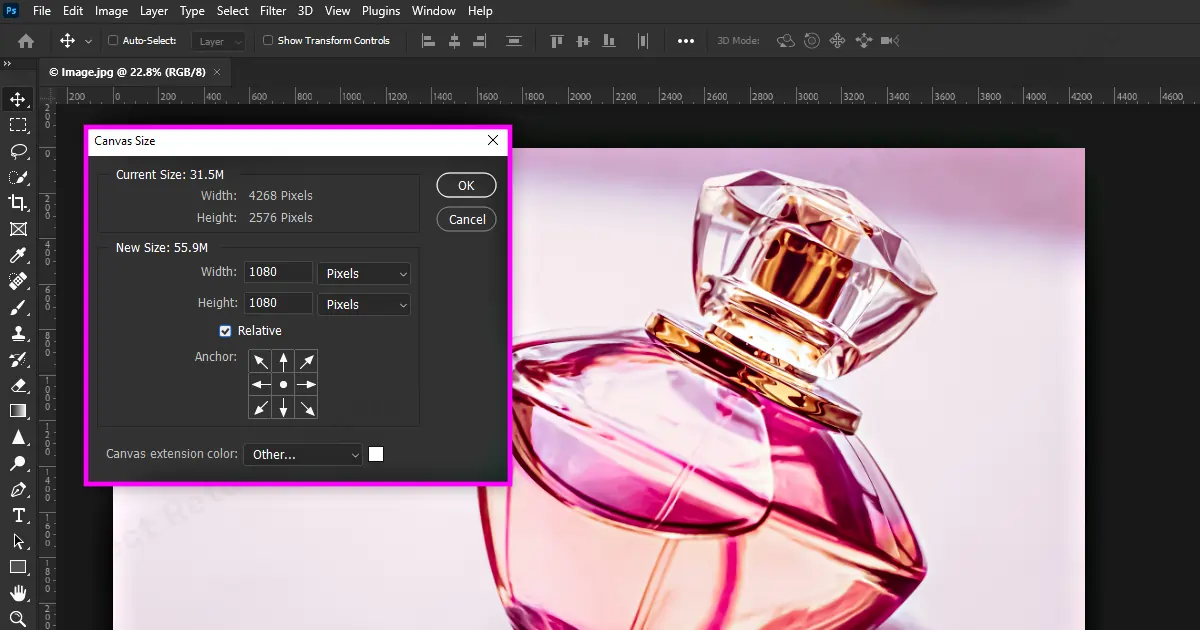
Method 4: Extend Canvas Evenly Around the Photo
From the Menu Bar, choose Image>Canvas Size.

Canvas Size Dialog Box will pop up- Click Relative.
Fill the Height and Width section with your desired measurement.
From the Anchor section, if you need the picture in the middle, keep the anchor in the middle.
If you want to increase the canvas size up, down or on the sides, click on the arrows and it will create space. Such as clicking the middle arrow from the first line, will create space on the bottom line.
Click OK. Your resized canvas size is ready.
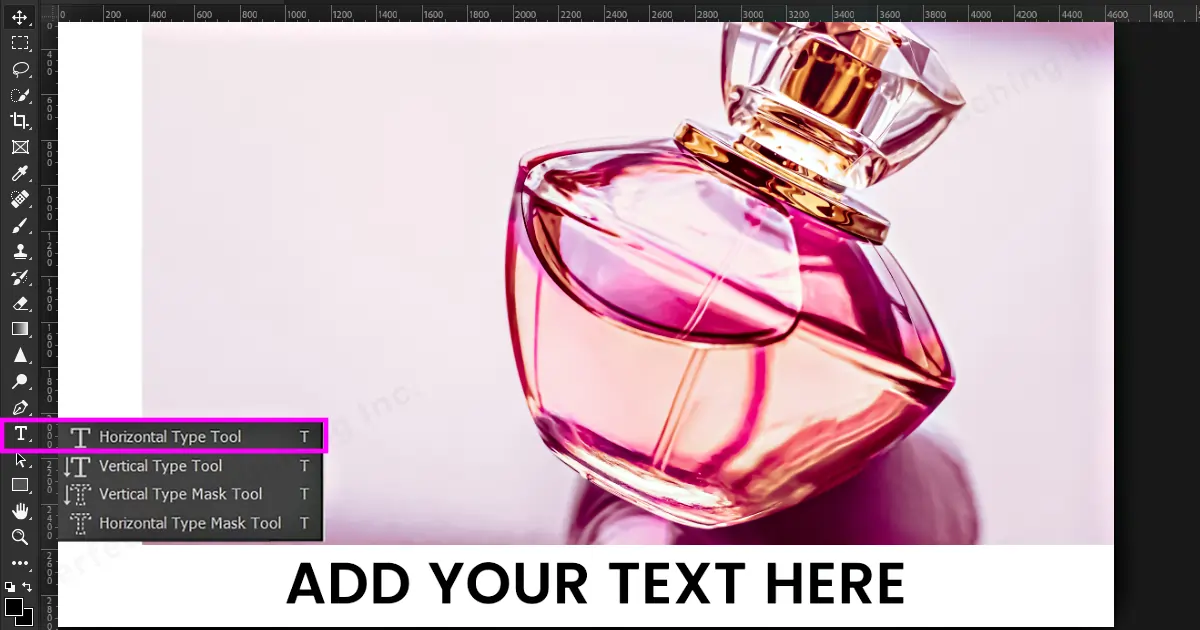
Method 5: Place Text in the Extended Canvas
When you are editing photos, your client may request to put a text in the photo. However, if the text does not look good or attractive in the photo, you can expand the canvas size and set the image there. Here’s how to put a text in the canvas size.
- Go to Image menu>Canvas Size.
- Click Relative- Set your measurements in Height and Width.
- If you just need to increase width or height, set the measurements separately.
- Choose the color for the extended border from the Canvas extension color. Click OK.
Choose Text Tool- write the text- Click Move Tool- Click on the text and place it on the extended canvas. Click Enter.
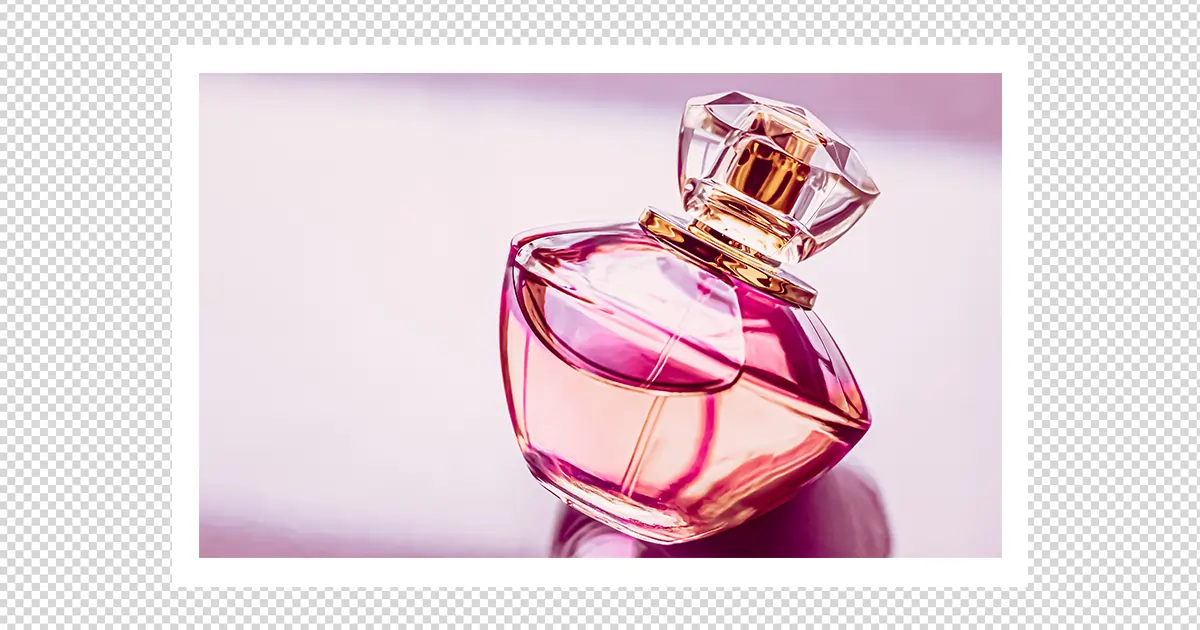
 From the image, you can see that there are borders around the photo. If you want to remove them, do this.
Go to Image>Trim.
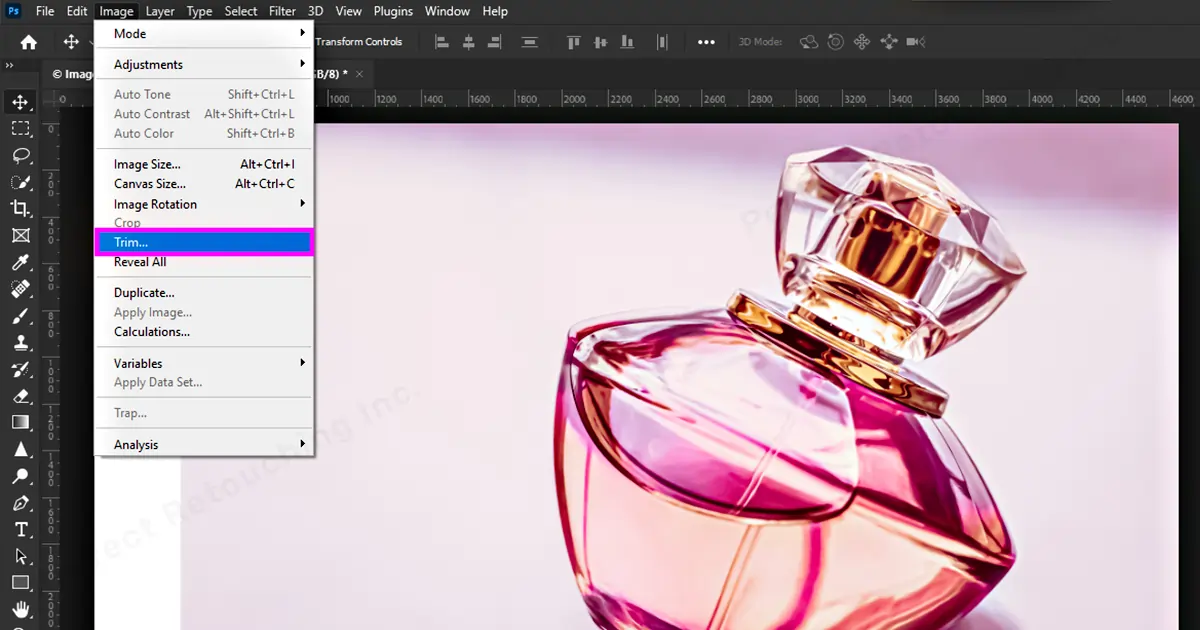
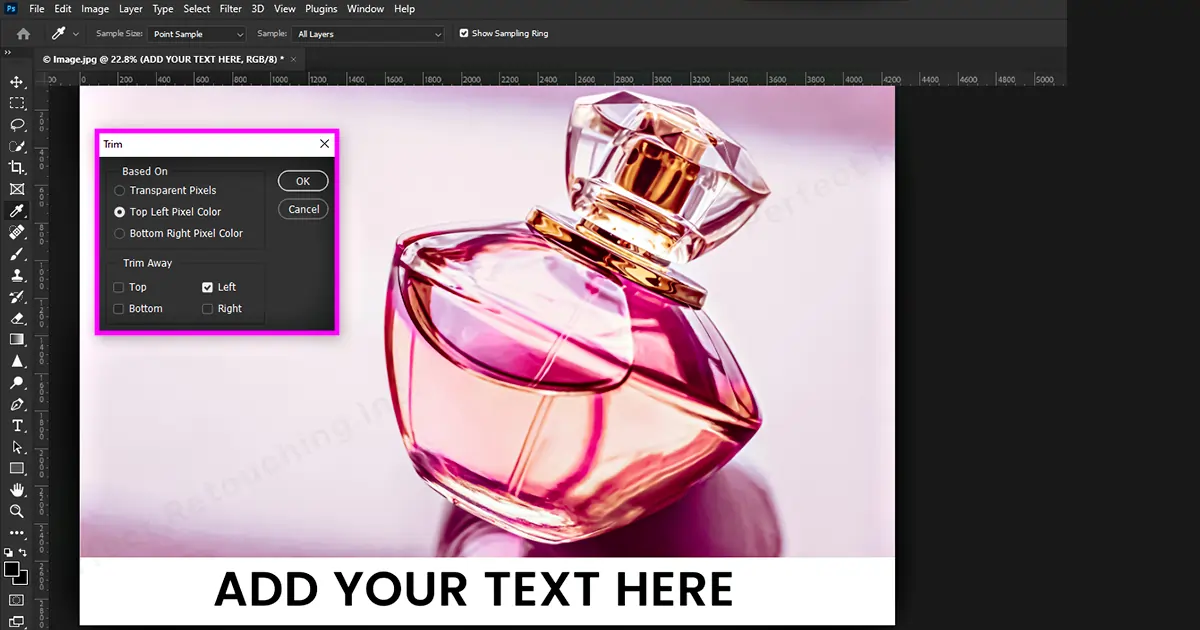
- Trim Dialog box will appear. From the Trim Away Section, click on the sides you want to trim. For Example, I want to trim away the top, left and right side. So, I only removed the Bottom right sign.
Click OK. You have successfully added a text in the extended canvas.
Closure
How was it? Easy, right? I hope my tutorial on how to change canvas size in photoshop was helpful. There are more ways to change the canvas size but I showed you the easiest methods. Try it, practice it and you will be able to change the canvas size within minutes.
And, if you need professional help to increase or decrease canvas size in your photos, take our product photo editing service to edit your photos. We are always happy to help.


