 English
 Arabic
 Danish
 Dutch
Dutch
 Finnish
 French
 German
 Hebrew
 Italian
 Japanese
 Norwegian
 Polish
 Portuguese
 Spanish
 Swedish
 Russian
How to Do Hat Product Photography on Your Own
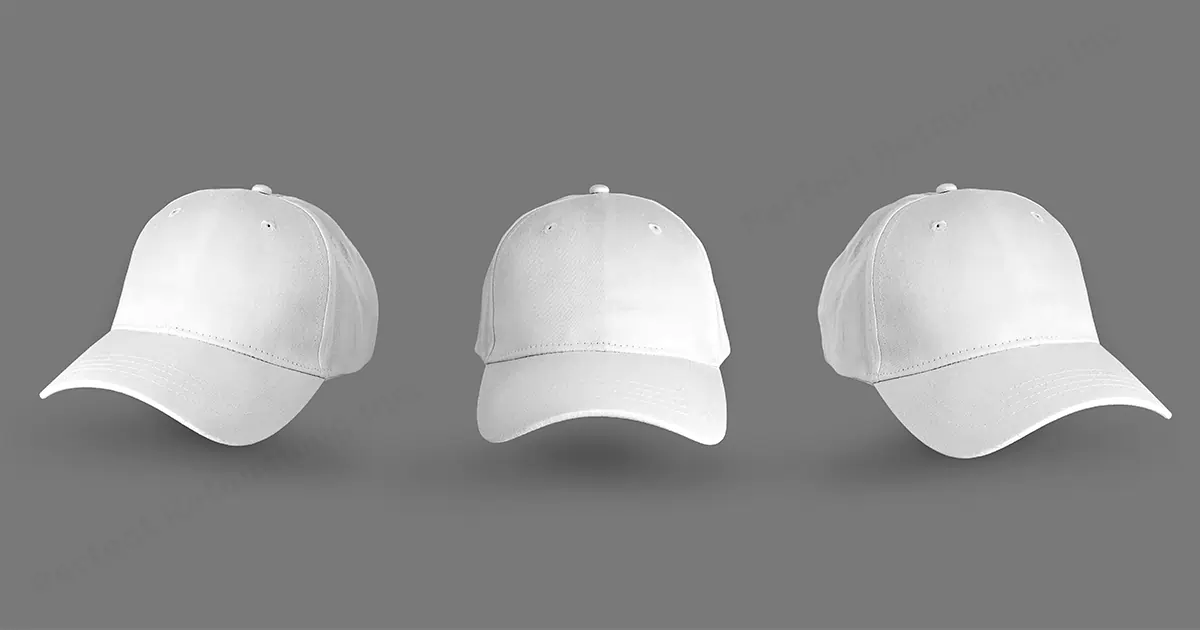
Photographing hats is different from other product photography. Remember what Frank Sinatra said? "Cock your hat, angles are attitude"! Definitely, showing off your product 'hat' is quite sensitive, you gotta show the perspectives of every hat thoroughly... I mean display each hat to visualize its unique design in attitude. Turn a cool music on, grab a coffee and go on clicking the hat, cause you gotta bring the mood on!
When I take hat photos, I make sure that the hat design stands out. All the details of the hat is important but its design is the most important to attract customers.
Read my take on hat product photography flawlessly to mesmerize the audience!
Hat Photography Equipment
As much as taking a photo is important, organizing the equipment is also important. By organizing the tools, you are making your job easier. So, these are the tools you will need to photograph hats.
Table
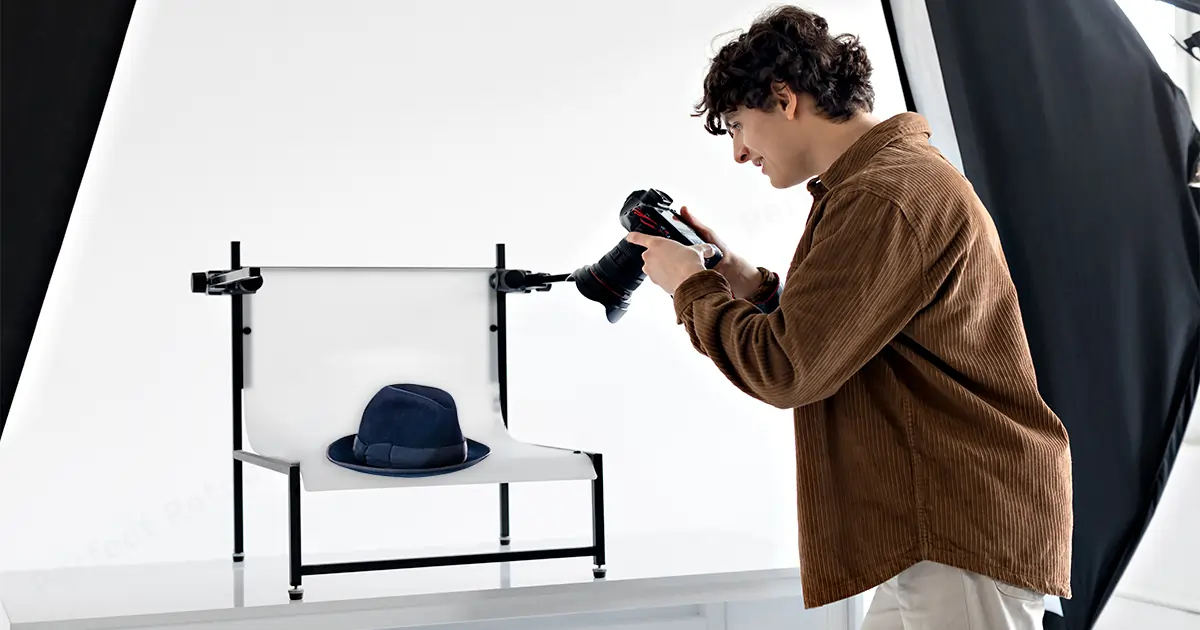
You can use any size table for the shoot. Just set it against a wall or in any place you see fit to take the photo.
Camera
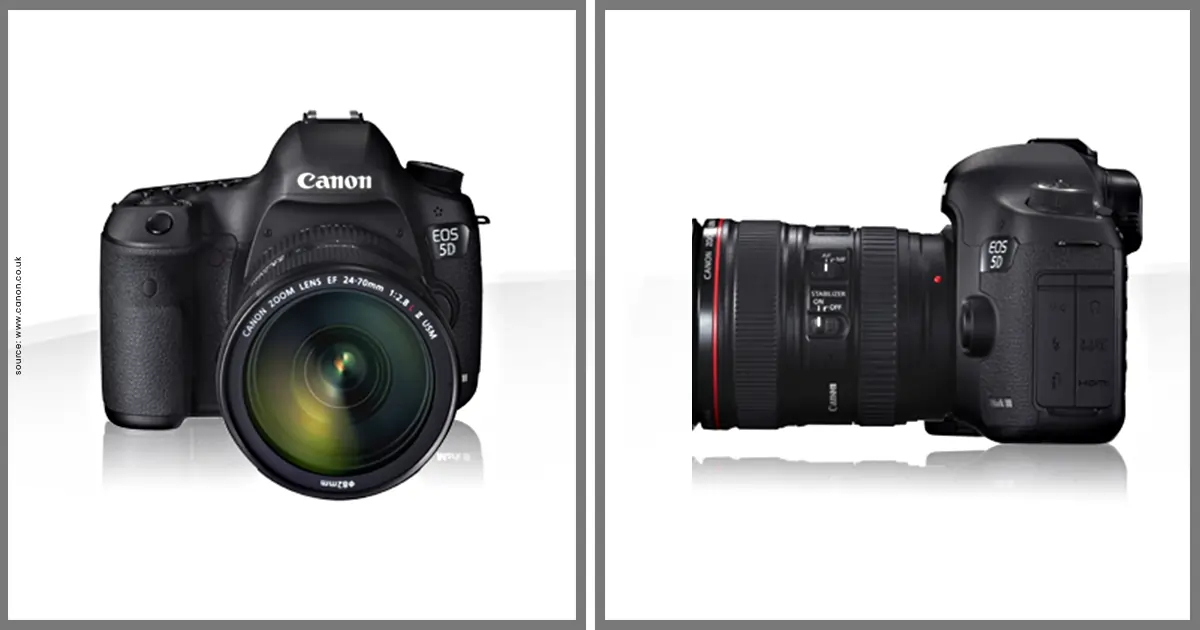
For cameras, I suggest the Canon EOS 5D Mark III, a mirrorless camera. Its ISO, Aperture and Shutter speed quality is great. It has 22.3 megapixel CMOS & a Digic 5+ image sensor. It gives a bright yet natural color. You can use a raw processor easily to take creative photos. It also focuses accurately and quickly.
Studio Lighting
For hat product photography lighting, studio lighting is the best. As you can set the lighting to your liking and move it around however you want to take the best shot of the hat.
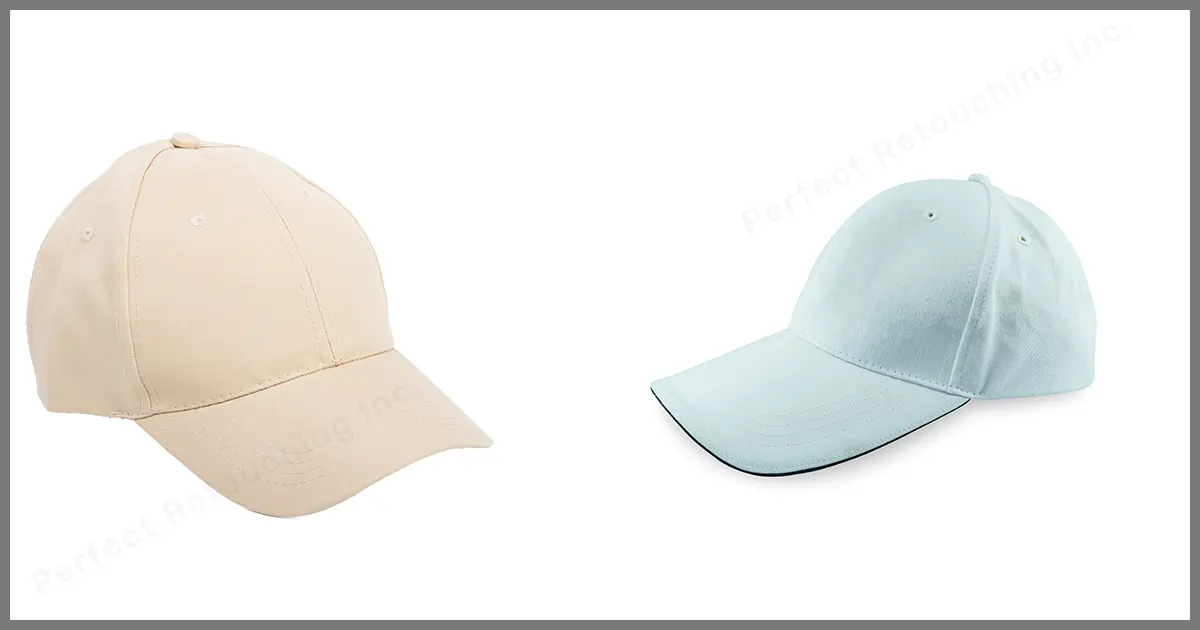
Use White or Other Color Background
Choose your background color wisely, as it will highlight your product photos. For example, If you use white background with white hat, it will not highlight the design.
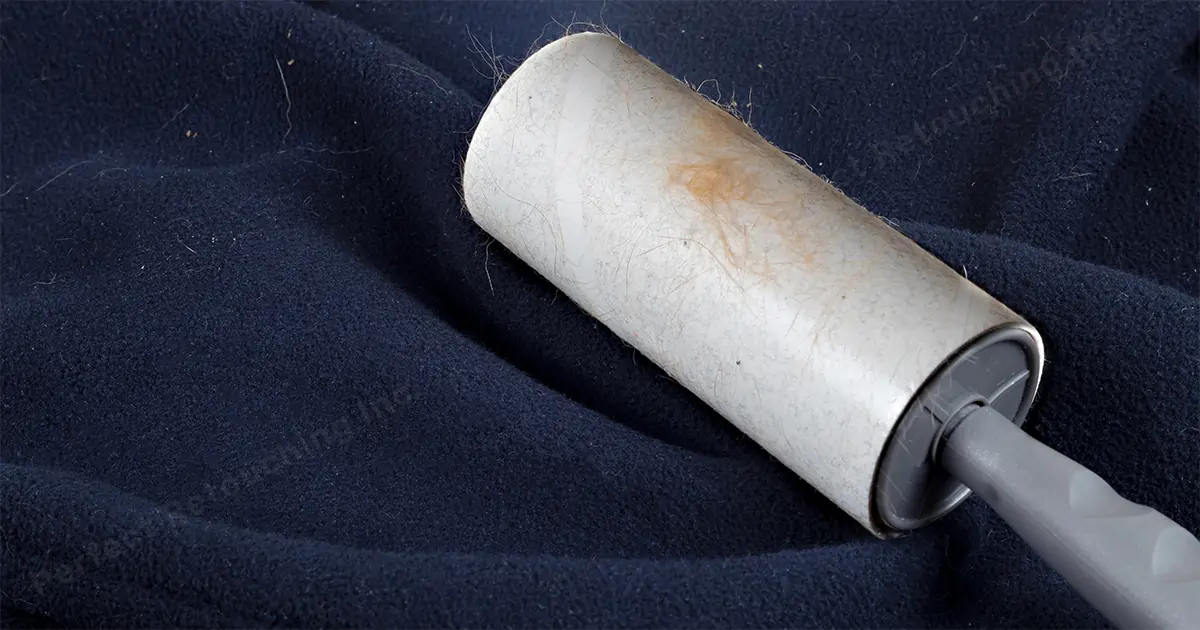
Sticky Lint Rollers
Use sticky lint rollers to clean your hat.
Hat Stand
Use a hat stand to stabilize your hat. Set the hat stand in the middle of the table to take good photos. However, you can also use string or just the table to take pictures.
Hat Helmet
Put the hat helmet in the hat to make it look firm. It will also help you stand out your design in the hat. You can easily buy it on amazon.
Tripod
With the help of a tripod, you can easily set the camera settings and take the photos with ease.
Photoshop Software Such as Adobe Photoshop/ Lightroom
After taking the photo, remember to do photoshop to fix the light, color, shadows and remove spots.
Shooting Process of Hat Product Photography
Hats are usually worn for formal purposes such as ceremonial and religious purposes. People wear hats to enhance their beauty with the attire and to look classy. Now, here’s how to do hat product photography to attract customer’s attention.
Set up the Stage
- First, set the background according to your hat colors. If you are taking a photo of a dark color hat such as black, blue, green etc, use white background. If you are taking photos of light color hats, such as white, ash etc, use dark color background or black background.
- Place the table in front of the background.
- Position the lights surround the table and make sure that it is lighting the whole area properly. Place a strobe light beside the background. Set the strobe light facing the background so that the light reflects on the background properly. It will create a nice light behind the product.
- Place a white reflector on the table. It will help you prevent the harsh light that comes from the lighting and strobe light.
- If it is still giving harsh light, use a white foam board to get a soft shadow.
Clean Your Hat Properly
Keep in mind. your hat is your hero, take care of it. Make it clean & shiny before the photoshoot.
Clean it with a Sticky Lint Roller. As hats are made of cloth products, lint rollers are best for cleaning them. Just roll the lint roller over the cloth softly, it will collect all the dirt and dust itself. The camera lens can catch dust, blemish and dirt. If you clean the hat before the shot, it will lessen your work in post production.
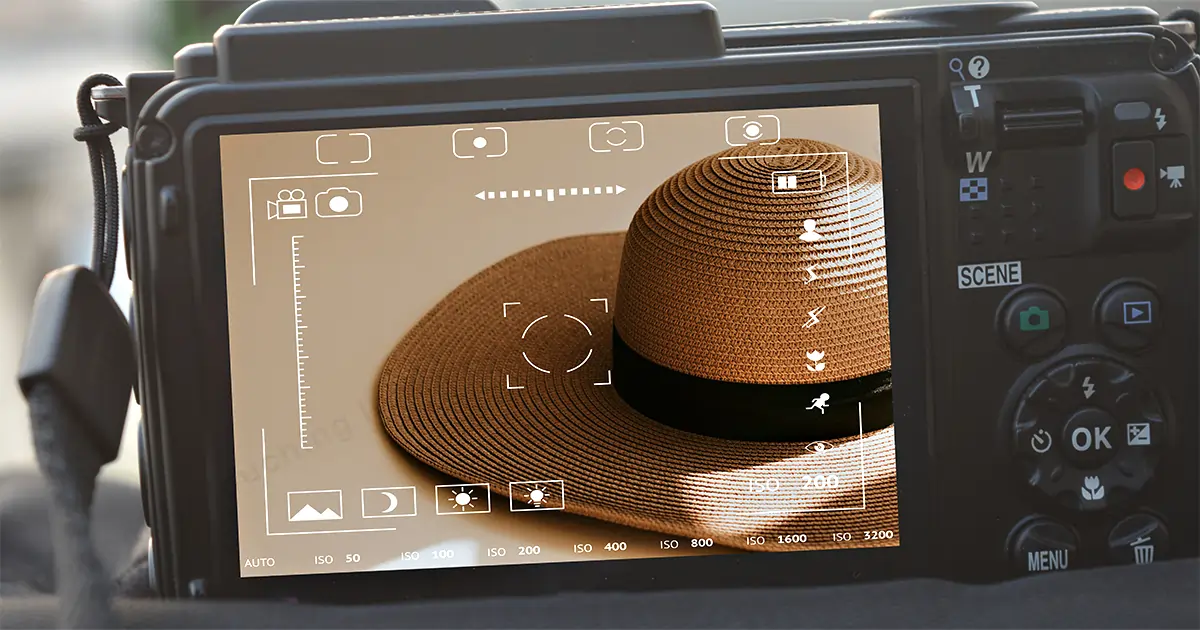
Camera Settings for Hat Photography
- Put the camera in the tripod to use settings with ease.
- Use Raw mode. It will help you capture more information and details to the image.
- Set your camera to manual mode. Manual mode is a bit hard to handle but you can experiment with it and take very creative photos.
- Set your ISO to 800 to get a bright image. However, keep the noise in mind. If you see that using higher ISO is making your image quality dull, lower it.
- Use Aperture to f/8.0/9.0 to get deeper depth of Field. It will keep the hat in focus and the surrounding will also look less blurry.
- Set the Shutter Speed to 250. It means it is open for 1 over 250 of a second. It is very fast. It will freeze the movement fast and take a sharp photo. However, you will get a dark photo, as less light will come in so set the ISO based on that.
Note: ISO, Aperture and Shutter speed is interconnected. Depending on the distance, you set these three. So, practice it and experiment with it to see which works the best for you to get a sharp and crisp image.
Props for Hat Product Photography
Whichever prop you use to take photographs, remember to remove the price tag or hide it properly.
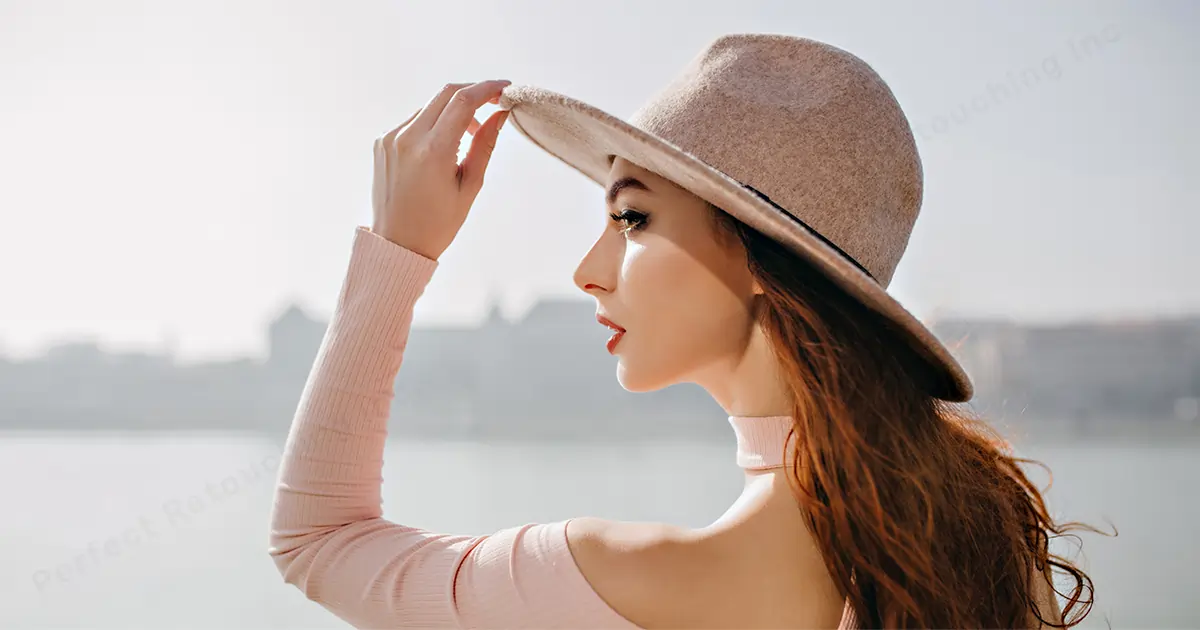
- Hat Model
For hat photographs. I suggest not using models, as it might distract them from the item. However, you can use hat models without distraction. Take the photo of the model from head to shoulder with a clear background. Model’s face should portray hat’s purpose such as an official or holiday purpose. Make sure the audience understands what you are promoting.
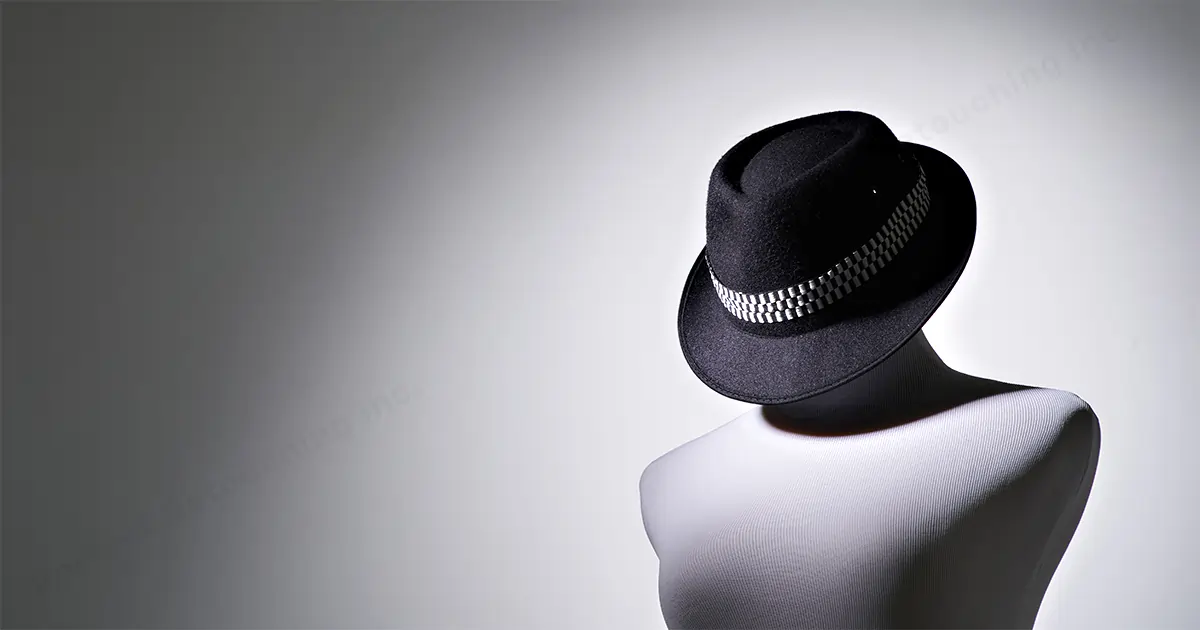
- Mannequin Heads
Ghost mannequin photography with hats is a good choice for taking hat pictures. Especially, good for taking pictures of beanies. As hats are made with cloth, it will not stay firm on the table alone. On the other hand, Ghost heads are made of plastic. So, when you place the hat on the ghost mannequin, it will stay firm. So, the picture will come out nice and all the embroideries will stand out.
Note:While you do photo editing, edit the ghost mannequin if it becomes a distraction.
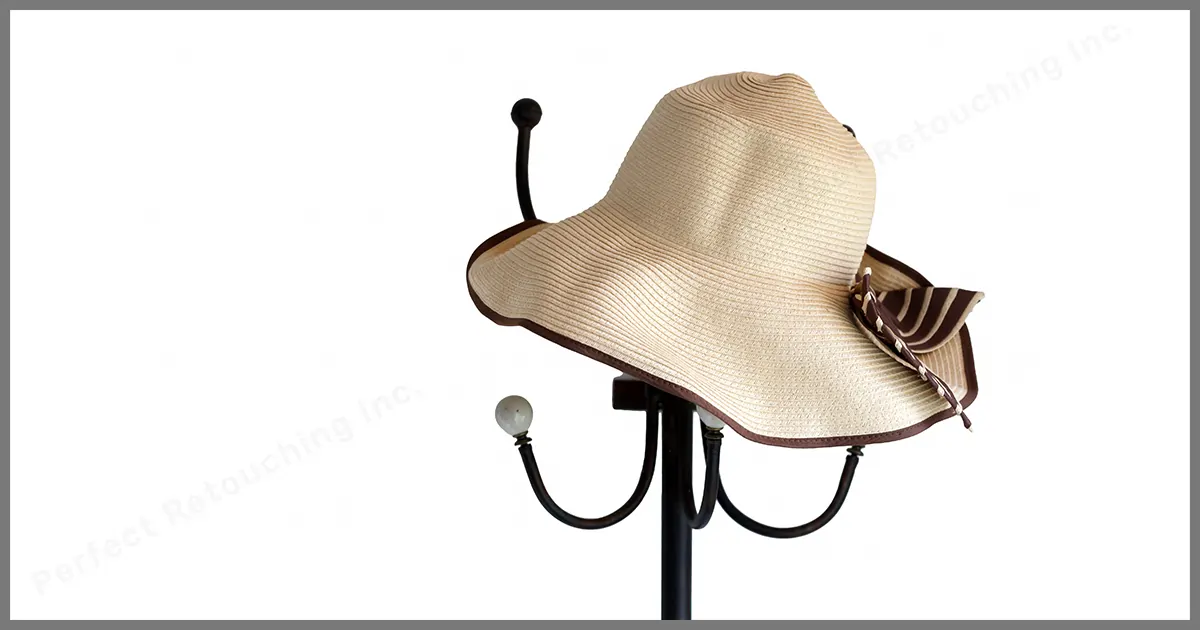
- Hat Helmet
If you do not want to use ghost heads and models, you can take the photo with just a hat stand and hat helmet. Use a hat stand to set the hat in a higher position. Set the hat helmet in the hat properly and put it over the hat stand. Now you can take the picture using any angle.
Note: Edit the hat stand while photo editing.
Take the Photo
You can take the image in many ways. However, I will tell you three ways which will make your hat design stand out and shine your image in the crowd.
- Take the Photo in an Angle
You can take a straight photo of your hat but it will look boring. To make your hat photos more interesting, set them in angles.
- Apply Three Grid Mode
Three Grid Mode is always helpful when it comes to professional product photography. Use the three horizontal and vertical lines to take sharp hat images.
- Apply Negative Space
Hats have simple designs, hence, negative space is a very effective way of taking hat photos. Negative space keeps the focus on the main subject. Use a simple background/backdrop and leave the surrounding of the hat empty. It will show the simplicity and elegance of the hat.
Note: Whichever technique you apply, take at least three photos per image to avoid blurry and shaky photos.
Retouch Your Hat Photo to Make It Flawless
Hat photos are usually taken very simply. So, why do you need to do photo retouching?
Post production is very important for your product image, as you will sell your product through your image. A hat photo may seem simple but no photo comes out perfect hence, need retouching.
- First, look for any dirt & dust in the hat. Though you cleaned it up before the shoot, it may catch dust in the photo. So, zoom the photo to find any dust or dirt to edit it.
- Do the color Correction. Because of lighting and camera settings, the hat’s color may look faded in some places. So, check the color and make the color even in all places with photoshop.
- Also, correct the background color. Because of aperture, sometimes the products surrounding get blurred, so retouch it to make it look sharp.
- Remove the Ghost head and hat stand. After using them, remove them with photoshop, as hat photos look the best when they are only in the focus without distraction.
Note: For beanie photos, do not remove the ghost head. Without a ghost head, it will look unnatural. - Fix the shadows. shadows need to look natural and soft. Make the shadows look realistic with the hat.
If you do not know or have time to do your photo retouching, take professional help to retouch your photos.
Conclusion
In hat product photography, your hat is your knight and it should tell a story. It needs to look flawless. The customers should be able to visualize how they want to use that. And you can make that happen with your photography. I hope this guideline will be helpful to you.


