 English
 Arabic
 Danish
 Dutch
Dutch
 Finnish
 French
 German
 Hebrew
 Italian
 Japanese
 Norwegian
 Polish
 Portuguese
 Spanish
 Swedish
 Russian
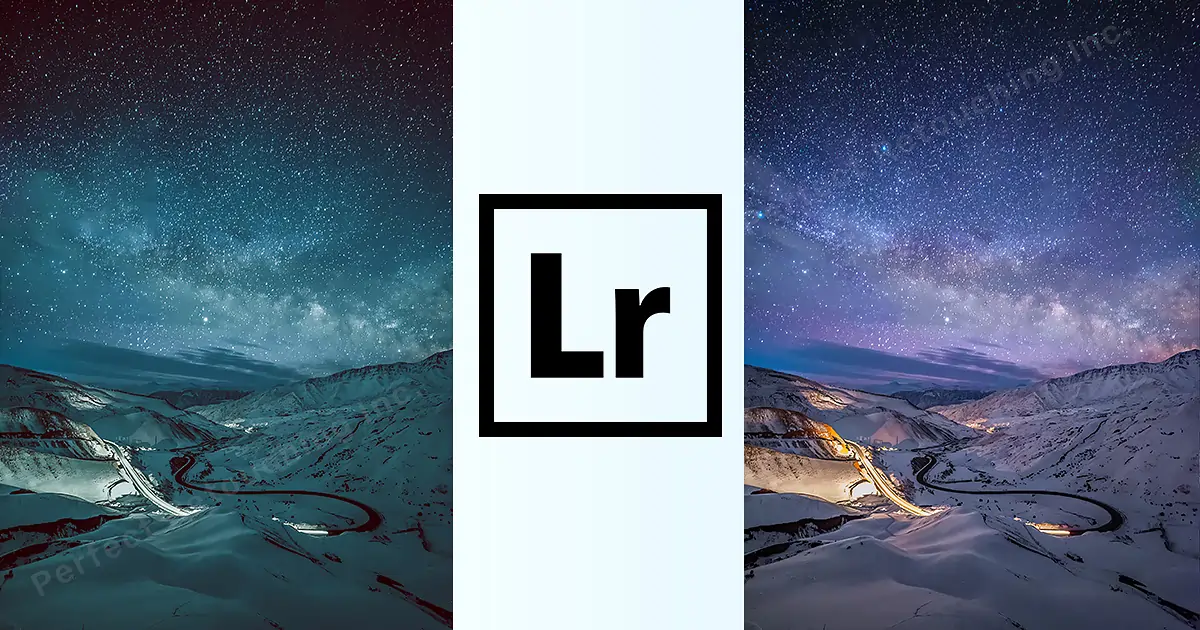
Capture the Dreamy Night: How to Edit Night Time Photos in Lightroom
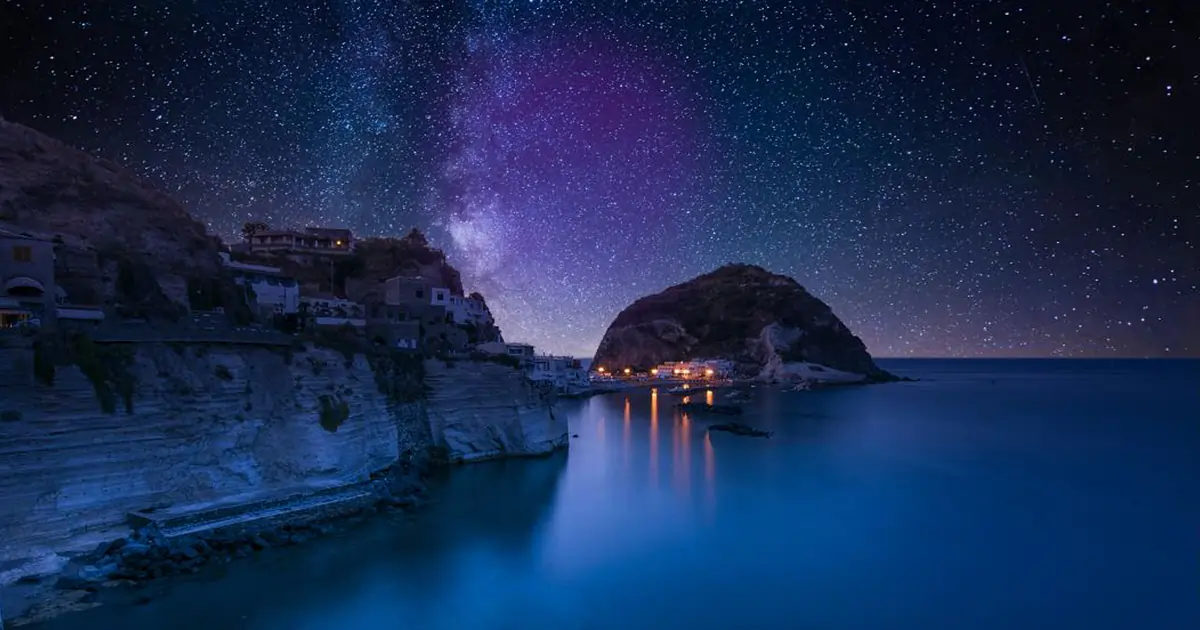
After hearing the word night time photos what comes to your mind first? Darkness-dimmed light, city lights, Astrophotography, etc. all can be described as dreamy. Night street photography is not a new concept. But not all photos appear as dreamy. Photos at night can appear very dull.
Don’t worry. That’s where photo editing comes in. But editing nighttime photos can be tricky. But some small efforts and Tricks can change the game. It’s all about capturing how to edit night photos.
How to Take the Night Time Photos
Before starting to edit photos, you have to understand a few things about photography at night. Try to click photos where the darkness is mighty and a little bit of lights look tiny. That will bring the vibes of aesthetic photos. Set your vantage before the photoshoot. Dark night pictures or night city photos are also fine for this tutorial.
You can use a tripod. If it’s not always possible to have a tripod everywhere, then don’t worry. You don’t always need to have all the necessary equipment to do photography the way you want to. If you have anything that can click a picture is good. Yes, the better-quality camera you have, the better pictures you will get.
In short, if you don’t have a tripod, you can still work. Put your camera on a chair/table or a stable object that will be able to hold the camera steadily. Then you can click the picture. If you don’t even get anything close to a tripod or anything steady then set your camera on timer. Only 3sec will also be fine. So that there is no chance of any handshakes while clicking the button on the camera.
Camera Settings for Nighttime Photoshoot
If you are shooting with a professional camera then make sure you make proper use of that camera. How? Shoot it as perfectly as you can. Start with the perfect camera setting.
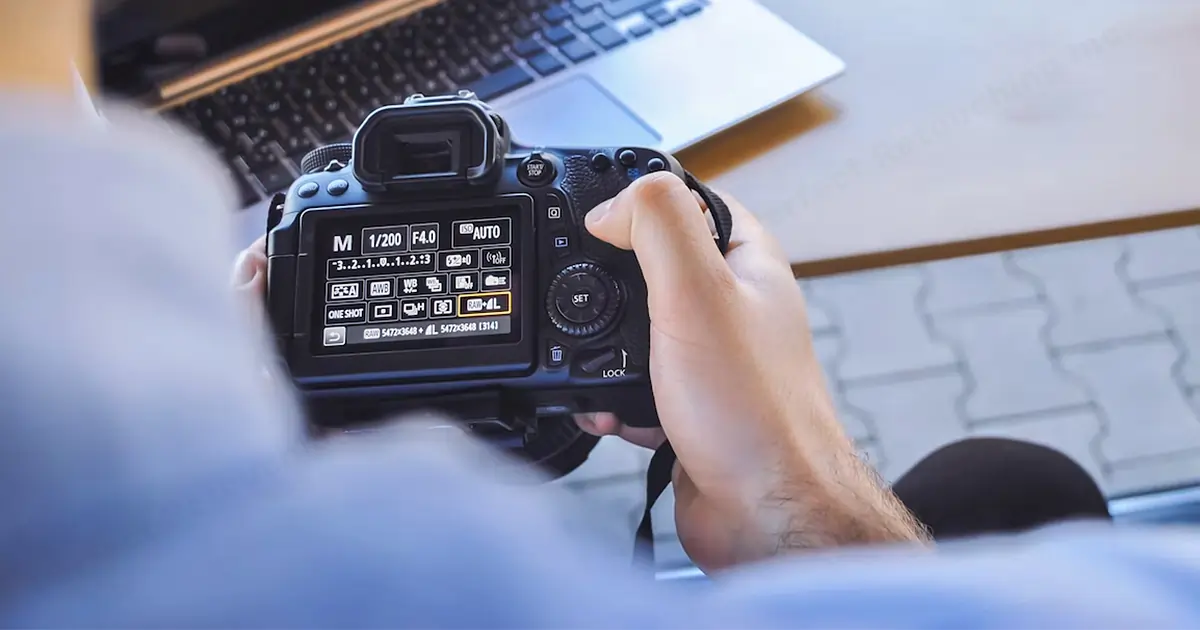
Set the camera in M (manual) - Set the camera into manual so that you can modify the settings according to your preference.
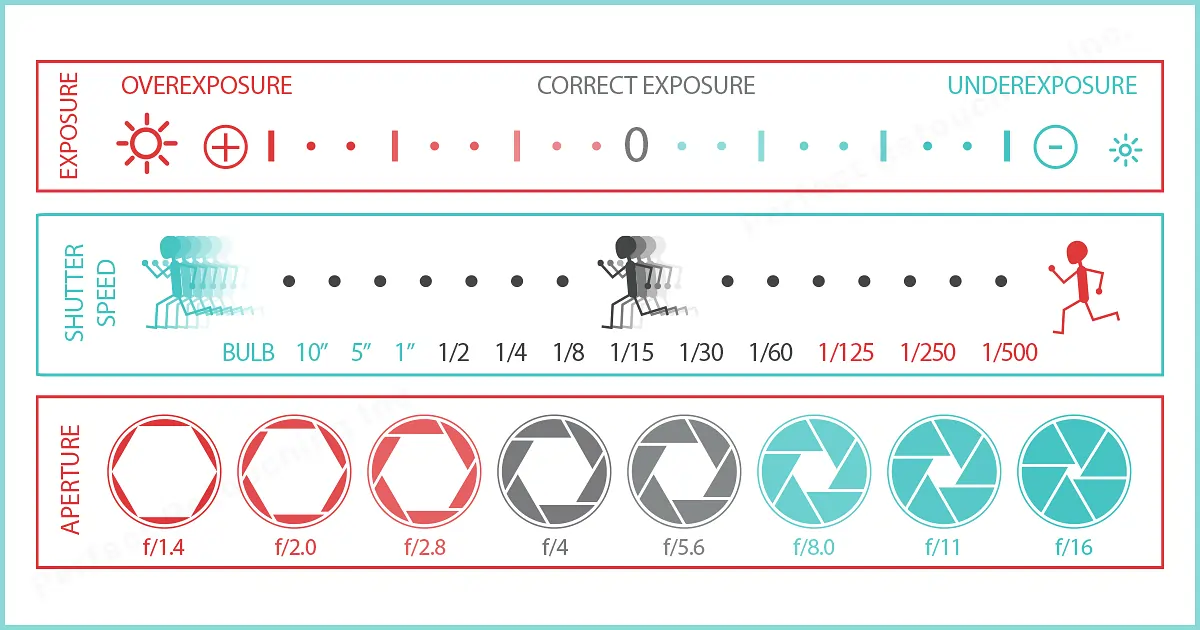
Shutter speed – Shutter speed indicates the length of time that the camera will be exposed to the lights while taking a picture. So, in nighttime photoshoots, it is better to have longer time exposure. So, every single detail will be captured.
Aperture – Keep the aperture in F8, F11 or F16. A large F stop means a smaller aperture and a smaller F stop means a larger aperture. For example, F4 is larger than F14 or F16. A smaller aperture captures every detail and blurs less. But larger apertures will blur out most of the space. It will focus on lesser things. So, it is wise to capture night pictures in smaller apertures.
ISO - Keep ISO at 100 or 200. ISO controls the image quality. It controls the amount of light required in an image. ISO depends on the sensitivity. If the sensitivity is more, the amount of light required is less.
In short, if you are shooting in bright daylight, where everything is visible then shoot it in low ISO. But if you shoot in a very dark place, go for a lighter ISO.
To make sure you have a crisp clean photo without any noise keep ISO in between 100 to 200.
Set White Balance to Auto – During night time there can be various kinds of lights with various undertones. So, if the white color balance is not proper then the picture might look very off.
These were some major settings that you should follow. There are also some points that will help you to improve your photography like manual focus and shooting in RAW.
Now, click some nighttime pictures.
How to Edit Night Time Photos
After taking the proper photo with the proper settings, it will not always be perfect. To make the picture perfect, you have to take the help of photo retouching here. There are various software and apps for retouching. But let’s focus on Lightroom for today’s blog. Let’s see how to edit photos taken at night…
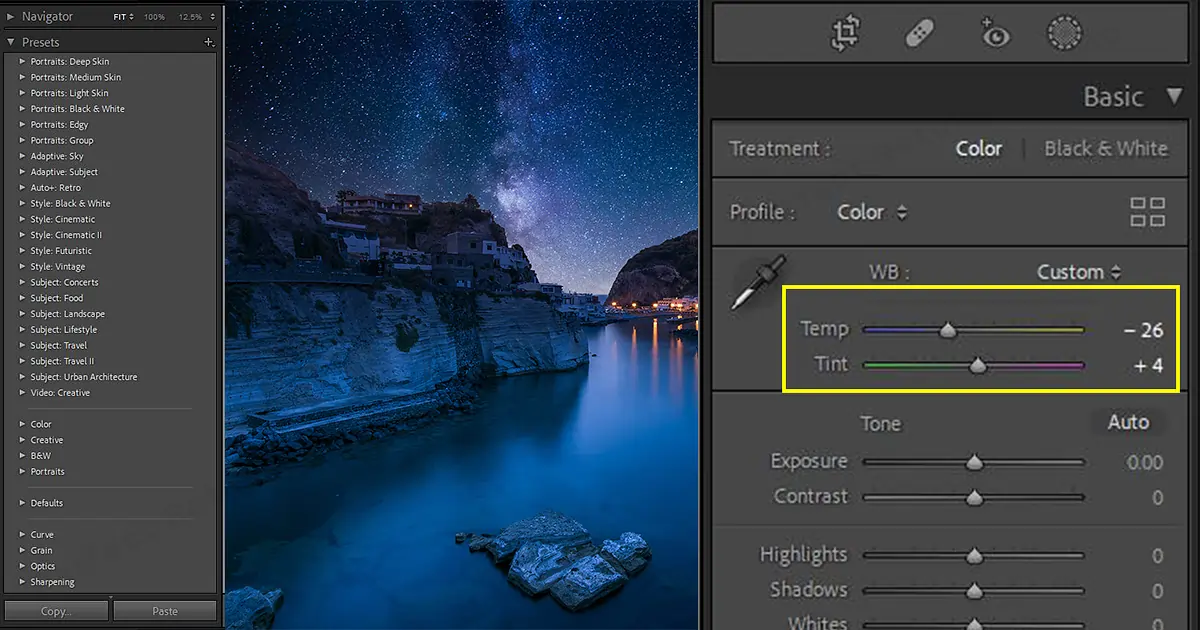
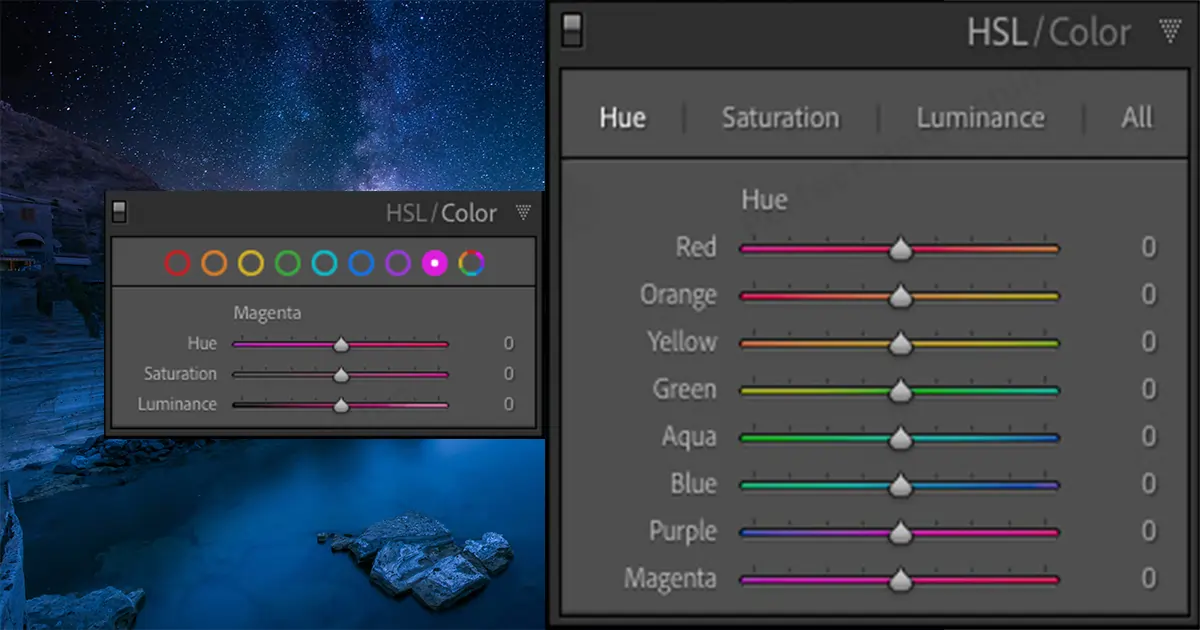
1. First, look for the temperature. Adjust the temperature. The temperature of a picture is very important. In the summer vibe picture, the undertone of the image is more warm-toned. And in a winter-vibe picture, the undertone of the image is more cool-toned. Since we are working on a nighttime photo. The undertone of the picture is definitely cool-toned. Like blue, purple, teal green, etc. So, drag the temperature into a cooler tone. Decrease the temperature. To compensate for that, adjust the white balance to more of a purplish-blue tone. (You can do it in whatever color theme you want but go for a cooler tone)
2.Bring up the saturation and vibrance. Add more vibrance to the picture. We can adjust that slowly according to the color theme of the picture.
3.HSL is amazing for these types of color adjustments. HSL is used to define color more beautifully. You can play around and see what adjustment would work for you.
4.For gradients focus on shadows and highlights. Increase them both. Don’t overdo it. You don’t need to worry about the mid-tone since it’s a nighttime picture.
These were all basic editing. Basic stuff that you can adjust in almost every picture. Now let’s make this picture more dramatic. The perfect way to make a nighttime photo dreamy is to focus on the little lights that are peeking through in the picture and make it dreamy. How? Let me tell you how…
5.Go to the histogram. Here you will find exposure, contrast, Highlights, shadow, whites, and blacks. You can adjust them according to your preference, but our focus is not here. We are here for the “selective tools” like the Radial filter. Select the Radial filter.
6.Now go to the picture and find the light that can add a dramatic view to the picture. Draw the filter over the lights where you think it will fit perfectly.
7.Now decrease the dehaze. You will soon notice a volume in the aura of those lights. You can also change the color of the light here. (If you even want to change the color of the light try to maintain the undertone of the picture. Because that can be tricky to adjust sometimes)
8.Now the lights are lit up. But yet there are more we can do. Select the graduated filter and put it on the dark side of the picture. Decrease the exposure. You will find a more beautiful contrast.
There you have it. A dreamy starry night time picture just in a few minutes.


