 English
 Arabic
 Danish
 Dutch
Dutch
 Finnish
 French
 German
 Hebrew
 Italian
 Japanese
 Norwegian
 Polish
 Portuguese
 Spanish
 Swedish
 Russian
Top 9 Real Estate Aerial Photography Tips: Master Drone Photography
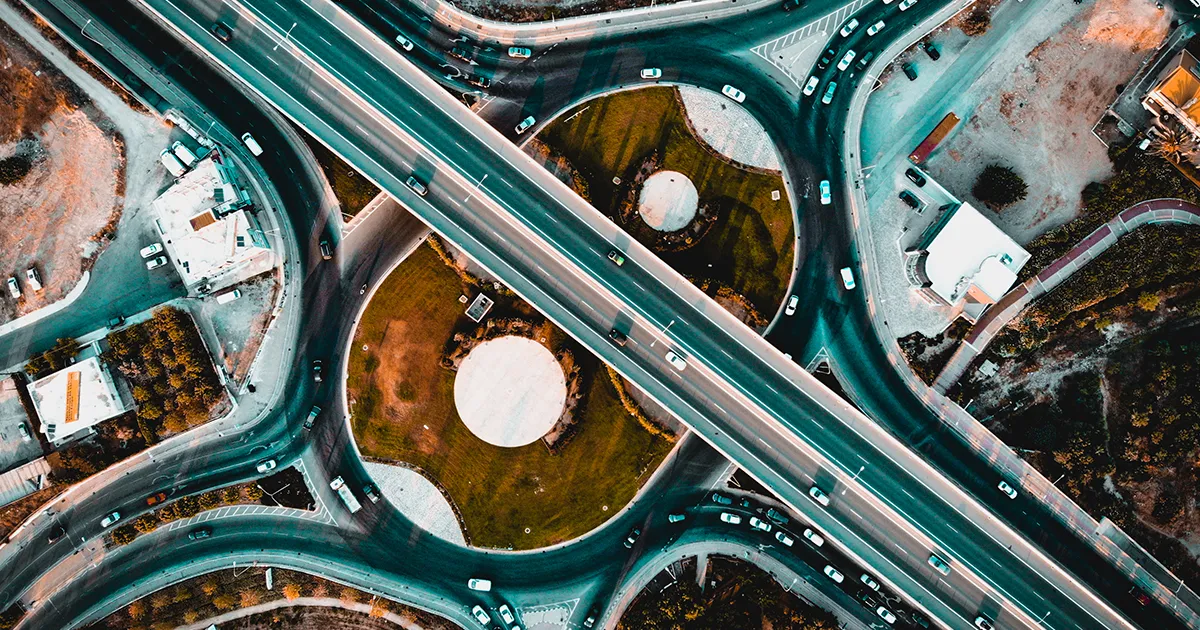
Aerial photography for real estate is a must for agents, developers, and marketers to show the complete view of the building. It shows the building context, provides a clear understanding of the place, attracts customers, and justifies its pricing.
In this article, I will tell you 9 professional real estate aerial photography tips to help you create eye-catching drone shots. Ensure your drone real estate images create a "Wow Factor" and make your customers stop scrolling and take action
Why You Should Invest in Aerial Photography for Real Estate
6 reasons you must invest in aerial real estate photography now.
- Visual Depth: Drone real estate images portray the full layout of the place, including the landscape, roads, backyard, pools, and many details.
- Show the Neighborhood: Other than the property layout, you can see the neighborhood areas like supermarkets, parks, and schools. Allow them to judge whether they like it or not.
- Great First Impressions: Aerial shots are rare. Create a rare view for the audience to see the real estate from a new angle.
- Increase Engagement: Property drone shots increase 68% more views than standard building images - MLS Statistics.
- Generate Conversion: When the audience can see the property and the neighboring area clearly, they make a decision and convert.
- Premium Listing: Best real estate photos with aerial views portray your professionalism and increase property pricing in the market.
9 Real Estate Aerial Photography Tips to Capture Stunning Drone Shots
Learn easy aerial real estate photography hacks to take drone real estate images like a pro.
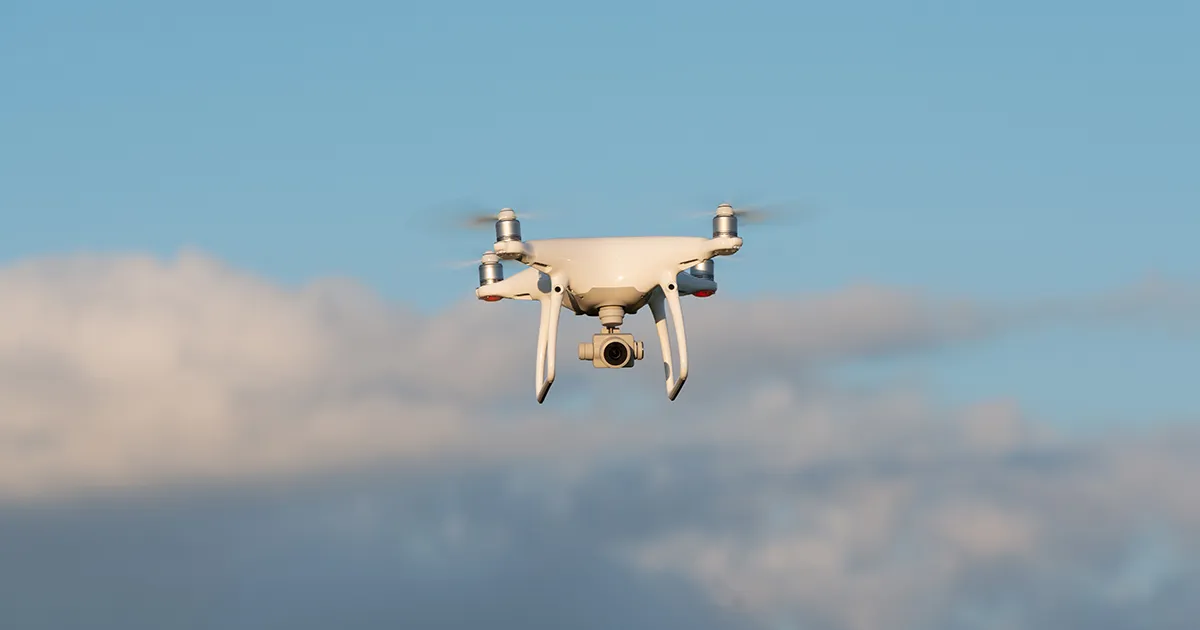
Choose the Best Drone for Real Estate Photography
The right drone allows you to capture creative aerial perspectives. Show the quality of the real estate that aligns with users' needs.
Key Features of the Best Drone:
- High-Quality Camera: Your ideal drone real estate photography camera should have 4K video and 20MP still image capacity. It will allow you to take sharp images for large screens or printed copies.
- Obstacle Sensors: Ensure the drone has obstacle-avoidance sensors. It will help you safely fly around the trees, buildings, and other obstacles, and shoot anywhere you like.
- Smart Flight Mode: Ensure your drone has features like "Orbit, Follow Me, or Waypoint. These features will allow you to capture cinematic angles without manual control.
- Battery: Use a battery that offers flight times of 20-30 minutes per charge, such as the DJI Avata. Carry extra batteries for hassle-free shooting for as long as you want.
- 3-Axis Gimbal: The Gimbal stabilizes the camera while flying in complex, windy conditions. Ensure smooth, stable, and blur-free aerial shots.
Learn Drone Rules and Regulations
Each country has its own airspace laws and licensing. You need to know about the laws in your country to capture drone real estate images hassle-free.
The laws of flying drones in the USA:
- Register your drone with the FAA if it weighs over 0.55 lbs (250g).
- Part 107 Licensing. To use your drone for taking great real estate images or other commercial purposes, the FAA's Part 107 Certification is a must.
- Keep Airspace Maps to avoid entering restricted areas. The B4UFLY and DJI FlySafe Apps allow you to stay aware of restricted areas and keep your drone safe.
- Follow the fly safety rules. Fly your drone under 400 feet. Maintain line-of-sight. Do not fly over people or vehicles.
I have explained the rules for flying drones in the USA. If you are flying a drone in another country, search Google for the Airspace laws and licensing.
Plan Your Drone Photoshoot
Planning makes half the work done. Proper planning lets you stay fully organized and smoothly execute the photoshoot. Here is how you can plan your best real estate photography session.
- Visit The Property: To get creative real estate picture ideas, you must scout the property first. Understand the lighting, layout, and surroundings.
- Check Weather Conditions: Use online weather-checking apps like Meteologix or AccuWeather to choose sunny days for photoshoots. Avoid rainy, cloudy, or gusty days to reduce your work in aerial photography post-processing.
- Choose Your Lighting Wisely: Golden hour drone real estate images turn out the best. Other than that, take images in the late morning or early afternoon to get great lighting.
- Research Real Estate Picture Ideas: When you know the property layout and lighting, create a shot list. It will allow you to effectively use the flight times and capture high-quality images from your desired angles.
- Take Permission: Get written photography permission from house owners and neighbors to capture drone photos hassle-free.
Understand Your Buyer’s Perspective
While capturing drone real estate images, you need to understand what matters to your target audience the most. What will attract them and entice them to convert? Thus, include all the area images I am mentioning here. Ensure that you convey every detail in your shots.
- Full House Exterior: Take separate shots of the rooftop, driveway, kitchen, store room, and other rooms. Ensure every room of the house is presented well to the audience.
- Outdoor Elements: Take a pool, garden, decks, patio, outdoor kitchen, and hot tub to highlight what makes your house stand out from others., If buyers purchase it, they will be able to enjoy these elements in a luxurious home.
- Context of Your Location: Show the surroundings of your house to give buyers a whole idea of the place.
- Sunlight and Sunset Shot: Show the property's appearance in the morning, afternoon, golden hour, and sunset.
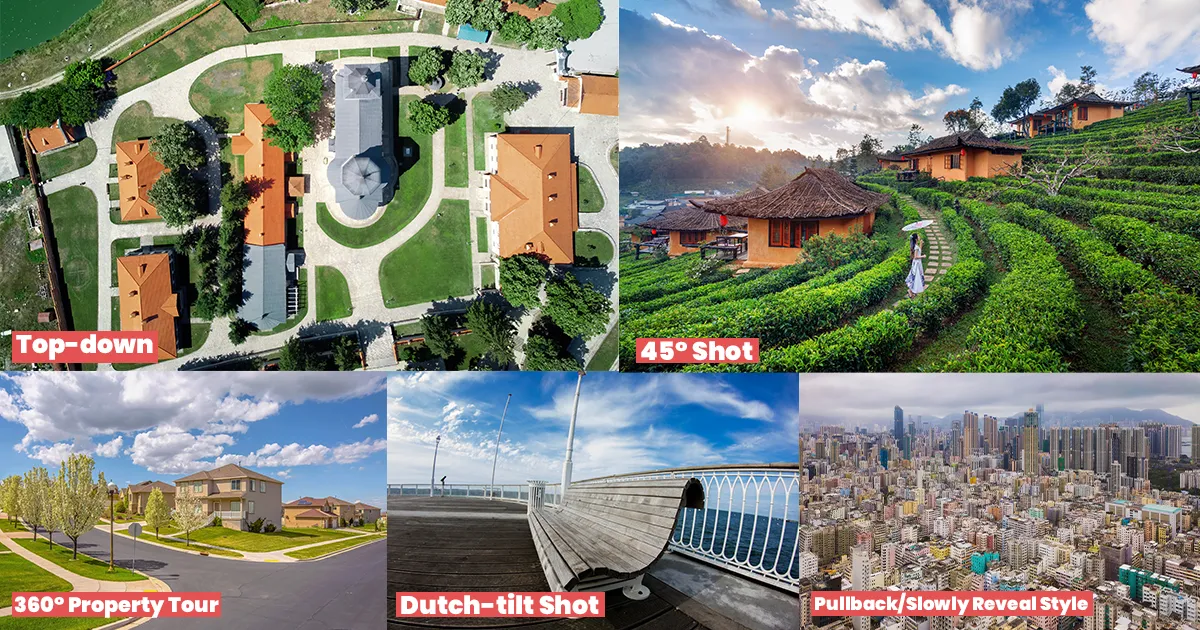
Tell a Visual Story with 5 Aerial Photography Styles for Real Estate
Aerial photography style for real estate varies from property to property. Thus, it is not about how much area you can cover in your photos. Rather, it is about how beautifully you can show the property in your frames.
- Top-down Shots: Showcase the landscape design, rooftop condition, parking lot, and more in the drone real estate images.
- 45° Shot: It is a unique real estate picture idea that displays property details elegantly and precisely.
- Dutch-tilt Shot: The drone hovers just above the house, tilts a little, and takes a shot, creating a dramatic/cinematic effect. You can use titled real estate professional pictures as opening video shots to capture customers' attention.
- Pullback/Slowly Reveal Style: Start the video from the door and slowly pull back, showcasing the full context of the property. You can also start from the house and fly backward to show the surroundings in a unique manner.
- 360° Real Estate Photography: Circle around the property by orbiting 360°. Provide a comprehensive exterior view to the audience. This aerial photography style is great for social media promotion and listing intros.
Composition and Framing Style
After fixing your real estate aerial photography style, it is time to compose the images to bring out quality results.
- The Rule of Thirds. Change your camera settings to three-grid mode. 3x3 horizontal and vertical lines will appear on the screen. It will allow you to place the house according to lines, creating a precise and elegant image. For example, you can place the house in the center.
- Light and Shadow Play. Angle your drone in a way that captures lighting and shadow in its best condition. Emphasize the properties, texture, and depth realistically.
- Minimize Distractions. Take drone real estate images when the roads are free of vehicles. Remove trash cans, the leaves on the grass, or anything that may appear as a distraction. It will lessen your work in professional real estate photo editing services.
- Capture Property in Frames/Borders. Utilize trees, driveways, fences, or anything that may create a natural frame for the real estate. The frame will direct the customer's eyes to the property, creating a creative look.
- Highlight Property Key Features. If the property has something unique to offer, like a pool, decks, a garden, or something else, compose a shot highlighting the unique feature. It will capture its target audience's attention, converting them into your customers.
Manual Camera Settings for Drone Photography
Here is an ideal camera settings idea for the best real estate photography.
Manual Mode: Go to the camera settings and set it to manual mode. It will allow you to experiment with the exposure triangle and capture high-quality shots.
Raw Mode: Set the camera settings to Raw mode. Though your work in real estate photo editing will increase, this is the best feature for capturing every detail in your frame.
White Balance: Set the white balance according to the lighting and setting before the photoshoot. It will help you avoid inconsistent colors in videos and still images.
ISO: Keep the ISO to 100-300 to capture noiseless, crisp property images.
Aperture: Adjust aperture to F/4-7 to capture quality depth of field drone real estate images.
Shutter Speed: Set the shutter speed to 1/1000 sec to capture stunning, sharp images.
Note: Experiment with the ISO, Aperture, and Shutter Speed camera settings. Take 3-5 test shots to see which exposure triangle produces the best real estate photos. Finally, work with the setting that best matches your lighting and movement.
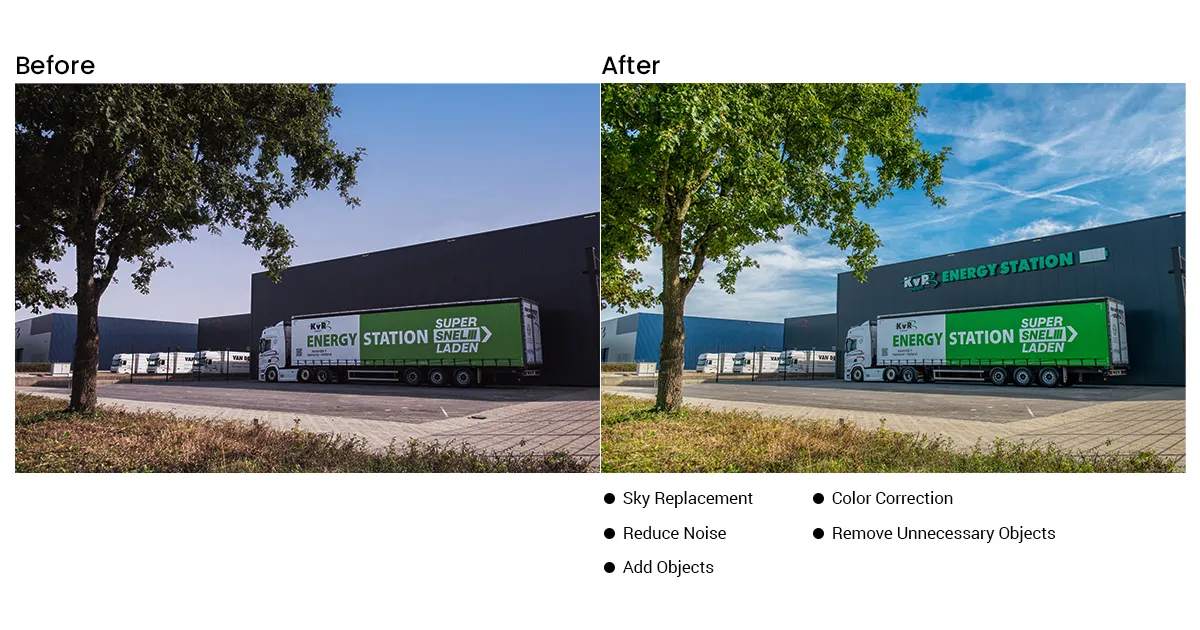
Edit Real Estate Photos Like a Pro
You must follow these real estate aerial photography tips to take your property photos to the next level. Edit your raw images to turn them into a high-quality visual.
- Sky Replacement: If the images turned out too sunny or were captured in bad weather, replace the sky in Photoshop. Ensure the property looks bright.
- Color Correction: Correct white balance and uneven colors, ensuring drone photography color correction looks well-balanced. For example, the green leaves look green and the white walls look white.
- Straighten Vertical and Horizontal Lines: Ensure the lines perfectly align with the property or rooms.
- Reduce Noise: If you had to use a higher ISO due to lighting conditions, the image may have captured noise. Remove them in Photoshop. Ensure they look sharp.
- Add Objects: If you think adding an object increases the property value, adjust it in Photoshop. For example, adding fire to the fireplace. However, ensure the object mingles well with the whole scenario.
- Remove Unnecessary Objects: If any object reduces the value of the property, edit it out. Retouch the area. It will increase the value of the image.
- Adjust the Shadow: Real objects have shadows, like window shadows falling on the ground. Do not remove it entirely. Soften it, creating a great view for buyers. 0
- Avoid Too Much Retouching: While retouching, focus on realism. The viewers should get what they are seeing in the image. It will increase customer trust, loyalty, and sales.
How to Use Aerial Shots for Real Estate Marketing
Aerial photography? Done. Real Estate photo retouching? Done. Now, what is left? Promoting your aerial real estate photography in the online market.
- Use a Multiple Listing Service (MLS) Listing as a feature photo and attract potential buyers.
- Use images and 360 videos for social media ads and reels.
- Use the best real estate photos in Google My Business profile (GMB) and Maps, ensuring local clients find your brand.
- Add your property images to website sliders or property galleries.
- Create high-quality brochures and email campaigns with great real estate photos. Attract potential buyers who are interested in purchasing property.
- Print the images and distribute them to potential clients who visit the office to check out great estates.
Concluding with
Mastering real estate aerial photography tips is challenging, however, super fun. You will make lots of mistakes. The first images will turn out low quality. However, keep on trying. Follow our tips and techniques to practice aerial real estate photography, and you will eventually succeed. Once achieved, great real estate photos will be produced by you.
If you are busy with drone photography and unable to retouch the final images, Perfect Retouching is here to help you. No matter the image quality and the flaws, we can turn them into the best real estate photos. From correcting color to straightening lines to adding realistic shadow, we can edit everything and deliver it on time. Contact us today and take advantage of our free trial. If you like the quality, let's talk about your project. That's it for today. Adios!


