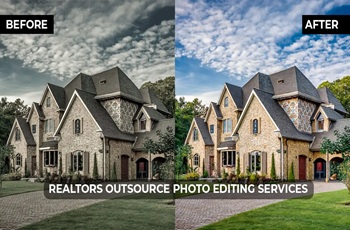
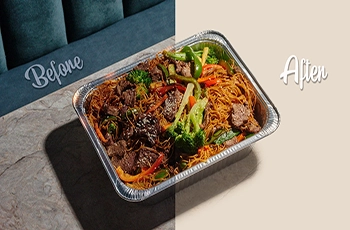
Why Your Product Photos Fail to Sell: 15 Common Product Photography Mistakes
Most online sellers make the same photography mistakes over and over without even realizing it. These are sneaky little problems that add up to one big result: abandoned carts and lost revenue.
Here are the 15 photography mistakes costing you sales right now:
Flat lighting
Color mismatches
Blown-out highlights or dark shadows
Cluttered backgrounds
Soft focus
Incorrect white balance
Tilted or skewed angles
Fake-looking edits
Unremoved imperfections
Mismatched framing
Unwanted reflections
Unoptimized files
No context shots
Platform rule violations
Inconsistent editing styles
Don't worry! Once you spot these issues, they're surprisingly easy to fix. Keep scrolling, you will find every solution for your product photos.
Relatable Reads: Best 5 Photo Retouching Providers to Choose From Free Trial
What Makes a Product Photo “Sell” Instead of Just “Look Good”?

You will see a photo that will make you tap on the “Buy now”. These product photos have that charm to do that instantly. Some tell stories, some look realistic. All these happened because of the great lighting and colors, and are perfectly retouched.
Let us show you how a product photo influences customers:
Stories Beat Simple Shots
Product photos used as mini-stories. A candle on a white background? That's okay. But that same candle glowing on a cozy coffee table with a warm blanket nearby? Now we're talking! When customers see a story, their brains actually imagine themselves using what you're selling.
Building Trust Through Real-Looking Photos
All customers can see is the photo. They can’t touch them. So, they rely on your photos. A product photography failure occurs when it can’t convince the eyes. Either looks heavily edited or doesn't show true colors.
Light, Texture, and Color

Lighting can change how you see something. Sometimes it can make you feel warm or cold. When lighting gets dramatic, it adds mystery and excitement. If you fail to use them wisely, your camera gets confused. It will bring a weird color to the screen. Colors matter too! Show textures clearly so customers can almost "feel" the fabric or surface.
Photo Retouching Makes or Breaks Sales
Good editing is the unsung hero of great product photos. It removes dust, fixes weird shadows, and ensures colors match reality. Both too much editing and poor editing are equally damaging. The final images look far from real.
Check out: Best Tips to Get Eye-Catchy Images For Social Media
15 Common Product Photography Mistakes That Kill Sales

Understanding what product failure in photography means, recognizing when images don't drive conversions. We'll go over the mistakes and fixes so your product photos don’t look like this.
Poor Lighting That Flattens Texture
Issue: Setting the lights from the wrong direction will give the product a dull and flat look. It can even make the premium item look cheap. These things instantly bring down the shoppers' trust. After that, they don’t even read the description.
Fix: Directional lighting and soft editing to bring back depth and realism. In post-production, carefully enhance shadows and highlights to restore texture without making edits obvious. The goal is to make products look touchable and real.
Inconsistent Color Between Photos
Issue: One shows navy blue, and the other shows royal blue. Guess what, they are the photos of the same product. These things make the shopper frustrated. Their thought of purchasing is long gone now. Because now they are doubting what they will receive.
Fix: To fix this inconsistency, use color checkers during shoots. When you sit down to edit, maintain consistent editing presets. In retouching, match colors across all product variations. It will remove customer dissatisfaction.
Harsh Shadows or Overexposure
Issue: Too bright or washed out. Images look like that because of overexposure. The added harsh shadows restrict the ability to see the details. Both problems pull attention away from what matters. Customers can't evaluate what they can't properly see.
Fix: You have to have control over highlights and shadows. Use exposure adjustment tools for this. It will lift shadows without adding noise. Dodge and burn techniques are another way. It will let you selectively brighten or darken specific areas.
Busy or Distracting Backgrounds
Issue: The Crowded background won’t let you see the main product. It will confuse the eyes. That’s why you will see Amazon wants a white background for the main photo. Customers scroll right past because the image feels chaotic.
Fix: Clean background retouching or digital backdrop replacement. Go for a professional retouching method. It will remove background distractions. You can even replace busy backgrounds with clean ones.
Lack of Sharpness or Focus
Issue: The image gets blurred either because of camera shake or incorrect focus settings. Sometimes, you see slight motion blur in the final photos. These out-of-focus photos mean the product is bad. At least for the customer. This unconscious judgment happens in milliseconds, costing you clicks and sales.
Fix: Focus blending and fine-detail enhancement. When shooting, always use tripods and proper focus techniques. In retouching, use focus stacking to combine multiple images taken at different focus points.
Ignoring White Balance
Issue: Incorrect white balance can cause unnatural color casts. Photos might look acceptable on your monitor, but terrible on customers' phones or tablets. This inconsistency breeds distrust.
Fix: Balanced tones for visual harmony in editing. Set proper white balance during shooting. Use neutral reference points to correct any remaining color casts. Check them on multiple screens before publishing.
Uneven Product Angles
Issue: When products appear tilted at weird angles, customers can't properly judge dimensions and proportions. Uneven angles make items look misshapen. This uncertainty is especially problematic for furniture, clothing, and accessories, where fit matters.
Fix: Use perspective correction tools in editing software to straighten product lines. Create alignment templates that ensure every product sits at the same angle and distance from the camera.
Overediting That Looks Fake
Issue: Both overly retouched images and poorly edited ones are equally damaging. When skin smoothing looks plastic, or textures disappear completely, shoppers know something's wrong.
Fix: Focus on subtle enhancements that maintain natural appearance. Remove only genuine imperfections like dust or scratches. Keep textures visible and colors true to life.
Dust, Wrinkles, or Scratches Left Visible
Issue: Poor preparation of products themselves is one of the most frequent errors. These imperfections signal carelessness to potential buyers. Customers assume you don't care about quality control either. This perception dramatically reduces conversion rates.
Fix: Spot-cleaning and surface-perfecting retouching. Use healing and clone stamp tools to remove dust specs, lint, scratches, and other surface imperfections.
Inconsistent Framing Across Catalog
Issue: Not using consistent backgrounds makes it difficult for users to scan, browse, and compare products on your online store. This visual confusion exhausts shoppers, increasing bounce rates.
Fix: Create templates that specify exact product placement, size ratios, and padding for different product categories. Use batch processing tools to apply consistent crops and alignments across multiple images simultaneously.
Ignoring Reflection or Glare Issues
Issue: Unwanted reflections can show your studio, equipment, or even the photographer in the product surface. These problems make professional-looking shots nearly impossible without proper handling.
Fix: Using diffusers with your light source can resolve many reflection problems. In post-production, carefully reduce or remove distracting reflections. Add selective masking to tone down hot spots without flattening the entire surface.
Wrong File Size or Format
Issue: Every extra second of load time increases bounce rates exponentially. Conversely, over-compressed images look cheap. Finding the sweet spot between quality and file size is everything.
Fix: Export images at appropriate dimensions for their display size. Use modern formats like WebP that offer better compression without quality loss. Test loading speeds regularly to maintain optimal performance.
Lack of Lifestyle Context
Issue: Many brands use pictures to show products rather than take a simple sales-oriented approach. Without lifestyle context, customers struggle to imagine products in their own lives. It reduces emotional connection and purchase motivation.
Fix: Create or composite lifestyle scenes that demonstrate scale, usage, and benefits. Use background replacement and shadow creation to place products in relevant environments.
Not Following Platform Image Guidelines
Issue: Amazon, Shopify, Instagram, and other platforms have specific image rules for size, file formats, colors, and text. If you don’t follow these guidelines, you could end up with your listings hidden and your ads turned down.
Fix: Create platform-specific image versions optimized for each channel. Maintain a checklist of specifications. Verify compliance before uploading to avoid costly mistakes.
No Post-Production Consistency Across Shoots
Issue: Images from last month look entirely different from this month's shoot. This inconsistency makes you look disorganized. It confuses customers about your brand identity.
Fix: Create a style guide documenting exact retouching specifications. Color profiles, contrast levels, saturation preferences, shadow density, and background treatments. Include before-and-after examples. Train all photographers and editors on these standards.
How Professional Product Photo Retouching Solves These Issues
Product photo retouching services are going to rescue your drowning sales. Yes, the professional retouchers have the expertise to solve these mistakes within days. Here is how they will take things into their expert hands:
Lighting, tone, and mood for brand trust
Professional retouchers ensure every image matches your brand's visual identity. They do it with consistent color correction and tonal adjustments. You will see that all your photos feel the same.
When customers see this consistency, their brains recognize your brand instantly and trust you more. It's like seeing the same smile every time you visit your favorite store.
Maintaining uniformity across hundreds of SKUs
Consistent backgrounds and framing make it easier for customers to scan, browse, and compare products. Professional retouchers use templates and batch processing to ensure every single product sits at the same angle, size, and position. From SKU 1 to SKU 1000, they follow identical visual guidelines.
Enhancing realism while removing distractions
The goal is to make products look their absolute best while staying completely believable. Professional editors remove dust, scratches, and weird shadows that don't belong. They clean up imperfections without making images look overly processed or artificial. Your product looks perfect yet touchable.
Increasing CTR and reducing return rates
Products with high-quality images see 32% higher sales. Plus, you’ll get 94% more views on average compared to your competitors if you include photos in your content. All this happened because of color accuracy, proper lighting, and realistic representation.
When photos show exactly what customers will receive, everyone wins. More clicks, more purchases, and happier customers who keep what they buy!
When Should You Outsource Retouching (Instead of Doing It In-House)?
Not sure if you should hire outside help for your product photos? Let's figure it out together!
Signs your internal team is stretched
Are your photos taking forever to edit? Does your designer groan every time you mention "batch retouching 200 products"? Then, outsourcing is the only option. Why let the quality suffer when it is easy to get the job done? You're just being smart about where skills live.
Why outsourcing saves time and boosts visual ROI
Professional retouching services can process hundreds of images faster than in-house teams. Outsourcing typically costs less than hiring full-time retouchers, especially for seasonal businesses. Plus, professionals have expensive software and years of experience.
Checklist: When to seek professional help
Here's when outsourcing makes total sense:
You're launching 50+ new products at once
Photos need platform-specific edits
Returns happen because products "don't look like the picture."
Your catalog looks inconsistent
Peak season is coming, and you're already swamped
You need advanced skills like ghost mannequin
Deadlines are tight, and quality can't be compromised
Your current photos aren't converting into sales
If you checked three or more boxes, it's time to call in the professionals. There's no shame in getting expert help.
What’s Next
You've learned what lowers sales and how to fix it. Now it's decision time. Every day with poor-quality photos means lost sales and unnecessary returns. Your competitors are already investing in professional retouching. Can you afford to fall behind?
No! So, contact Perfect Retouching today for a free trial and see how expert retouching can transform your e-commerce success.
 English
 Arabic
 Danish
 Dutch
Dutch
 Finnish
 French
 German
 Hebrew
 Italian
 Japanese
 Norwegian
 Polish
 Portuguese
 Spanish
 Swedish
 Russian


