 English
 Arabic
 Danish
 Dutch
Dutch
 Finnish
 French
 German
 Hebrew
 Italian
 Japanese
 Norwegian
 Polish
 Portuguese
 Spanish
 Swedish
 Russian
8 Common Mistakes in Product Photography That Affect Sales
As a businessman or a photographer, you may think that some small mistakes will go unnoticed by the customers. You are wrong. Customers have hawkeyes and they notice and judge everything brutally and honestly. If you can not deliver absolutely perfect product photos which look like the actual product, get ready for customer dissatisfaction or may be bad reviews.
Hence, some common mistakes in product photography can affect sales. While perfect product photos can boost your sales, dull photos can decrease your sales drastically. So, we created this article to help you to avoid common mistakes in product photography. Let’s have a look!
Why Is Flawless Product Photography Important
You may have noticed that the offline shopping era is gone and online store sales are thriving now. There was a time when people liked to go to the market to buy the products. However, during and after the pandemic, online store businesses became the new era. People only look at the photos from websites and order them.
Therefore, everyday new online stores are opening and people need beautiful and unique photos of their products to promote their businesses. They need to present their brands’ uniqueness to increase sales and product photographers can convey that through their skills. They can use various methods to showcase the product’s beauty such as using water droplets to show the water’s freshness.
How to Avoid Common Mistakes in Product Photography
No matter what the brand is, no camera can capture a perfect photo because it can not grasp the same scenario and color we see. So, we need to make corrections to the photo to make it look natural to our eyes. So, here is how to avoid 8 common product photography mistakes.
1. Lighting Is the Most Important
In professional product photography, lighting plays a key role in making a quality image. You would need the most natural light to shine your product. You can have natural light in two ways, window lighting and studio lighting.
To photograph in natural light, you need to have the perfect lighting time to get an amazing picture. When the harsh light is coming through the window, set a white backdrop close to your product to avoid harsh shadow and take the photo. But do not take it directly in the sun as it might reflect with the camera’s lighting and turn the photo bad.

In professional studio lighting too, you can create natural light via equipment. Set the camera in a daylight temperature- use diffusions like softbox or light box- use reflectors to give pleasing highlights to the photo. I personally like to take my product photos in the studio as it gives me more control in my equipment management. However, when I get the best natural light, I take photos in natural light as well.
2. Take All Angle Photographs
You may think that one photo per product is okay but it is not okay. As in online businesses, customers are buying the product by looking at the picture. If they can not see the product clearly from all angles, they will not purchase it. So, you should take 3-5 photos per product from all angles so that the customers can understand the shape, size and color properly. Another benefit for you is that if one photo comes bad, you will have a replacement to use.

3. Main Focus Should Be on the Product
A major common mistake in product photography is that they often get carried away and add too many props to the scene. You can use props and can do product photography with models however, it should not become a busy background. Props and models should not distract the main product. Customers should be able to identify the product and check the details clearly from the photos easily.
Some E-commerce companies prefer their product photos taken outside to show their usage such as cars, skate boards, surfboards etc. Keep in mind, while taking product photos outdoors, the product should be on the focus. If any person or distraction comes in the photo, you should edit them.
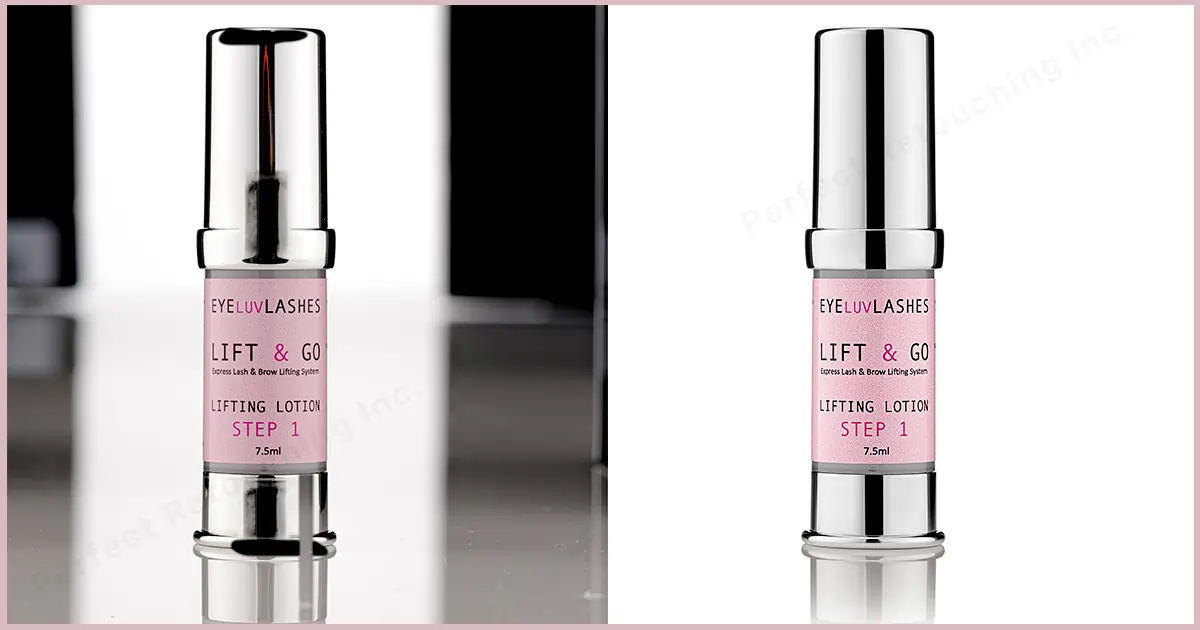
4. Avoid Too Much Retouching
We know that product photo retouching is very important to represent the photos accurately. However, too much retouching can make your photos look plastic or unrealistic such as reshaping and liquefying the product too much. So, you have to do the retouching in a way that the photo looks exactly the same as the real product in person.
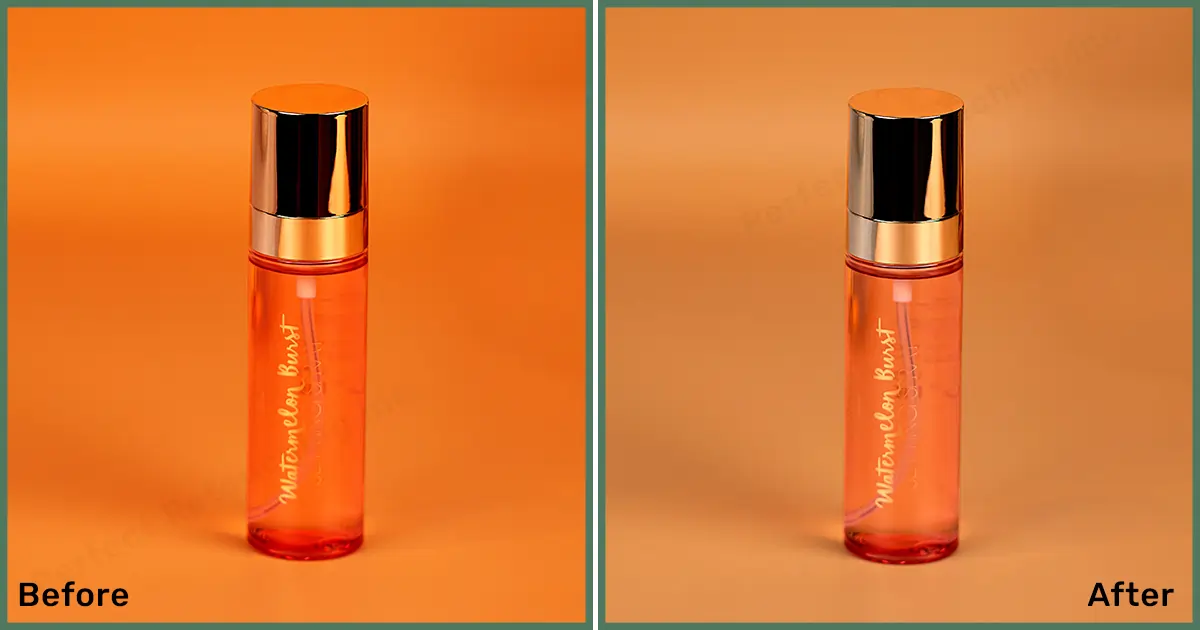
5.White Balance Ensures Colour Accuracy
Camera can not perceive colors like humans hence, we need to adjust white balance. What may seem to us as white light in human eyes, the camera may perceive it as blue or green.
So, we need to correct the temperature and color to get the exact same color we want. You can also use manual mode to add innovative modes and tones to the image but it has to be realistic.
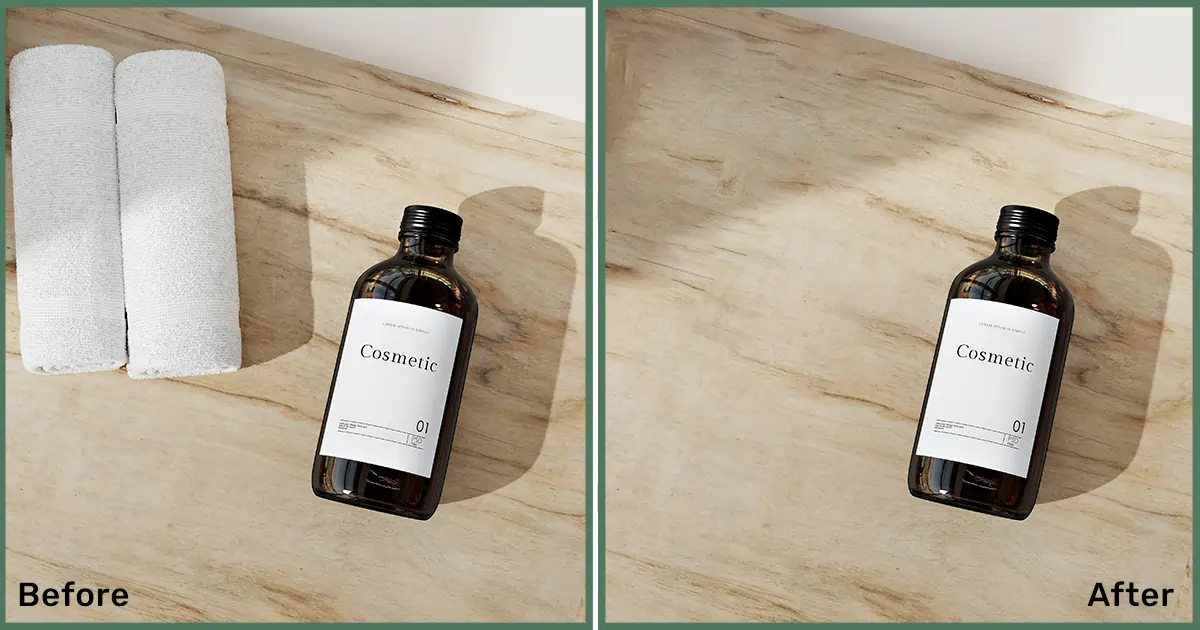
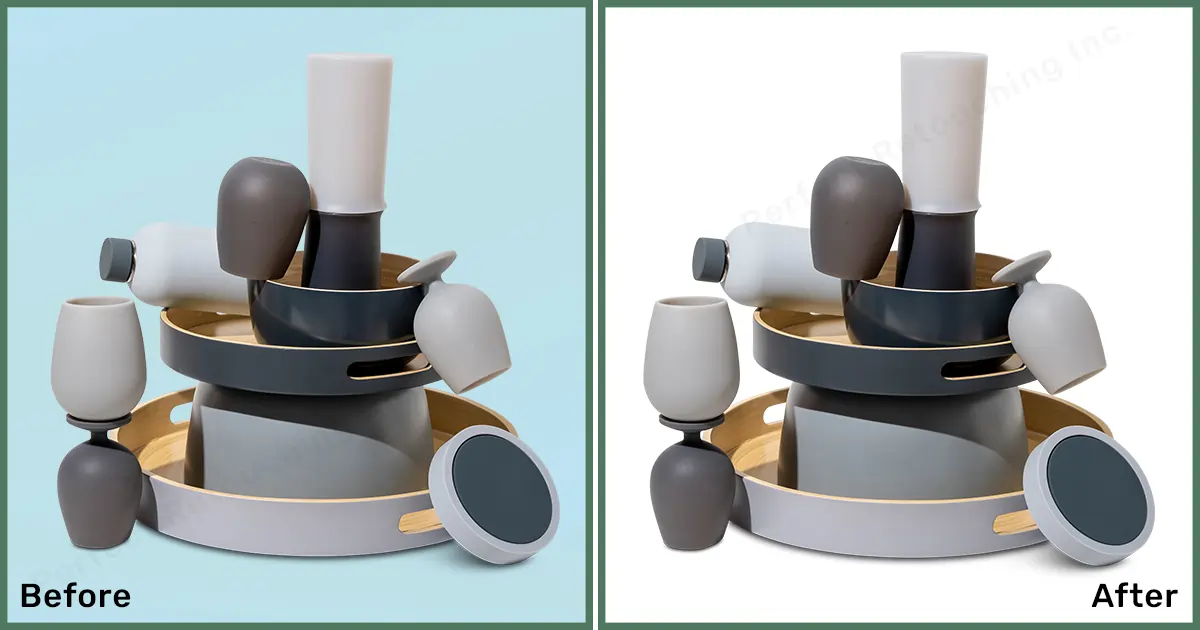
6. Use White Background
Background color is essential to product photography. Why? Because your product’s color, shape, sharpness and clearness will be affected by the background color. But why white background? Why not other background colors?
You can use other background colors but white background can show the products sharpness, color and shape clearly and accurately. E-commerce businesses also prefer white background photos as it is easy on the eyes and simple to understand.
If you use mixing light sources or other background colors in the product photo, it may look creative and extravagant but it can destroy the image quality
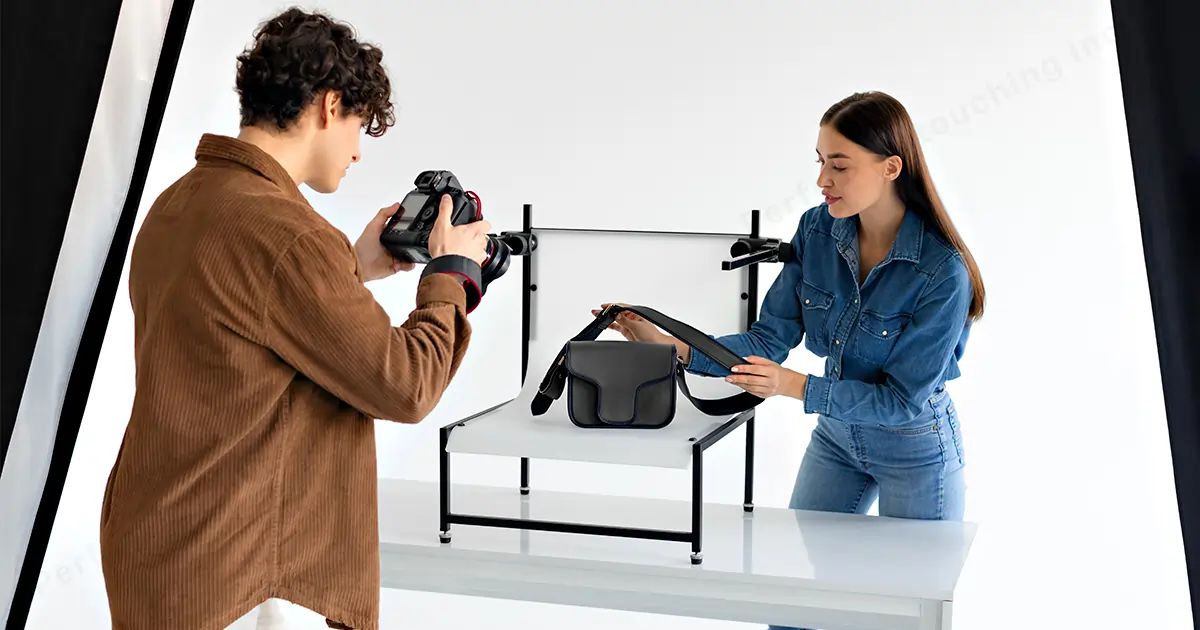
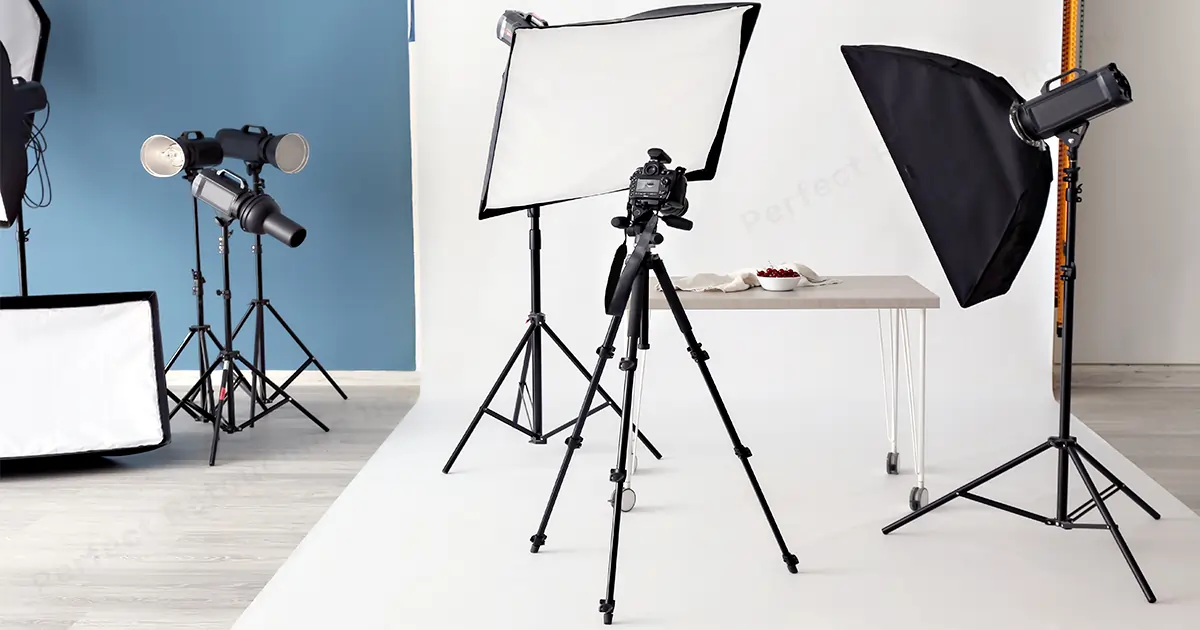
7. Rely on the Tripod
Tripod is a great tool to take product photos. You set up the light, diffusions, put the product in the product stand and take the photo with the camera in the tripod. It is a great way to take photos.
If you take hand held photos without experience, you can get shaky and blurry pictures. However, with a tripod, you can take photos easily and change exposures according to your wish.
8.Be Clear of Your Clients’ Need
Now-a-days people do not only sell through online stores but also Instagram, Facebook etc. Youtubers make their own marches and sell it through Instagram. So, there are all sorts of customers.
Hence, you need to have a very good communication with your client and understand what type of photos your client wants such as taking the photo in white background or black background.
You need to ask them their purpose for the photo, where they want to post them like Instagram or a website, how they want to use them. You need to take their orders in detail so that you can deliver the absolutely perfect product photo.
Simple Tricks to Avoid Common Mistakes in Product Photography
- Clean your product and surrounding area. Cameras can capture all the dust, dirt and blemish on the product. You need to properly clean the product and surrounding area before the shoot so that the photo comes bright and spotless.
- Always visualize the final product photo. Whether you are taking photos outdoors or indoors, you need to make a plan for it. You need to think about your product’s final outcome.
- Do not take a close shot. You may think that taking close shots will show more details of the photo but it will just turn the photos boring and bad.
- Highlight the brand while taking photos. In brand product photography, you need to highlight the brand name and portray the special features of the product.
- Learn to use the exposure triangle properly. The most important camera settings are ISO, Aperture and Shutter speed. For natural lighting, shutter speed is important to avoid photo errors. As shutter delay will make more lights go through the lens which will make the photos blurry. You need to master exposure triangles properly to improve your photography skills.
- Use manual mode. It will give you more freedom in taking photos with your desirable options.
- Learn the basic Composition rules. You need to learn the rules of the third and leading line. Using three grid modes will make your photo sharp and clear. Also, if you take product images with leading line strategy, it will make the images interesting.
- Remember to do Post Production. Post production is when you give finishing touch to your photos. After finishing the shooting, you need to do editing and retouching to adjust light, color and background etc.
- Always have a good relationship with your clients. You may start with small orders but with time and trust, you may get more and bigger orders from your clients.
- Never ever use filters . With filters, product photos may look cool but it will lose its color accuracy.
Final Words
I hope this article helped you to understand how you can avoid common mistakes in product photography. Keep in mind, good vs. bad photography can make or break your sales. Hence, Photos need to look absolutely perfect and precise before uploading them to the websites.


