 English
 Arabic
 Danish
 Dutch
Dutch
 Finnish
 French
 German
 Hebrew
 Italian
 Japanese
 Norwegian
 Polish
 Portuguese
 Spanish
 Swedish
 Russian
2 Effective Ways How to Flatten an Image in Photoshop
Flatten means to make anything flat or become flat. In that scene how can you flatten an image? Sounds like you have to put your image on a diet. Certainly, that’s not possible. So, send your images to the gym. They will work out in the Gym and will lose weight. Sounds impossible? No. it’s not impossible to flatten an image with the help of Photoshop. By flattening the image, you can reduce the file size and save space.
Imagine an image with a lot of layers of editing. Heavy to carry, normally the file size will be large. But you want to make it slim, so that you can carry it wherever you want to. Take it to ‘Photoshop’ named Gym and convert it into one single layer and by this, it will eventually reduce the size of the image and make the file short. Slimed-trimmed.
Know About the Image File Formats
The process through which images can be flattened is important to export them in the right format. But which format will be best to flatten an image? Let’s learn…
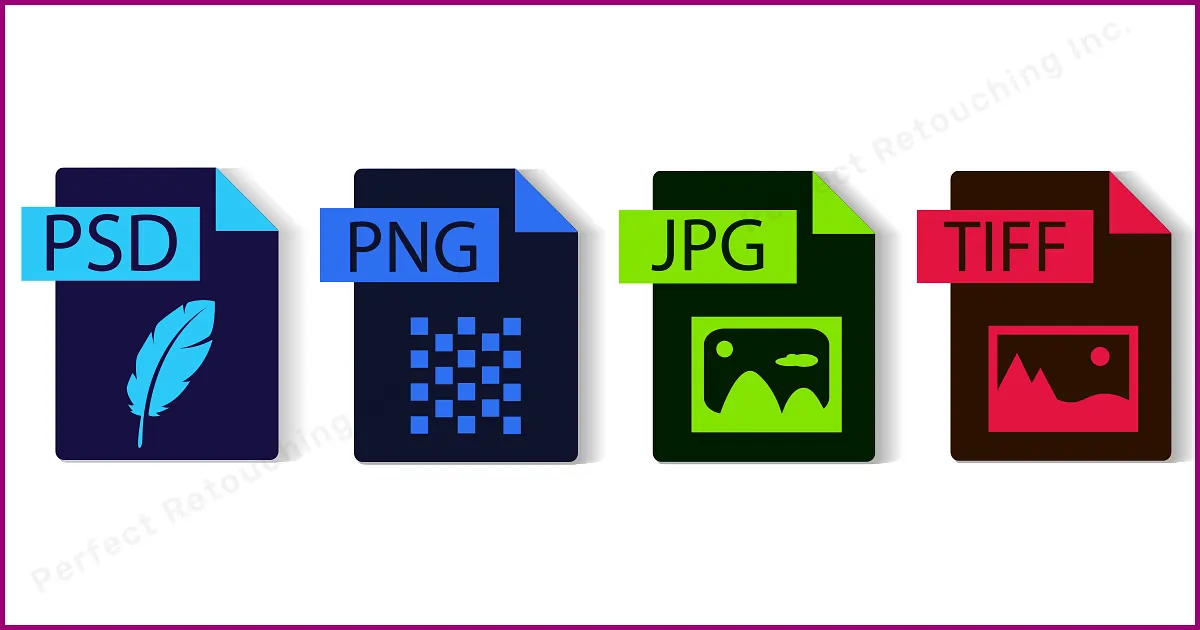
PSD
Photoshop PSD files are known as master files. They are called master files because those files can be transformed even after saving. Each and every layer will be saved if the file is saved in this format. If you are working on a file and after completing the work you feel you have to make some changes after saving, then definitely go for PSD format to save your file. Because in that way you can change or edit from exactly where you stopped or ended.
JPG
JPG is the most common and old format that is still being used because of its convenience. If you save any image file in JPG then it will save the images in one layer. Which means it will save the final output only. You will lose the steps or layers that you have worked on. But still, it is the preferable version since it is supportive of most browsers.
PNG
PNG stands for ‘Portable Network Graphics’. A fun fact is PNG was actually meant to replace the GIF format which led to people taking PNG standing for “PNG, not GIF”. Even though JPG is the preferred format yet PNG’s advantage over JPG is, it is a lossless file format. Which means it will reduce the file size but not the quality. The quality will remain the same and also can carry transparency with it.
TIFF
TIFF stands for “Tagged Image File Format”. TIFF file is one of the ways very few files support all Photoshop’s features. It is also the best choice for archiving images. TIFF files are usually larger in size compared to JPG or JPEG or other small size files. So, it takes up quite a lot of space. Yet it is a preferred version for most of the images destined for commercial printing and it is behind to be compatible.
The conclusion of this is when you are thinking of flattening an image you have to keep that in mind your images are going to have less weight. Which means small in size. So, you also have to choose a file format that takes less space.
Why Flatten an Image
Why not flatten an image? It makes the final image to upload or send to anyway easy without taking much space. Suppose you are best at photo editing and photo retouching and it is your bread and butter. and your client has sent you 1000 images to edit But you do not have enough space in the drive to upload and send the link to your client. What to do? How will you complete your Photo Retouching service? Then you can flatten images to make it less heavy (space occurring).
- Flattening an image makes the file print friendly
- Saves time
- Fast to load on websites and on other platforms
- Easy to upload to any social media platforms
- To protect the image from any third-party editor
How to Flatten an Image in Photoshop
There are a few ways to flatten an image, let’s talk about 2 methods now. So, let’s find out the simply flatter files…
Method 1
Let’s see how to flatten an image in Photoshop…
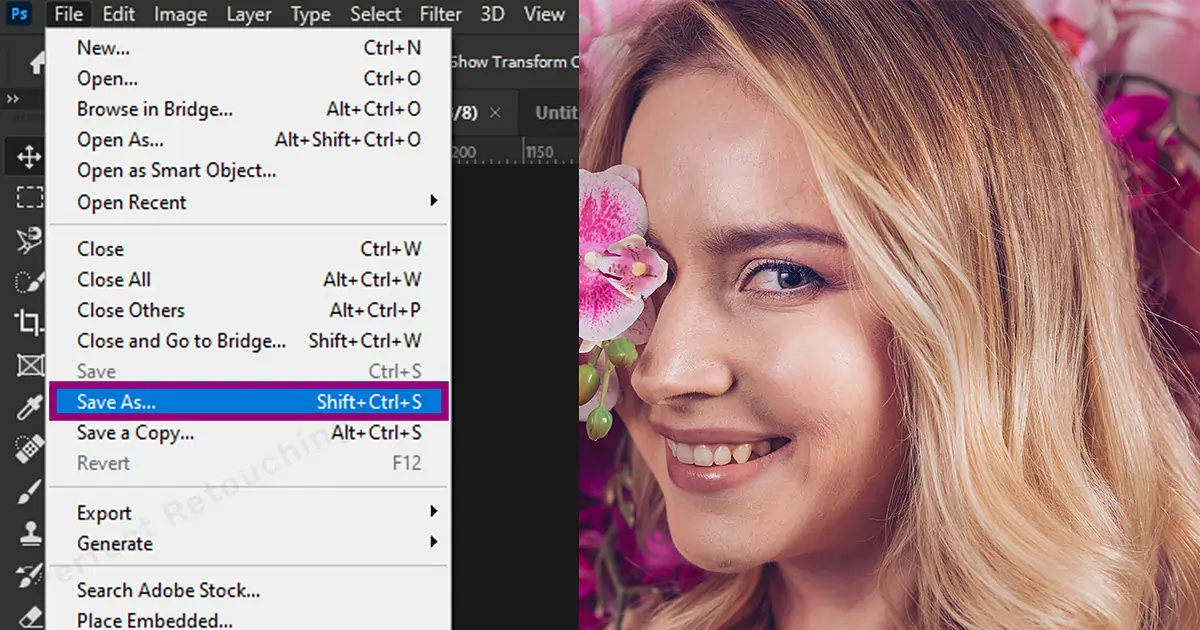
1. Save the file. Save the file as PSD. (You can skip this part if you want to, but I would suggest you not, so you can have the option to work afterward on that file)
2. Go to the Layer Panel. (Go to the windows, scroll down and select layers, if you can’t find them on the first look).
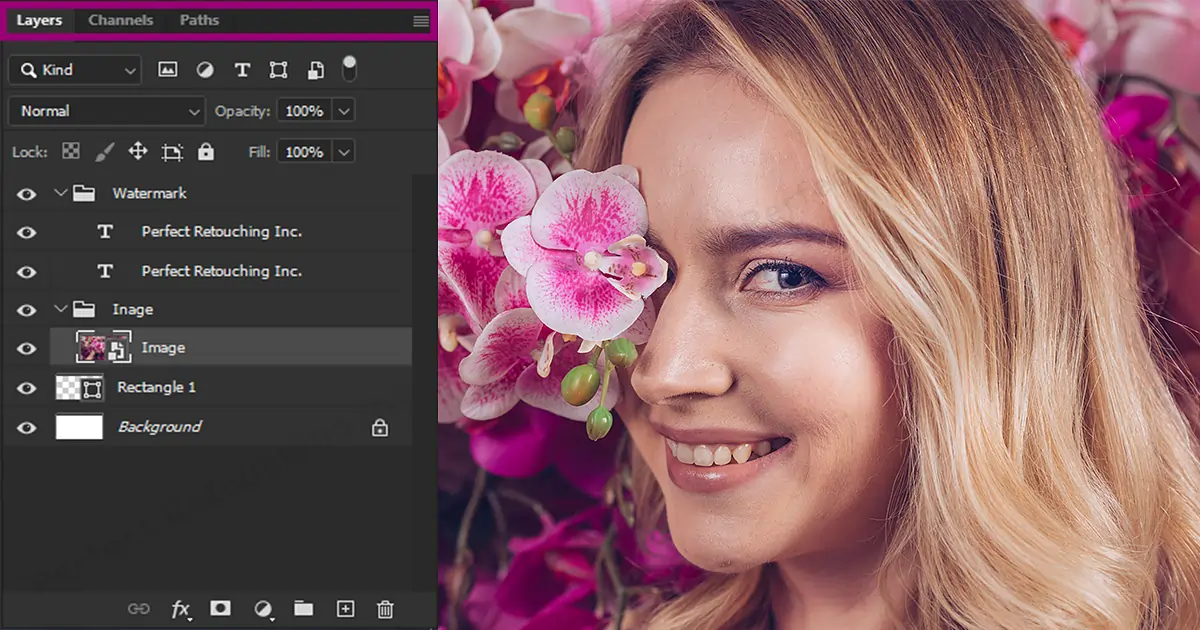
3. Select all the layers (hold shift and select multiple/all layers)
4. Do right-click and select flatten the image.
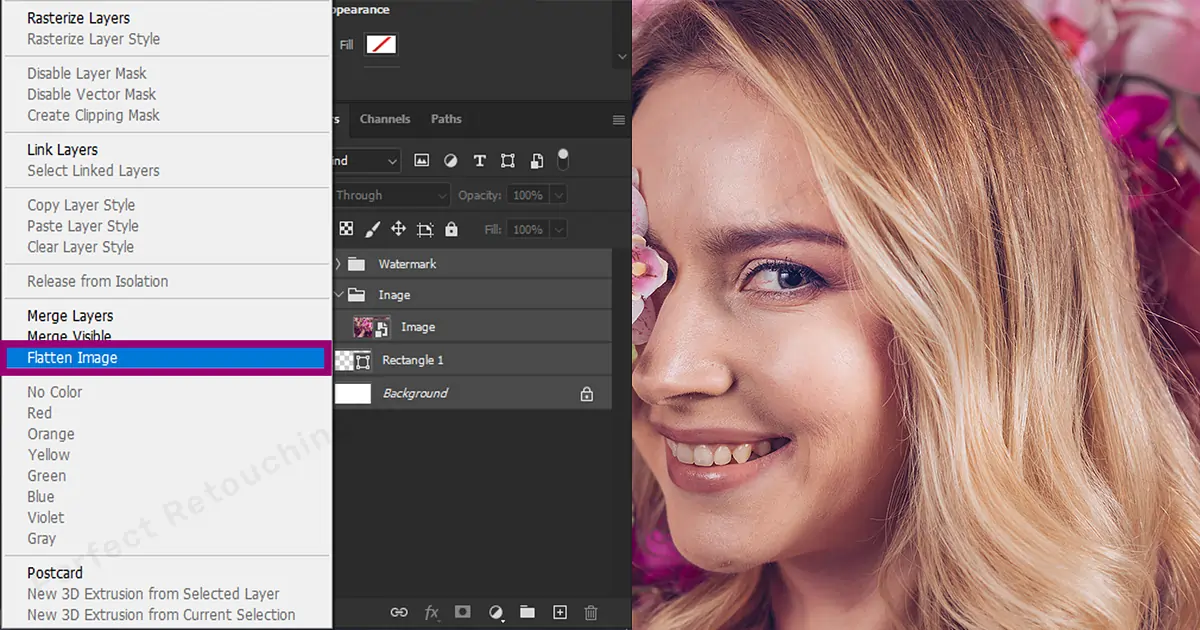
5. Congratulations!! There you have a flat file. now you can save it.
If you found the first method easy, then trust me the second method will be even easier for you.
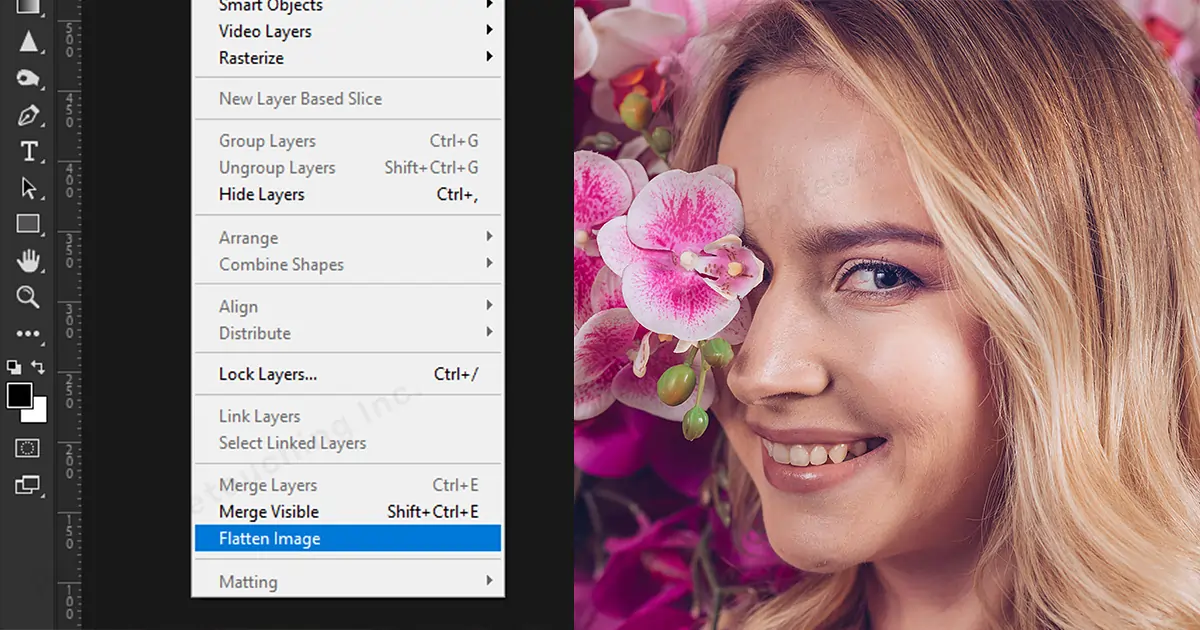
Method 2
Let’s learn how to flatten layers in Photoshop…
1. Go to the top tab bar and select Layer.
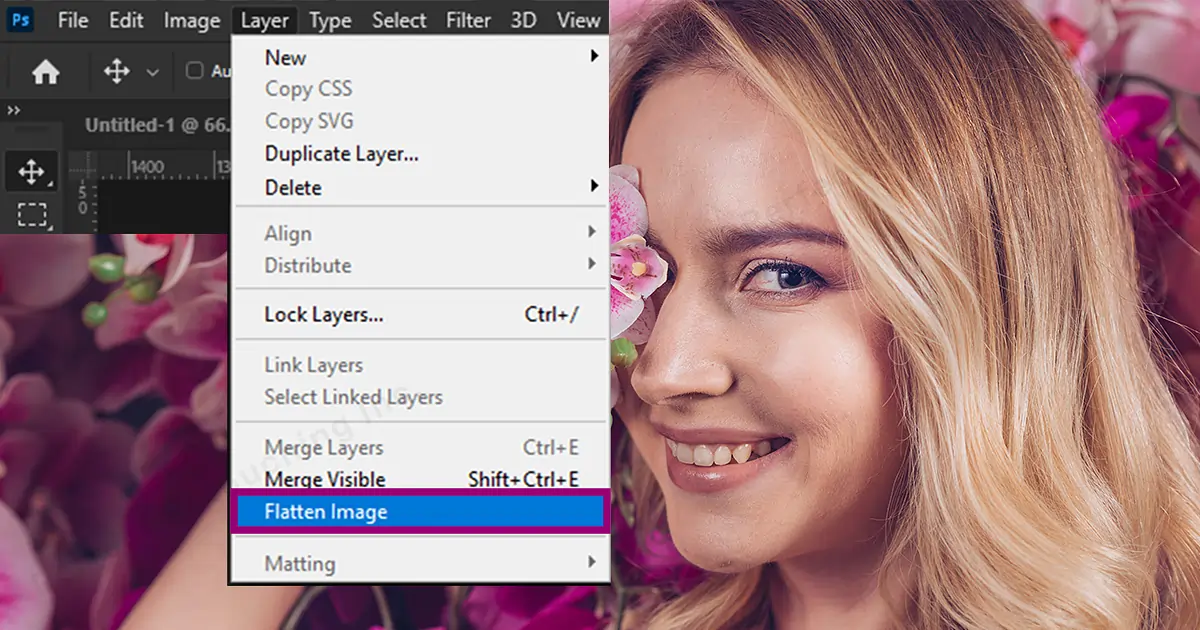
2. Scroll down the options and select flatten the image.
That’s it. You have flattened your image.
The Downside
There is only one downside to flattening an image. You can not edit the photo once you are done flattening it. So, you have to keep a PSD-saved file to have a backup.
Suppose you are good at jewelry photo retouching, your client said they want to have a basic jewelry photo editing service. you completed their work as they wanted. You flattened the
images to make it friendly to send. But after receiving the images clients want to have high-end-editing service, and you didn’t save the project. In that case you have to start from the very beginning.
Final Thought
Try once by yourself and you will also find these processes a piece of cake. These are my cup of tea from the day I learned. So, choose wisely what is needed for your work. And make it an easy-peasy process of yours as well.


