Learn How to Invert Selection in Photoshop Full Tutorial
To make the images look mesmerizing and flawless, editing and manipulation is necessary. Often, we need to remove things from the background to make the objects look sharp and crisp. And, knowing how to invert selection in Photoshop can help you to do those editing. You can just use Adobe Photoshop’s tools to invert objects in another background where they will shine brighter. Follow my comprehensive guide on inverse selection in Photoshop and post the best quality images online.
What Does Invert Selection Mean in a Photo
Invert means reversing the direction.
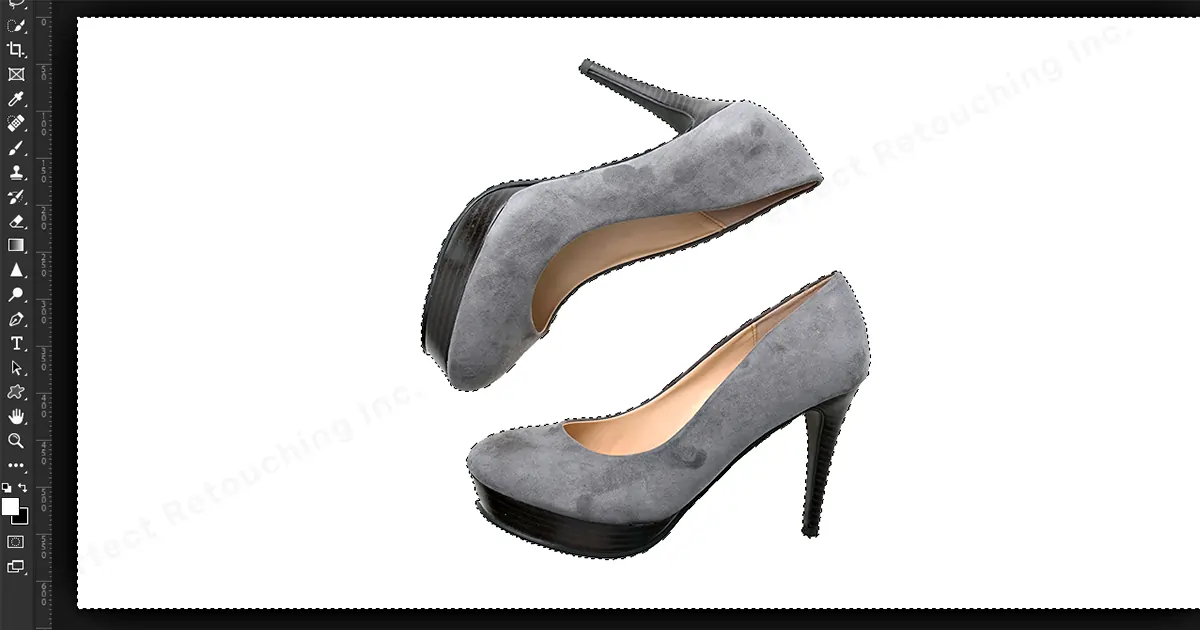
For example, you marked the subject with a selected Tool and hit Ctrl+Backspace. The subject will be edited directly. That is not what you want, right? So, in order to keep the subject in the layer and edit the background, you need to reverse the selection.
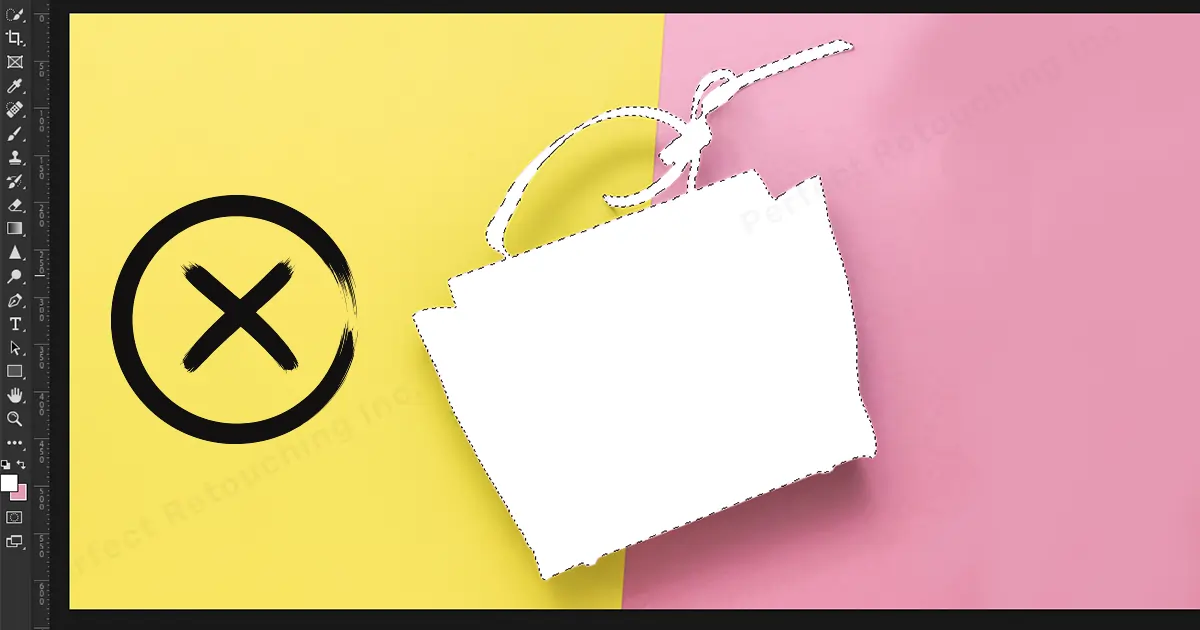
Means, you will choose the subject with the selection then select reverse to invert the selection to the background. So, when you click Ctrl+Backspace, the background will be edited.
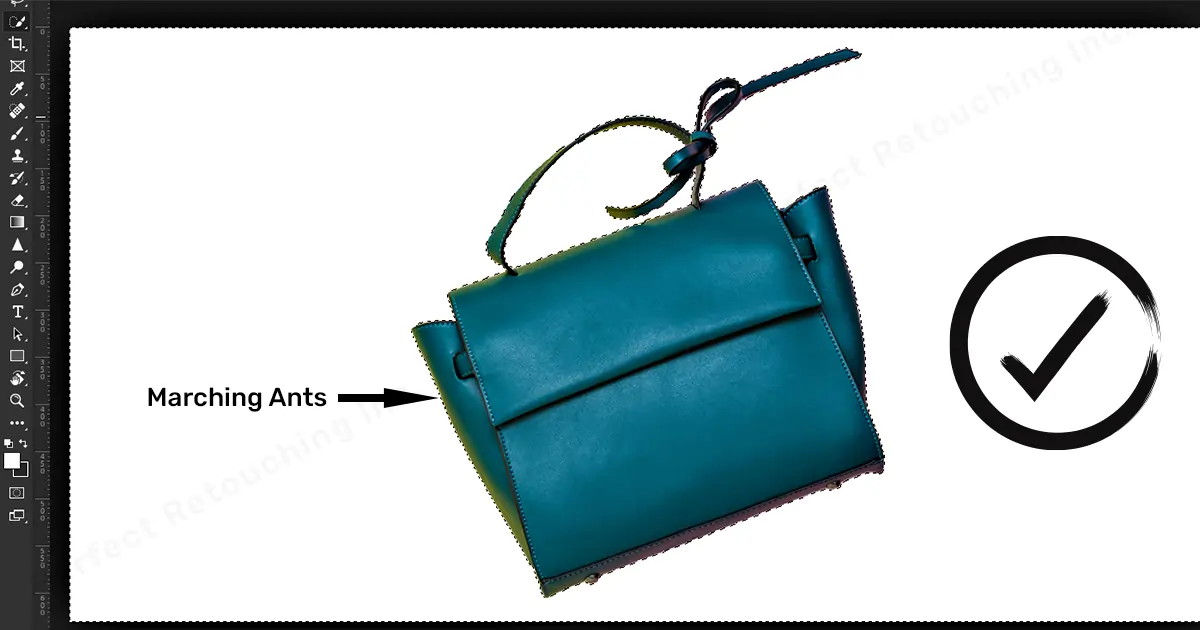
How Do You Know That Your Selection Tools Worked on the Object?
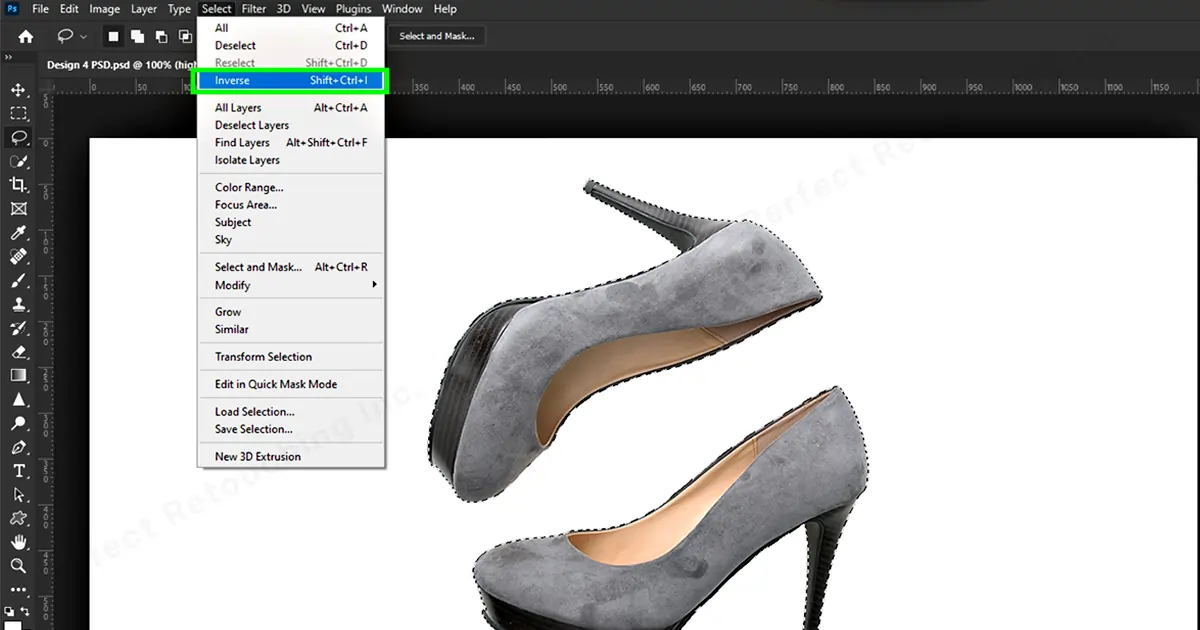
While you are selecting the area with your selected tool, you can see black and white dashed lines marking the object. These black and white lines are called ‘Marching Ants’. And, when you are done, you will see lines are moving like marching ants surrounding the object.
How to Invert Selection in Photoshop with Tools
There are quite a few tools with which you can edit your images such as Lasso Tool, Magnetic Lasso Tool, Quick Selection Tool, Rectangular Marquee tool and Elliptical Marquee Tool. All these tools work in quite a similar manner. However, the selection process is a bit different.
Invert Selection in Photoshop with Magnetic Lasso Tool
If you solely want to select the subject and not the background, use Lasso Tool, Magnetic Lasso Tool and Quick Selection Tool. These tools work the best for selecting the subject only.
And, for this tutorial, I have chosen the Magnetic Lasso Tool to show how it works.
Step 1: Click and drag the image to the layer box and Copy it to a new layer.
Step 2: Choose Magnetic Lasso Tool from the Toolbar- Click on the subject- Move the cursor over the subject till you close the dotted lines. It will select the area automatically like magnet- Click once to complete the selection.
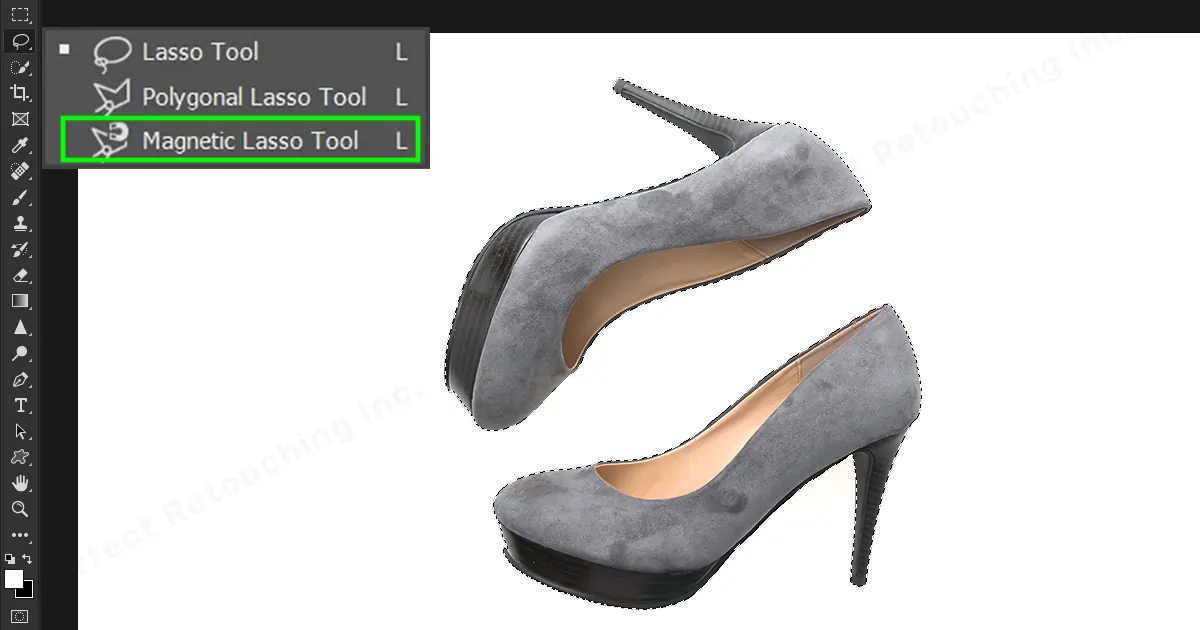
Step 3: Go to Menu Bar>Select>Inverse or Click the right button of your mouse and Select Inverse from the dialog box or hit Shift+Ctrl+I on the keyboard. The mark will be inversed to the background.
Step 4: Click Ctrl+Backspace on the keyboard and the background will be removed instead of the object.
Note: If you make any mistake while selecting the object, you can also redo it by deselecting it. Go to Select- click Deselect and the selection will be gone.
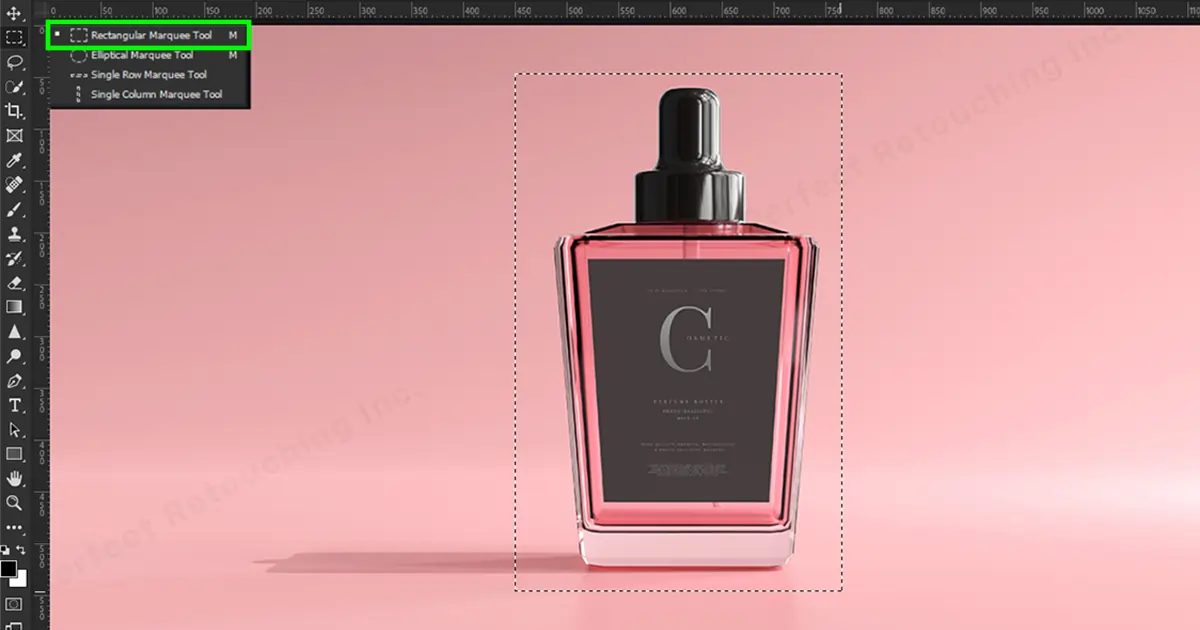
Marquee tools can also be used to invert subjects. However, unlike Lasso tools, it does not only choose the subject. It will also select some of the background. Here’s how to invert selection in Photoshop with Marquee Tool:
Step 1: Click and drag the image to the layer box and Copy it to a new layer.
Step 2: Go to Toolbar- Choose Rectangular Marquee Tool- select the area.
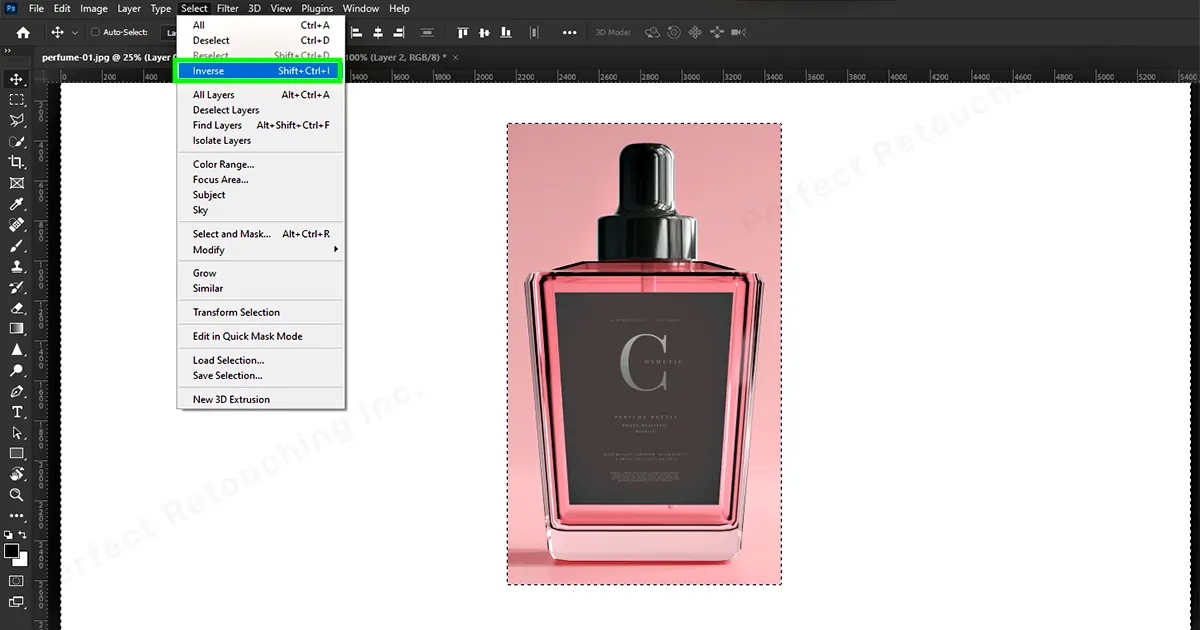
Step 3: Go to Menu> Select>Inverse or use Photoshop invert selection shortcut Shift+Ctrl+I- hit Ctrl+Backspace on the keyboard. Done, the selection is inverted.
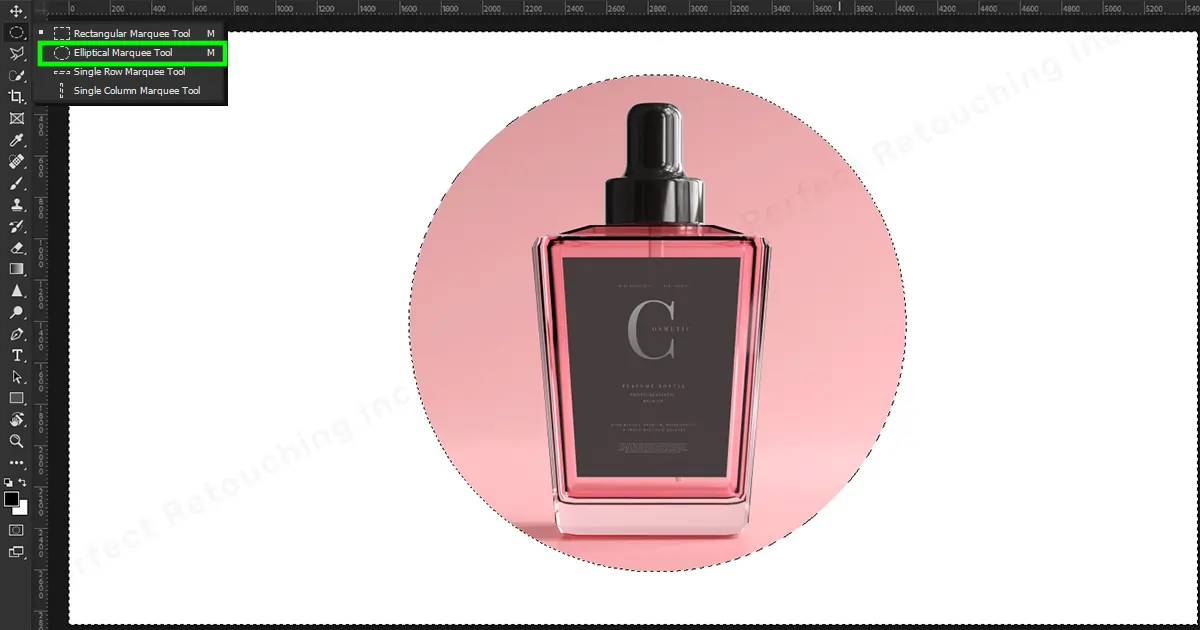
Elliptical Marquee Tool
You can also invert a photo with Elliptical Marquee Tool. Follow the same method as the rectangular marquee tool.
1. Go to Toolbar- Choose Elliptical Marquee Tool- select the area.
2. Go to Menu> Select>Inverse- hit Ctrl+Backspace on the keyboard and done.
Finale
Learning how to invert selection in Photoshop can make your life easier. You can be creative with your images and edit them if you need with Photoshop selection tools. I personally recommend the Magnetic lasso tool, as it selects the object only like a magnet when you move the cursor over it. However, if you have mastery over the mouse, use the quick selection tool.
Also, if you need professional help to edit images, take our jewelry photo editing service to enhance the beauty of your jewelry. Our highly trained designers are always ready to help.
 English
 Arabic
 Danish
 Dutch
Dutch
 Finnish
 French
 German
 Hebrew
 Italian
 Japanese
 Norwegian
 Polish
 Portuguese
 Spanish
 Swedish
 Russian

