 English
 Arabic
 Danish
 Dutch
Dutch
 Finnish
 French
 German
 Hebrew
 Italian
 Japanese
 Norwegian
 Polish
 Portuguese
 Spanish
 Swedish
 Russian
How to Retouch Skin in Photoshop: Create a Professional Look
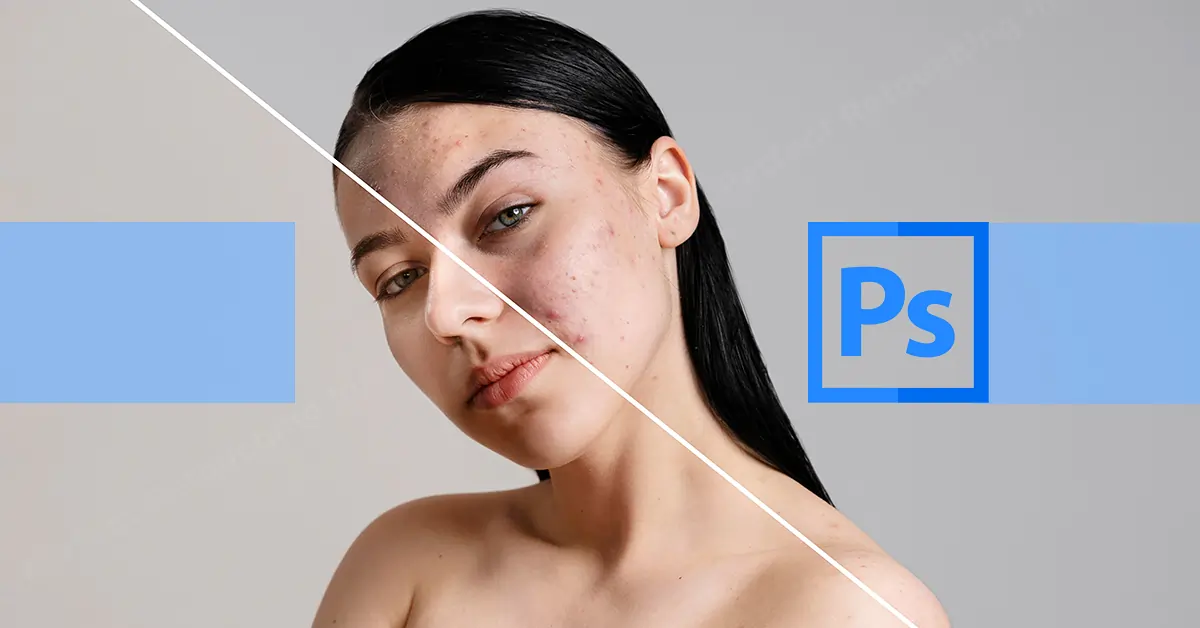
Retouching skin is a delicate process but it makes a huge impact on your photos. With the right tools and techniques, you can improve the appearance of your subject's skin, making them look healthier and more youthful. Continue reading this article to learn how to retouch skin in Photoshop and edit your subject’s skin flawlessly. Let’s Start the Process!
How to Retouch Skin in Photoshop - 2 Ways
Photo retouching is the process of altering an image using various editing software. No matter how perfect a photo you click you need to edit and retouch it to make it crisp and clear. Retouching a photo can be as simple as removing blemishes or as complex as enhancing jewelry.
What is Skin retouching?
Skin retouching is a technique that is widely used in digital photography and photoshop. It is the process of improving or altering the appearance of someone's skin in a photograph. This can be done to remove blemishes, wrinkles, or discoloration. It is mostly done in beauty photo retouching, headshot retouching, model portfolio, or magazine covers. Photoshop skin retouching requires a sense of flawless skin without hiding the natural features.
Skin retouching is easier in Photoshop. Here is how to retouch skin in Photoshop explained easily. Read and try.
1. Open the image in Photoshop
First, go to Photoshop and open the image in Photoshop for model skin retouching actions.
2. Duplicate the background layer
In the second step duplicate the background layer by dragging. Rename the duplicate layer so that you do not mess them up.
3. Reduce Skin Spots
Now, it is time to reduce the skin spots of acne, blemishes, etc. Go to the toolbar and choose the Healing Brush Tool. In the upper section of Source, select Sampled. Press and hold the alt key to select the sample of spot-free smooth skin part of the face. Place the brush on the problem parts and remove the unwanted spots like blemishes, sweat, and wrinkles easily. Now duplicate this layer and rename it.

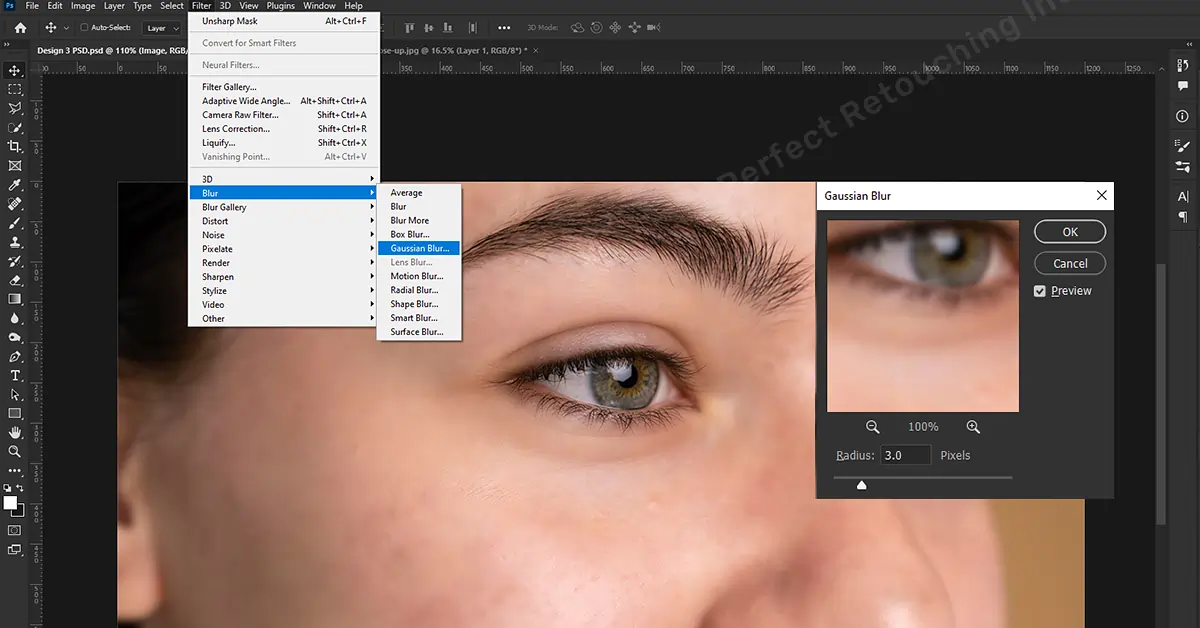
4. Do Skin Softening
This time, right-click on the layer and go to “Convert it to Smart Object” and change it from “Normal” to “Vivid Light”. Then go to Image Menu < Adjustment < Invert. Use the Shortcut Key ctrl+I to invert the layer. Then go to Filter Menu < Others < High pass. Increase the radius gradually until the red lights get totally invisible. And then Click Ok. Head again to the Filter Menu < Blur < Gaussian Blur and slowly increase the radius as you need. Don’t forget to press Ok. Now create a layer mask on the skin-softening layer and invert the layer mask. Then take the brush tool, set the opacity, and flow 100 percent. Make the foreground color white. With the brush remove the dark spots or pigmentation and soften the skin.
5. Do Camera Raw Correction
Now we will do a stem visible layer — press ctrl+alt+shift+E. Rename the layer. Again right click and convert it into a smart object. Go to Filter Menu < Camera Raw Filter < Basic and increase the Texture value and decrease Clarity Value as needed. Next, go to the Detail menu and fix sharpening, noise reduction, and color noise reduction values one by one. Hit ok before moving on to the next stop.
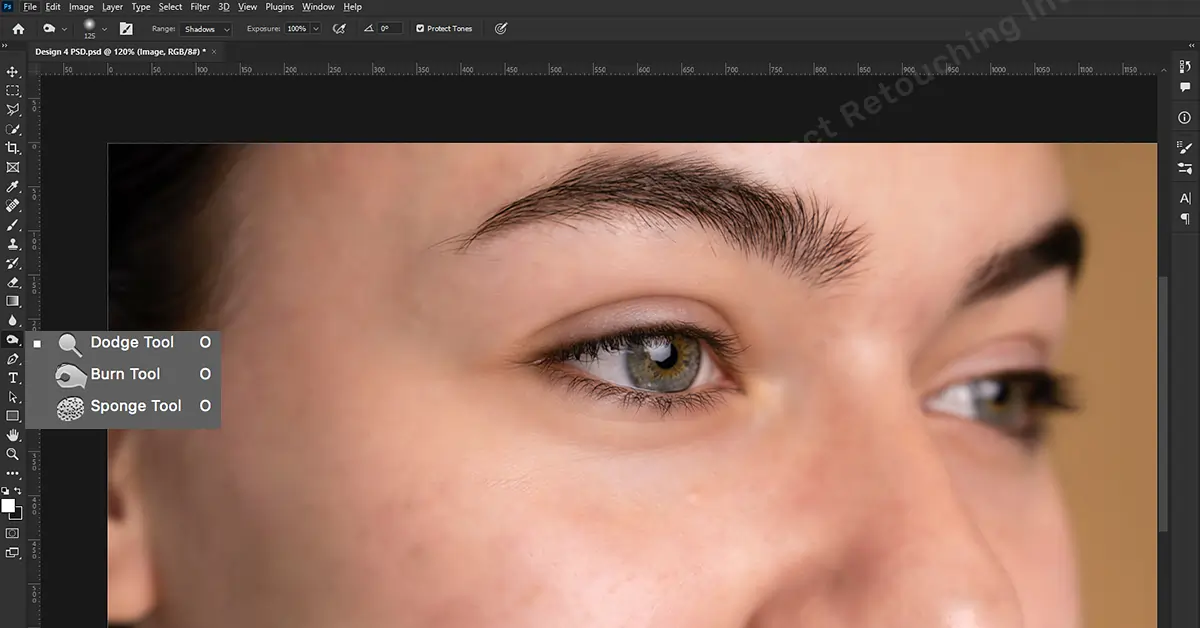
6. Apply Dodge and Burn Effect to even out skin tone
To fix the uneven skin tone you can use the Dodge & Burn Effect . First, create a crop assessment layer. Make a point in the center of the line and take it upwards to brighten the image. Rename it, Dodge.
Now press ctrl+I and invert the layer mask. Go to the brush tool, right click and choose the Hard Round Brush. Make lines on the dark parts of the face, create another crop assessment layer, and lead the center point down to darken the image. Rename the layer into Burn and invert the layer mask. Put lines on the brightened parts and then go to Properties and take the feather slide to the right till the differences can be seen. Select the burn layer mask and do the same. Then make it a group and rename it Dodge & Burn.
Fast Way of Skin Retouching Using Frequency Separation
If you intend to spend less time on skin retouching tasks, you might like to use the frequency separation tool in Photoshop. This frequency separation tool allows you to do retouching in two layers. So, here is how to retouch skin using Frequency Separation.
- Create a copy from the background layer (select the background layer and press ctrl+j).
- Name it Low-Frequency and the upper layer High Frequency. In low frequency, you will edit color, and in high-frequency layer, you will do texture.
- Make the high-frequency layer invisible since you will work on the low layer first.
- Switched to the layer frequency layer? Let’s start working on it. Go to the filter menu and then Filter – Blur – Gaussian Blur. Fix the radius pixel till where you found the right balance to disappear skin defects. You can zoom in and out and find the most prominent area of the skin to work on. Hit Ok.
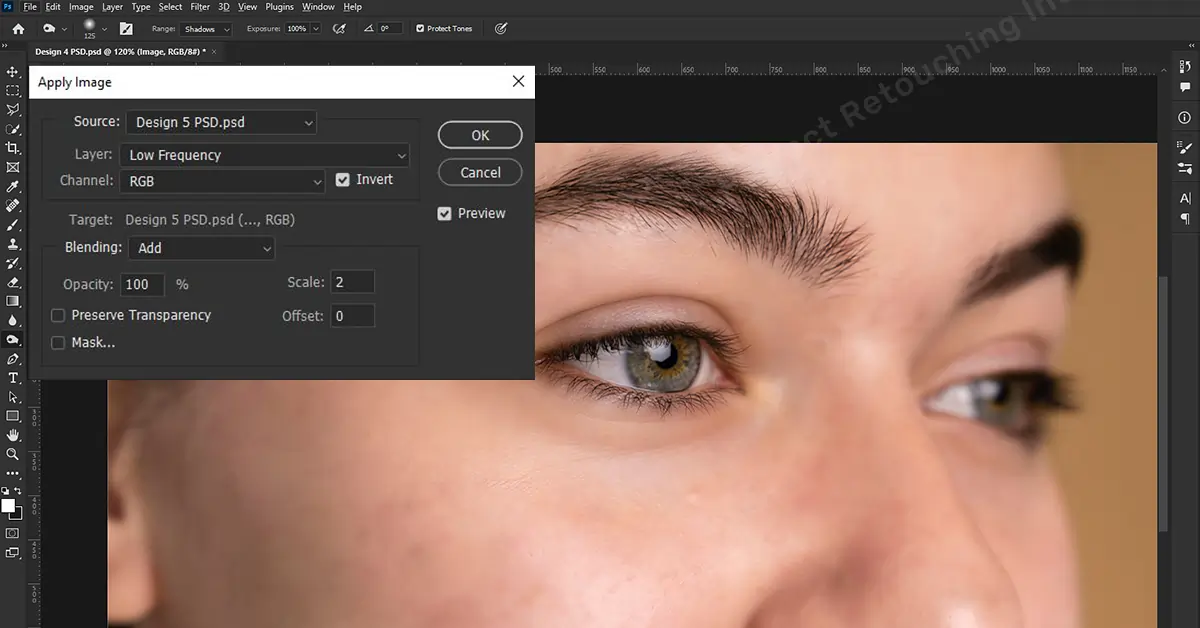
- Move to the high-frequency layer and activate it. Go to Image < Apply Image and in layer select the low-frequency layer, for a 16-bit image, Blending < Add, Channel < RGB, Opacity<100, Invert.section on, Scale 2, Offset 0, Preview turned on and you can see the textures in the grey layer. For an 8-bit image, make sure the invert option is turned off, blend mode subtract, scale 2, and offset 128. The preserve transparency and mask will be turned off in both cases. Click Ok.
- In Blending Mode do it Linear Light from Normal.
- Click on both layers and press ctrl+G and name this group Frequency Separation.
- Open up the group and select the low-frequency layer where you will do some corrections with the Mixer Brush tool. Hide the HF layer. Use your preferred setting and make the transition with the colors. Choose a hard round brush set flow to 100%. Make sure the Sample All Layer option is not selected. If it is selected, it will copy and paste the texture details from the HF layer. We only want to work with the color in this layer. Left-click and mix colors to blend well and get a smooth transition.
- Turn on the texture layer and you can see the original skin texture is intact. Grab the clone stamp tool and clean the blemishes and spots. Now you have an image with a naturally retouched skin tone without losing the original skin texture. That's it!
Final Verdict/Finale
Skin retouching requires skill but it is worth the effort to achieve a flawless photograph. By learning how to retouch skin in Photoshop, your beauty photos, model photos, and headshot portraits will stand out loud from your competitors and achieve a high-end outcome.


