 English
 Arabic
 Danish
 Dutch
Dutch
 Finnish
 French
 German
 Hebrew
 Italian
 Japanese
 Norwegian
 Polish
 Portuguese
 Spanish
 Swedish
 Russian
5 Easy Techniques on How to Take Pictures of Jewelry
What is your favorite jewelry? Mine are bracelets. Once, while scrolling instagram, a bracelet from Cartier snatched my mind which led me to their store and boy! That bracelet looked exactly the same as the photo!
Every Photographer’s aim should be taking such perfect photos so that customers can buy jewelry online hassle-free. Though it is a bit tricky and difficult, it is not impossible to attain. So, to help you take flawless jewelry photos, I created this easy tutorial on how to take pictures of jewelry perfectly with 5 steps only. Let’s have a look!
What You Need for Jewelry Photography
Firstly, you need to make sure that you have all the tools available so that you can take pictures effortlessly.
- Camera/iPhone/Phone
- Microfibre cloth and cloth gloves
- Folding Table/ Table
- Natural lighting or artificial lighting
- Diffused light/light box/softbox
- Tripod
- White Backdrop/Foam board
- Tape/clamp/String
- Photo editing software such as Adobe Photoshop
How to Take Pictures of Jewelry
After getting all the tools, follow these five techniques to take your jewelry’s flawless photos to upload on social media or online stores.
1.Clean your Jewelry and Camera:
You need to clean your jewelry properly.
- Use microfiber cloth to clean the jewelry’s dust, dirt and fingerprints. Microfiber cloth is good for jewelry cleaning because it is chemical free and it cleans the delicate features properly.
- Wear cotton gloves throughout the shooting so that the jewelry does not get dirty while moving around.
- Clean your camera and lens as well. Do not clean your lens with any cloth. It might damage the lens. Clean it with microfiber cloth so that the pictures come out well without any blemishes or marks on the photo.
2.Set The Camera:
Before taking the photo, you need to set the camera settings properly. Depending on selecting lens, ISO and aperture settings, your jewelry photo quality will vary.
- Lens
Use a 90mm macro lens with 1:1 ratio to take jewelry photos. If you use 50mm in taking photos, it will be too close shot. It will focus on one part of the photo and blur out other areas. - Aperture Settings
Set your aperture settings to F/9/10/11 and ISO to 100 to get sharp and detailed images. If you set it to F/7/8, the photo will focus on one part only which will blur out the other parts.
You can also use F/2.7/2.8 to take photos of small jewelry such as earrings, rings in a closer shot.
Note: Your aperture will vary based on the distance and depth of field you want to take the photo of your jewelry. So, take some practice photos first to get the best photo with the best depth of field. - Leave some room around the jewelry
Do not focus only on the jewelry or only on one part of the jewelry, rather leave some room around the jewelry. The customers should be able to see all the details of the jewelry.
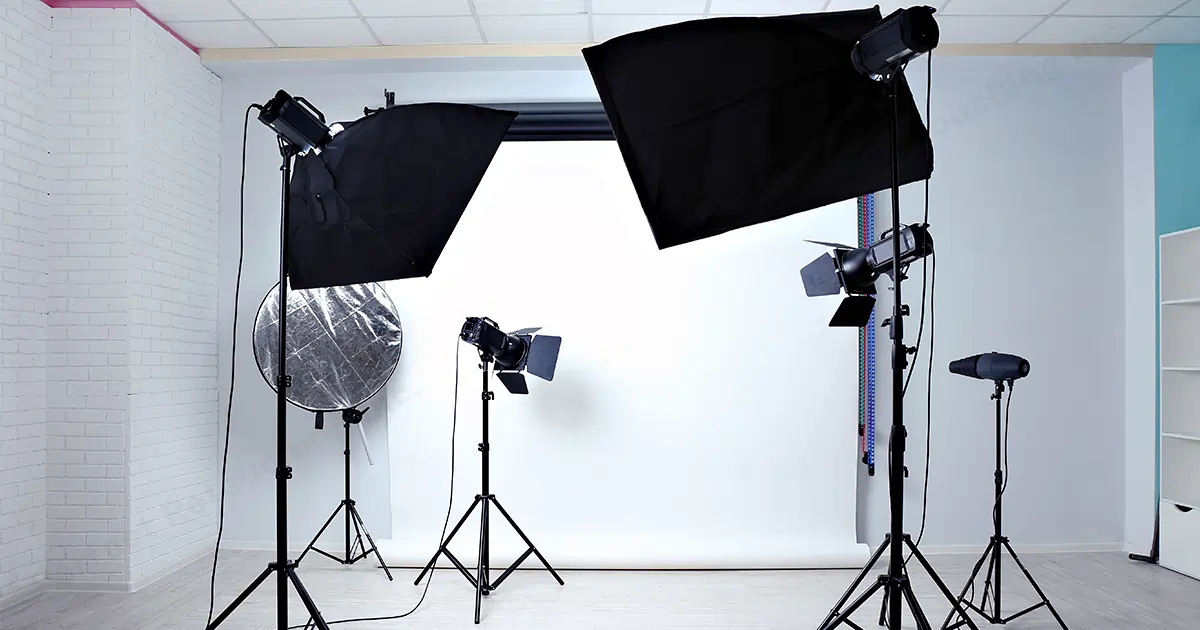
3.Choose Your Light Sources
Firstly, You need to decide whether you are going to shoot in natural light or artificial light.
a. Natural LightNatural light is best in the morning and throughout the afternoon for jewelry photography. You need to use indirect light by the window. If you take the photo in the direct light, it will reflect the bright light and the photo will turn all white and bad.
Set the table 90-degree angle to left or right to the window.
Note: Do not take the photos in golden hour rather, take jewelry pictures in proper and bright light.
b. Artificial LightOne of the best things about artificial light is that you can take the photo at any time and at any place with your equipment. However, you need to make the lighting look like natural light.
- Set the lighting to 45° angle to get a natural light on your subject.
Do not let reflection spoil your jewelry photo session. To prevent the harsh reflections of the jewelry because of lighting, you need to use a light box beside or behind the jewelry.
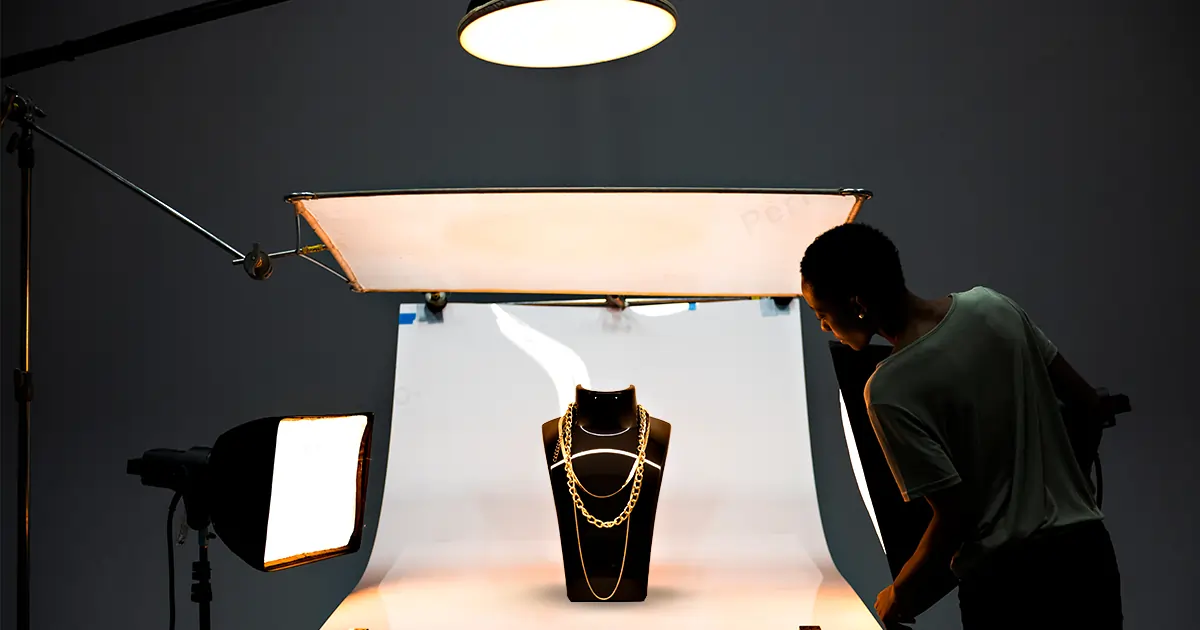
4.Organise the Equipment
If you know what type of lighting you are using, set the equipment according to that. It is both applicable for natural light and artificial light.
- Set your folding table/ table.
- Set white backdrop close to your subject to minimize the harsh reflections of your jewelry.
- Use a tripod to avoid getting shaky pictures and to adjust the focus point and depth of field.
- Set the camera in front of the table a little over the jewelry to get a better view of the jewelry.
- Use props if you want, such as fake plants or fake lavender to create beautiful and soft shadows. Use tape, clamp or string to set the jewelry such as rings and earrings to get the desired picture. You can also use ghost busts for necklace, bracelet and anklet photography.
Note: Do not use too much decoration. The Audience's attention should not be distracted from the jewelry. - Use white background, if you are taking the photo for business. However, you can also use other backgrounds as well.
- Set bounce lights surrounding your softbox (only for artificial lights).
Now that you have cleaned your jewelry and camera, set your camera, chosen your light sources and organized all your equipment, Take the photo with confidence.
5. Do Post Production Seriously
You know, no photo is perfect. Jewelry images especially need retouching to show all the details of the piece.
- As we use macro lenses for jewelry photography, the pictures color and shine changes while taking the photos. So, the product photo needs to be retouched to correct the color of the product.
- After taking the photo, check for any dirt, dust, distraction or color correction. If the product’s color does not look accurate and looks faded, use photoshop and white balance to make the color of the product correct.
- Edit the ghost bust, clamp, tape and string. These should not be shown in the final photo such as you used string to take a photo of the earrings’ and in post processing, you edit the string and only the earrings would be shown.
- Also, if you think that keeping the ghost bust with the product does not look good, remove it and create a natural shadow to enhance the beauty of the product.

How to Photograph Jewelry with Phone at Home
If you are a student and doing a small jewelry selling business on social media to earn money. This will help you to take jewelry photographs with a phone at home easily with a minimum budget.
- Set the table beside the window or set the table with white light.
- Use a rig to hold up your Phone.
- Change the camera settings to three grid mode. It will divide the camera into nine parts equally with vertical and horizontal lines. If you put your subjects into those lines, you can take a sharp photo.
- Use leading lines for creative photos. Put your subjects in a way that it would lead your customers’ attention toward the main subject.
- Use negative space. Negative space is when you leave some empty space surrounding your subject. It makes the subject look elegant.
- Set the white frame boards or white paper close to the subject to avoid harsh reflections.
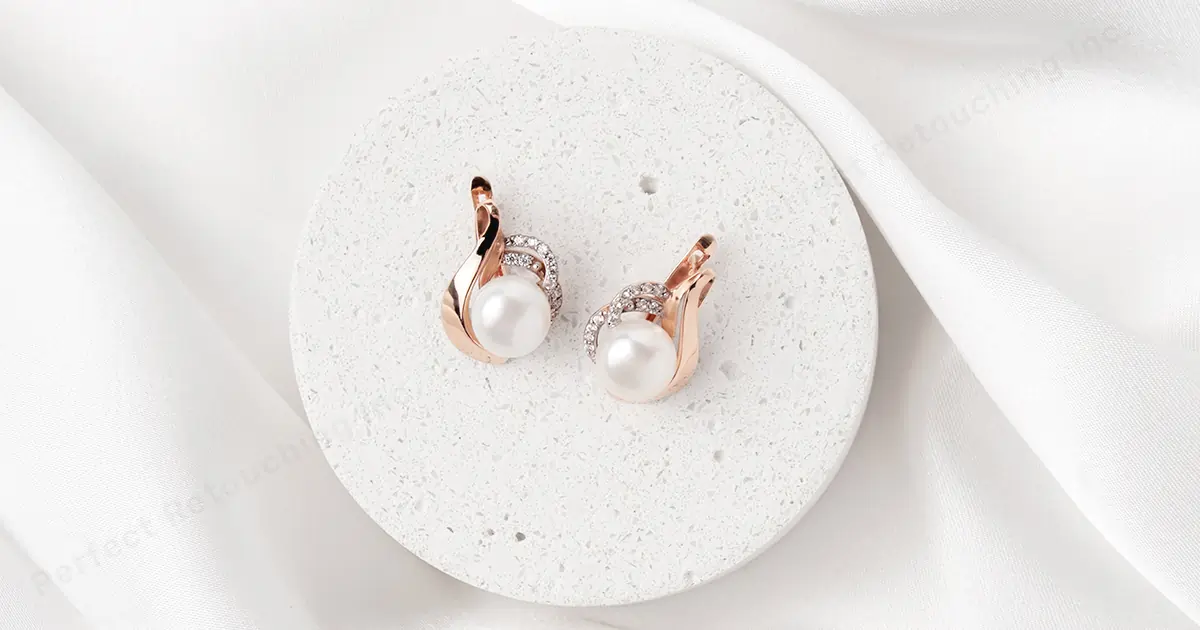
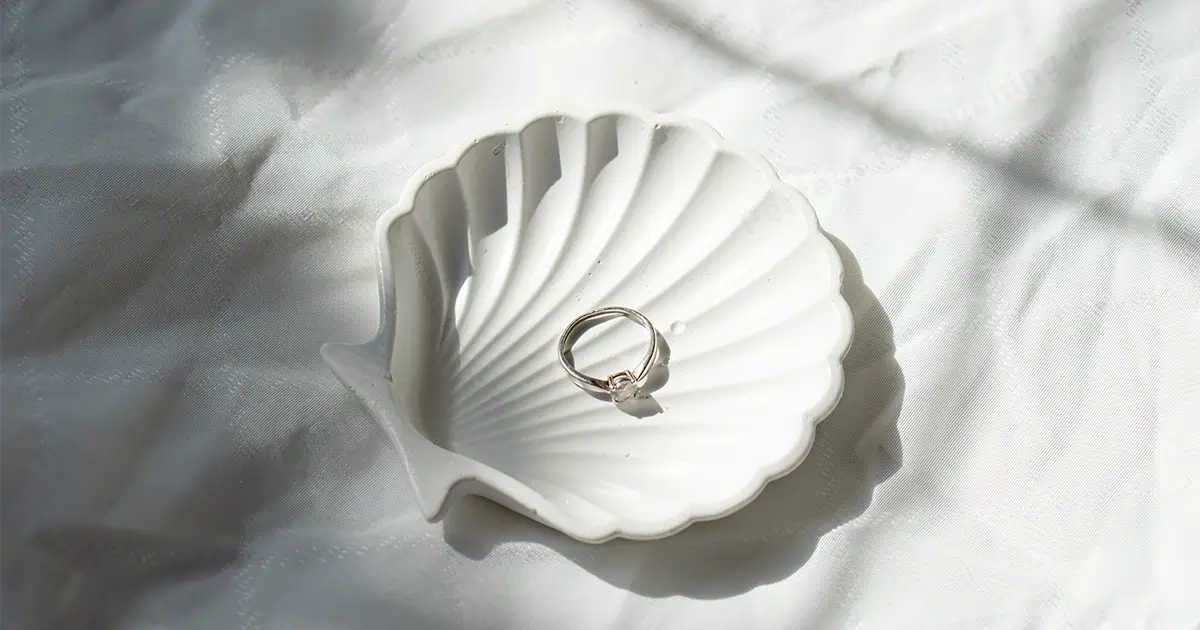
- Use white background or white satin cloth to take photos because jewelry photos with soft color background helps highlight the product most. However, you can experiment with other color backgrounds too to see how the jewelry photos come out
CAUTION: Ask your clients about their selection of background color. - You can do simple shadow play to add variety to the image with, for example, designed glass or fake lavenders.

Jewelry Photography Tips for All
- While taking the photo, think of the final image in mind. It does not always work but it is helpful for taking photos.
- Take extra photos for safety. If you take only one photo, it is too risky because the photo might come out blurry or it might get deleted accidentally.
- Use minimum props to avoid distraction, as customers will only see the jewelry and its features.
- If you can, use models or become the model to showcase the jewelry. It will help the customers to visualize the look on the person while wearing it.
- Do not forget to ensure professional photo retouching before sending it to the client or uploading it on social media.
Final Words
Photography is fun as you can be as creative as you want and make your photographs tell a story. Though jewelry comes in all shapes and sizes, you can still take creative jewelry photos and blow your customers’ mind. You just need to make sure your jewelry picture looks absolutely flawless before uploading it. I hope this article “5 Easy Techniques How to Take Pictures of Jewelry” will help you make your venture flourish.


