 English
 Arabic
 Danish
 Dutch
Dutch
 Finnish
 French
 German
 Hebrew
 Italian
 Japanese
 Norwegian
 Polish
 Portuguese
 Spanish
 Swedish
 Russian
Complete Tutorial on How to Remove Clothes in Photoshop
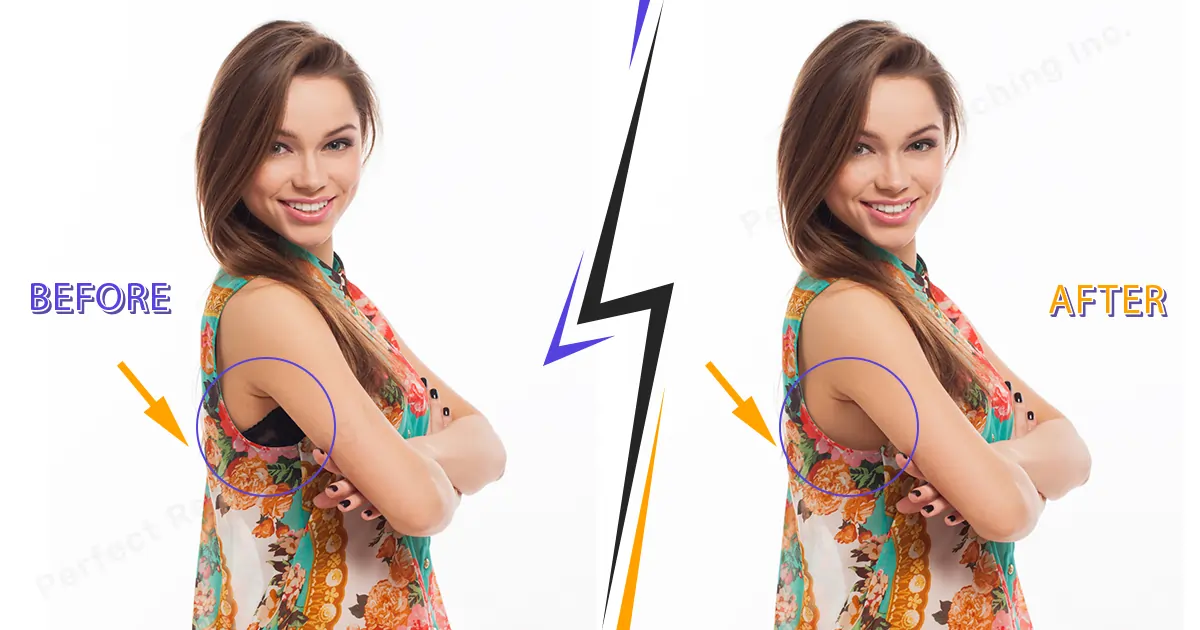
Can you remove someone’s clothes with photoshop tools? partially yes, you can. Will it look like a real body underneath? No, it will not. Photoshop can either replace or erase something from the photo. So, by removing clothes, you will have to replace it with something else. For example, if you remove a strand from a dress, you will have to retouch the skin with tools to make them look relatively natural.
So, In this tutorial, I am going to show you how you can remove clothes in photoshop simply and naturally with Lasso Tool, Clone Stamp Tool, Spot Healing Brush Tool and Marquee Tool. Let’s dive in!
How to Remove Clothes in Adobe Photoshop With Tools
In Photoshop, you can remove clothes to enhance the beauty of the cloth or to remove the logo or tag from the product for professional purposes. There are quite a few tools with which you can remove clothes from a picture. However, To do the editing swiftly and naturally, you can use Clone Stamp Tool, Spot Healing Brush Tool, Lasso Tool and Marquee Tool.
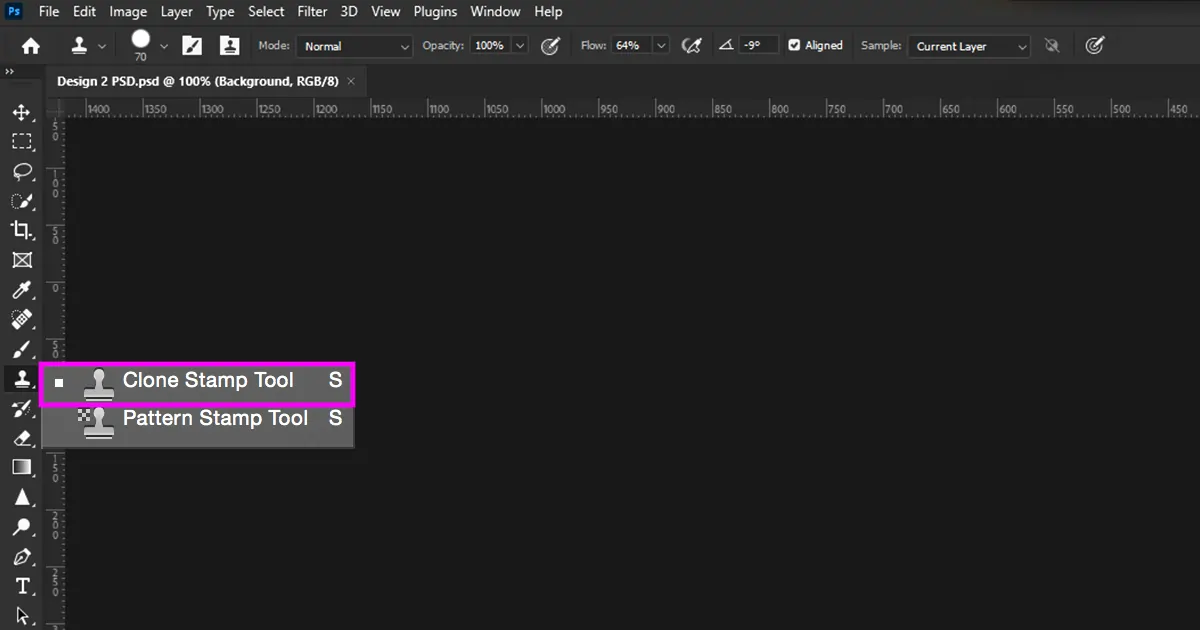
Clone Stamp Tool
One benefit of the Clone Stamp Tool is that you can clone tone first then just use that tone to remove the cloth from the photo. Let’s see how it’s done:
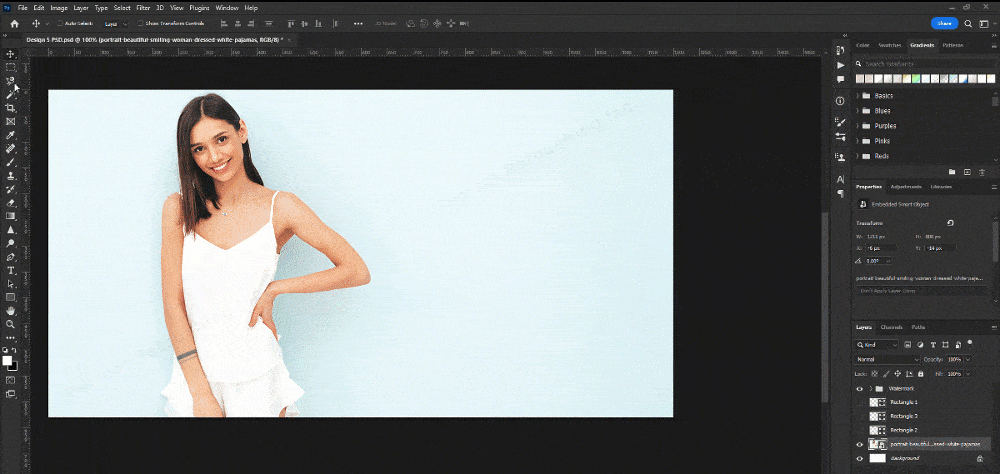
Step 1: Go to File>Open. Select a photo. Copy the background from the layer box.
Step 2: From the Toolbar, choose the Clone Stamp Tool or Click “S” on the keyboard.
Step 3: Now, you need to select the skin tone you want to clone after removing the cloth from that area. To select the skin tone, take the cursor to that area and click Alt+Left Click on the mouse/ Left-click action on the laptop.
Step 4: After selecting the skin tone, you can leave Alt and just keep on clicking on the cloth you want to remove with left-click.
Note: you have to keep on cloning the skin tone to continue to retouch smoothly with Alt+Left-click.
Keep on Retouching till the skin looks natural with the skin tone of the model.

Note: If your Clone Stamp Tool is not working, check out this article to fix it.
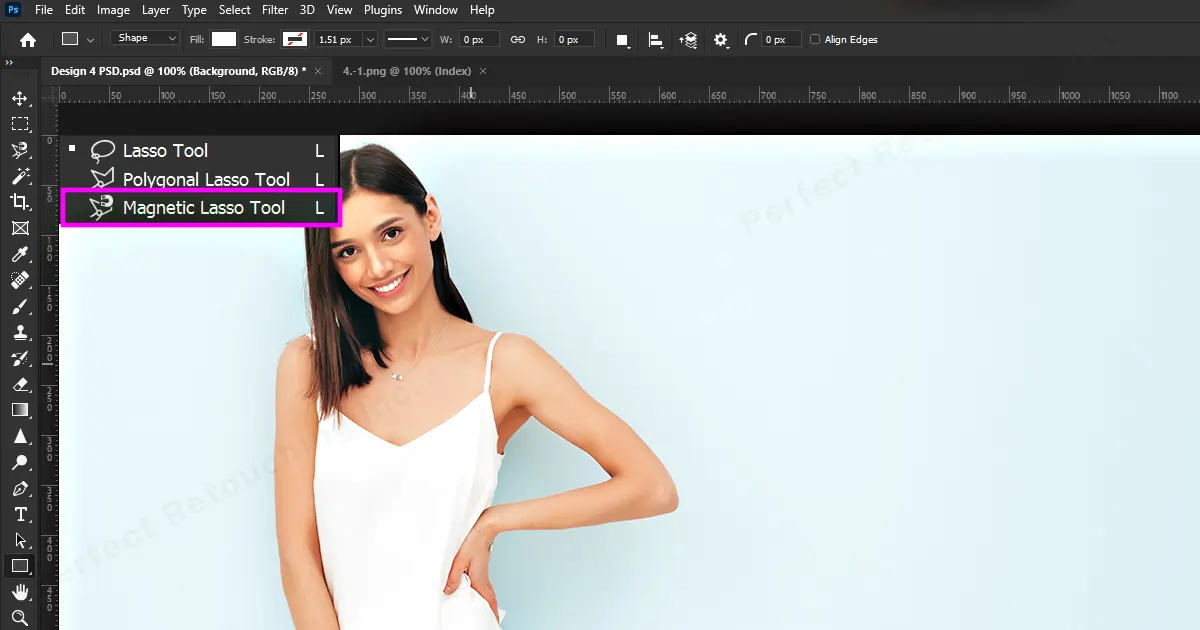
Magnetic Lasso Tool & Clone Stamp Tool
The benefit of removing clothes with these tools is that while you are editing the marked area, retouching will only be done in these areas. So, you can work with ease.
Step 1: Go to File>Open. Select a photo. Copy the background from the layer box.
Step 2: From the Toolbar, choose the Magnetic Lasso Tool or Click “L” on the keyboard.
Step 3: Select the area with Magnetic Lasso Tool.
Step 4: Choose the Clone Stamp Tool from the Toolbar. Click the Alt+Left button of the mouse to clone the skin tone. Now, Remove the cloth in the selected area by clicking on the Left button. The cloned skin color will replace the cloth.
Step 5: Once you are satisfied with your editing, Click Right Button on the mouse and click Deselect. The Lasso tool mark will be removed.
Remember to do a final check to see if the color blended well or not. If your picture retouching does not look natural with skin color, it will look unnatural and awkward.
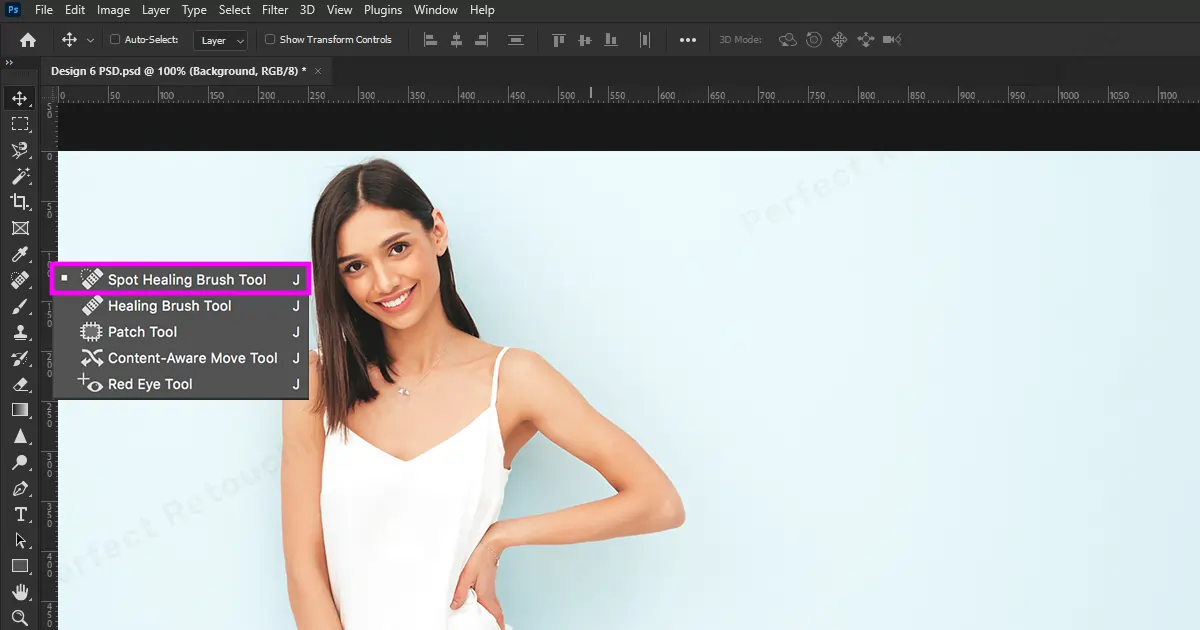
Spot Healing Brush Tool
You can also remove clothes with Spot Healing Brush Tool, however, the method is a little bit different.
Step 1: Go to File>Open. Select a photo. Copy the background from the layer box.
Step 2: Go to the Toolbar, choose the Spot Healing Brush Tool or Click “J” on the keyboard.
Step 3: Just click and drag the cursor over the part you want to remove. The part will be marked with black ink.
Step 4: Upon releasing the cursor, the marked cloth part will be edited. However, the edited area will look different from natural skin. Hence, keep on clicking and dragging over the area till it looks natural with surrounding skin tone.
Step 5: After you have done retouching the skin, save the photo.
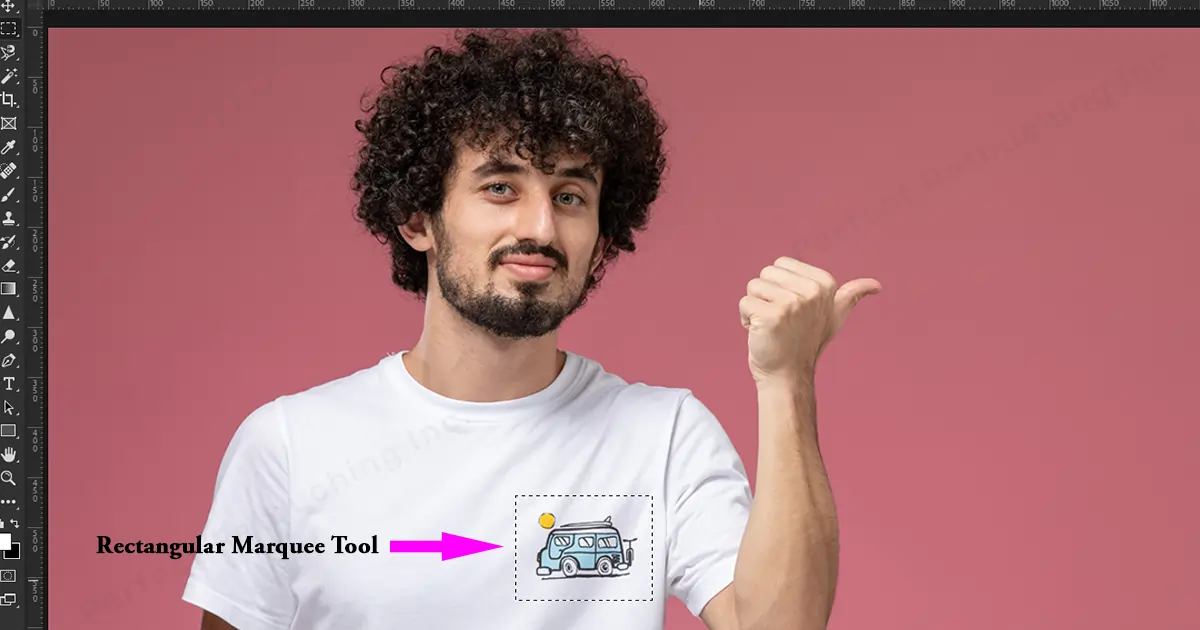
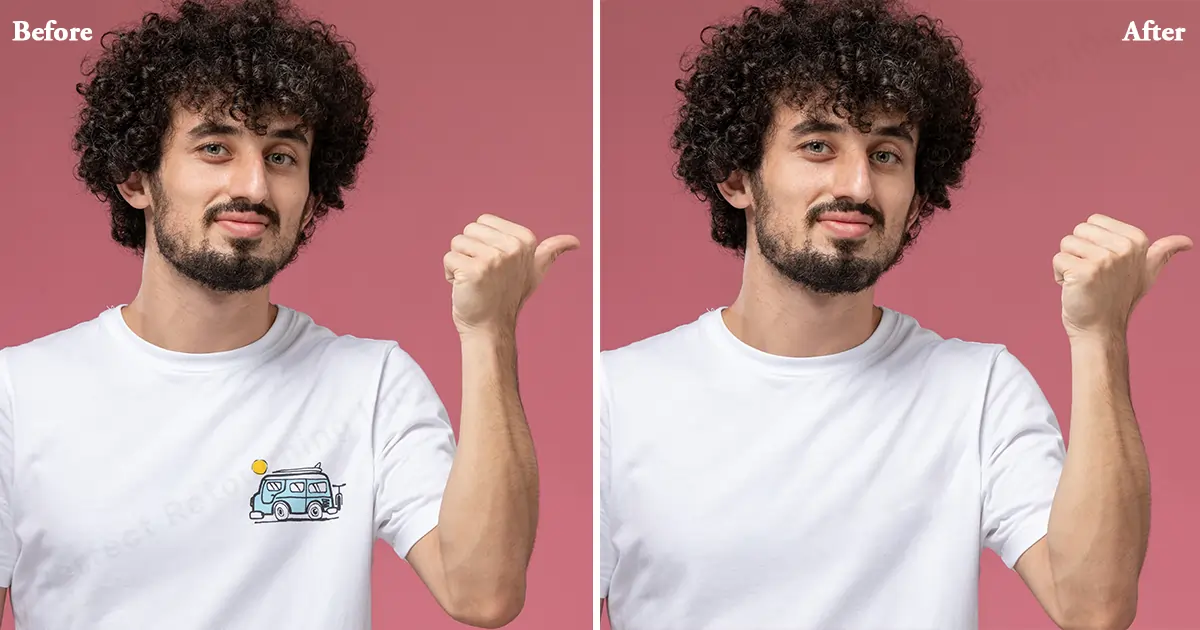
Marquee Tool
Marquee Tool is very good for removing designs or removing logos from the shirts/dresses. Here’s how you can remove a design/logo from a shirt:
Step 1: Choose a photo and select Marquee Tool from the Toolbar. Mark the area.
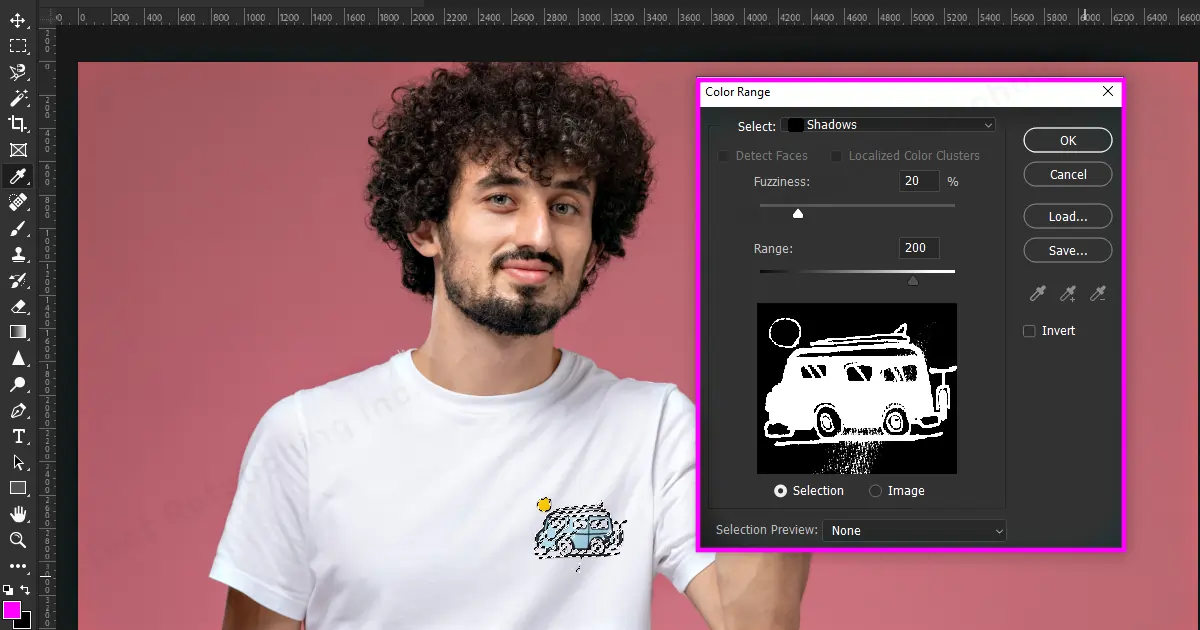
Step 2: From the Menu, choose Select>Color Range.
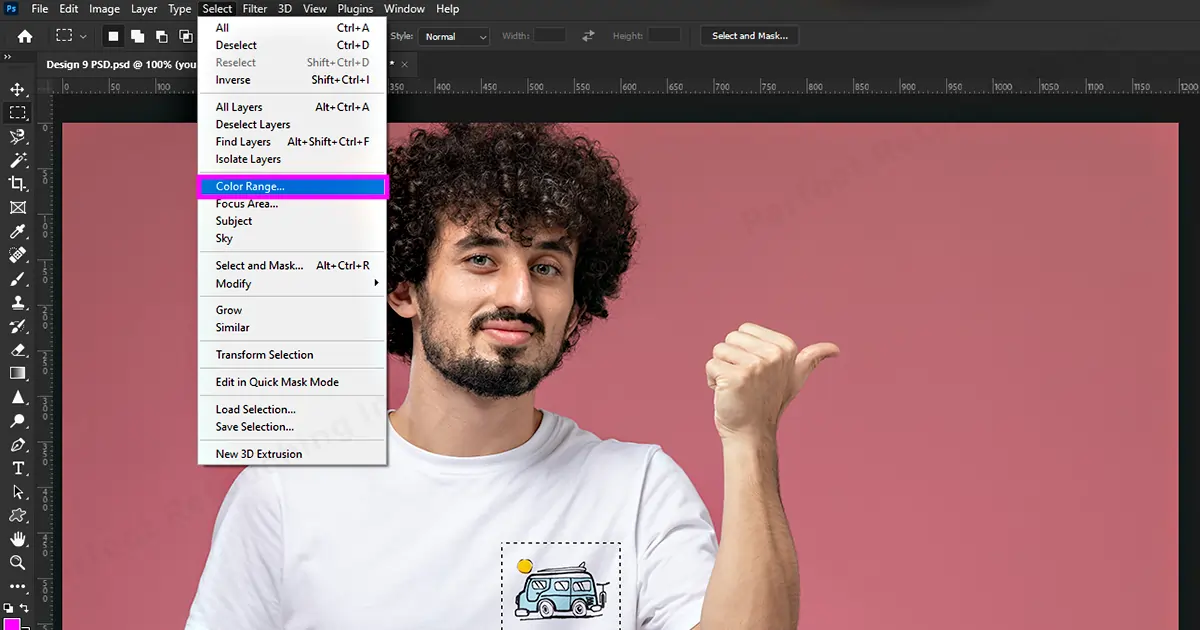
Step 3: Color range dialog box will open- Choose Shadows from select- Click OK.
Step 4: You can see that the design is selected. Now, again go to Select>Modify>Expand.
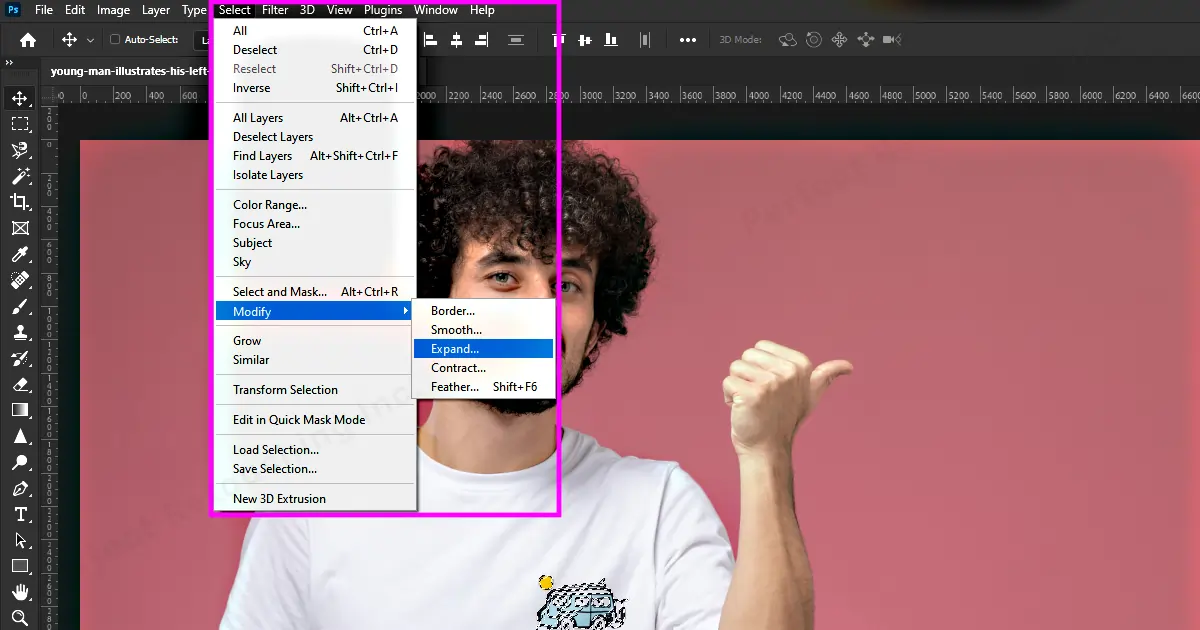
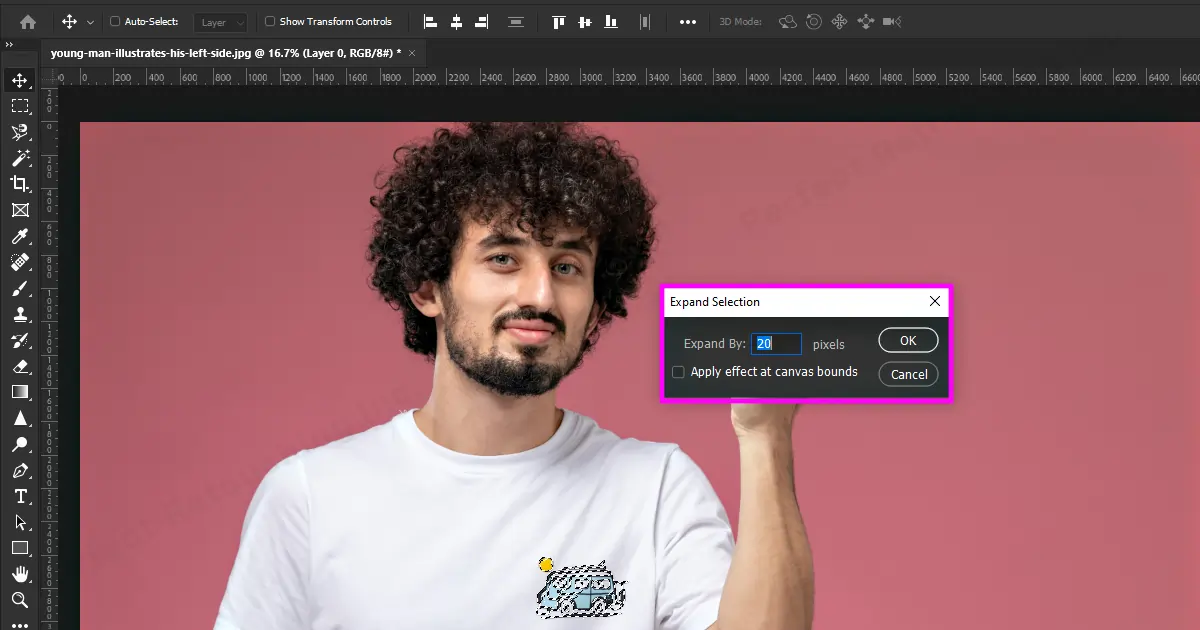
Step 5: Expand selection Dialog box will pop up- write your needed expended number from the expand selection by- Click OK.
Step 6: Click the right button on the mouse- Choose Fill.
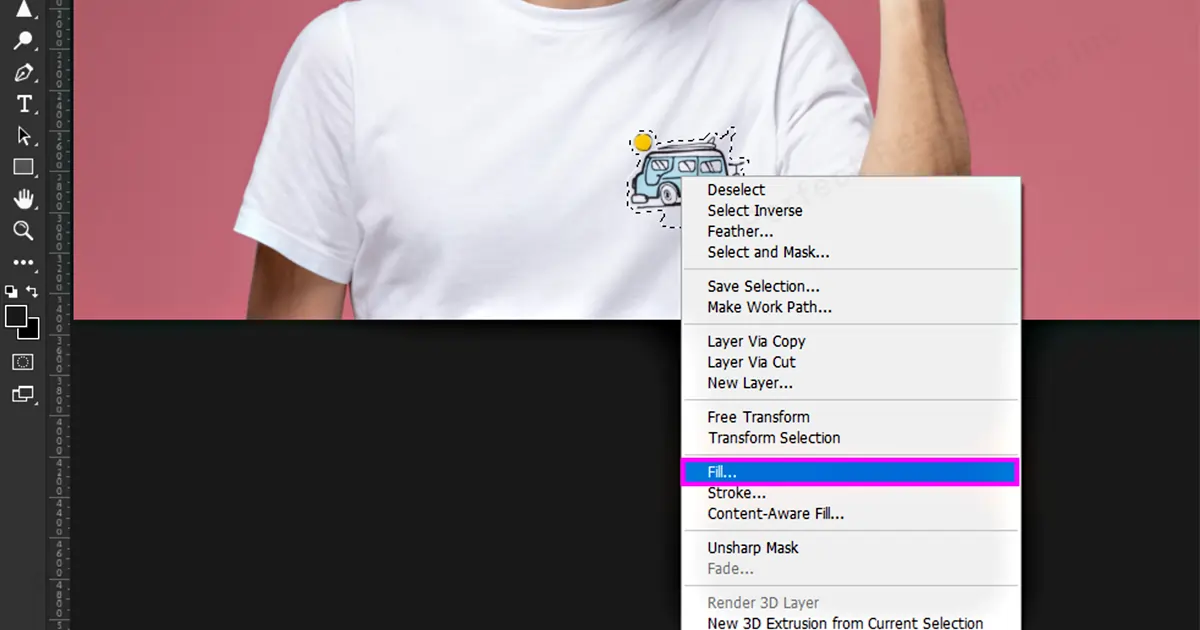
Step 7: Select Content-Aware from Contents- Click OK.
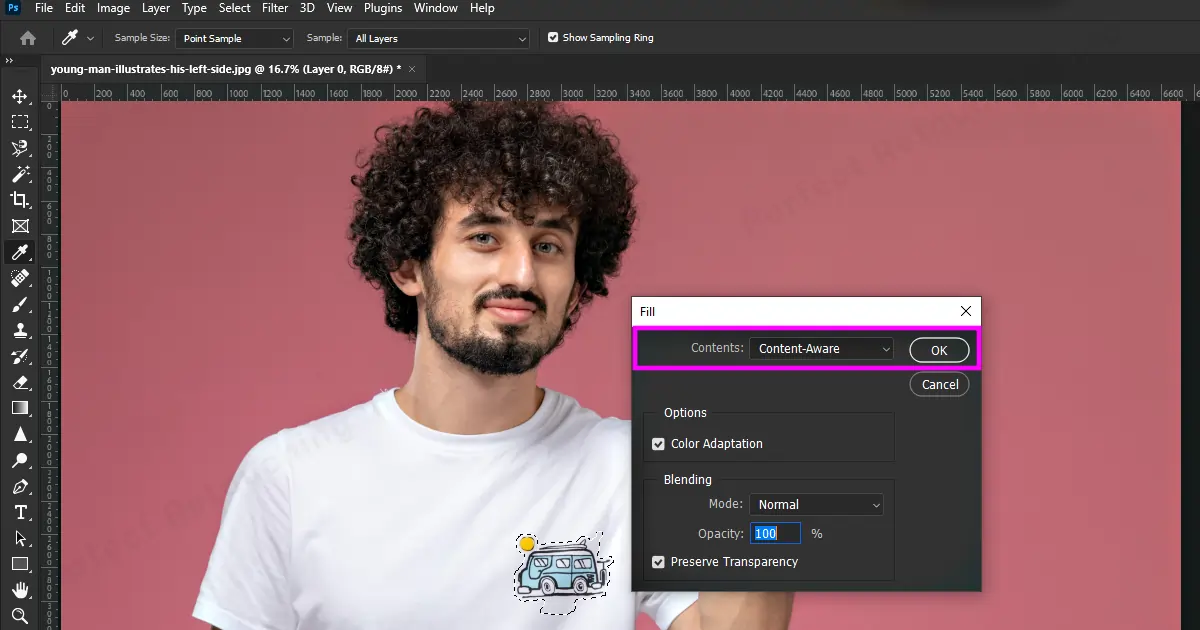
Step 8: The design in the shirt is gone. Retouch to smooth the area if you need. Save the photo in JPG, JPEG or PNG and you are good to go.
Keep in mind, whether you remove clothes from a picture or logo/design from a dress, always check thoroughly if all the editing is done evenly to avoid mistakes.
Important Note for Removing Clothes From a Photo
- While removing clothes in photoshop, keep in mind, the model may look naked or inappropriate.
- Take explicit consent from the model before removing clothes. Even if you remove a strand from their body, take permission from the model. As they can sue you legally in court.
- Photoshop can not do magic and show what is underneath the clothes. Photoshop is just a manhandled software. Even if you remove all the clothes, the place will become empty. You will need to cover it with something else.
Hence, be ethical and use photoshop to remove clothes only for professional purposes.
Final Verdict
Learning how to remove clothes in Photoshop may be a bit difficult but not impossible. You can use easy tools like, Lasso Tool, Clone Stamp Tool, Spot Healing Brush Tool and Marquee Tool to remove clothes/logos/designs from a picture.
And, if you need professional help to remove clothes from a picture effortlessly and naturally, contact our product retouching company. Our professional retouching team is always ready to help you.


