 English
 Arabic
 Danish
 Dutch
Dutch
 Finnish
 French
 German
 Hebrew
 Italian
 Japanese
 Norwegian
 Polish
 Portuguese
 Spanish
 Swedish
 Russian
Ghost Mannequin Photography: Create 3D Ghost Mannequin Effect
Do you know what is the 2nd best thing for fashion photography? The availability of ghost mannequins. You can use and reuse a ghost mannequin as many times as you want and they are less costly than models. By using them you can show the shape, size, and fit of the clothes. You just need to edit the mannequin in post-production and make the image look like a person is wearing the clothes. So, read our ghost mannequin photography article to learn how to take pictures of clothes on a mannequin and edit it to create a 3D effect afterward.
What is Ghost Mannequin Photography?
It is a photography style where it looks like the clothes are worn by a ghost/invisible person. Ghost mannequin effects are used for fashion and e-commerce photography. You take the images with a mannequin and later edit them in a way that keeps the consistency of your marketing channels. It is a nice addition to the apparel business because it helps the customers visualize their outlook on the clothes.
The ghost mannequin is also known as a 3D Mannequin, invisible mannequin, Hollow man, or invisible man effect.
Why Should You Use Ghost Mannequins for Your Online Stores
Mannequins can be used for both online and offline purposes. While they can attract customers 24/7 as replacements for human models in your retail store, they can also be used as invisible mannequins for clothing photography.
- Invisible mannequin usage is cost-effective. If you invest money in mannequins, you will be able to reuse them as many times as you want. At the same time, you can use them in your offline shops as well.
- Can take as many images as you want by using a mannequin. Models charge per hour so even if you do not get the perfect shot, they will leave. But you can try all angle shots with a mannequin without a time limit.
- Consistent with your website. As customers will see similar types of images, they will not be distracted and will have an easier time envisioning themselves in the clothes.
- All the shapes and designs are clearly visible. As the clothes are only in the image, customers will be able to see the clothes clearly from any side.
- Easy time editing the mannequin. The pictures are taken simply with a white background and mannequin, So all it needs is ghost bust removal in post-production. You will not have to retouch any skin or remove any distractions from the background.
The Process of Doing Ghost Mannequin Photography Flawlessly
Taking photos using a dummy is a bit tricky as you will have to edit and attach parts together in post-production to create a 3D Ghost Mannequin effect. So. let’s go and turn the unrealistic images into realistic ones.
Select Mannequin Size Based on Clothes
From large to small, many sizes of mannequins are available on the market. That is why often the clothes become too big or too small after placing them on the mannequin. Hence, getting a ghost bust based on the cloth size is a good strategy to fit the clothes perfectly.
However, if you can not find the exact same size, find at least close to the size. Then adjusting the clothes will be easier.
Note: Find a mannequin with removable pieces to work with ease.
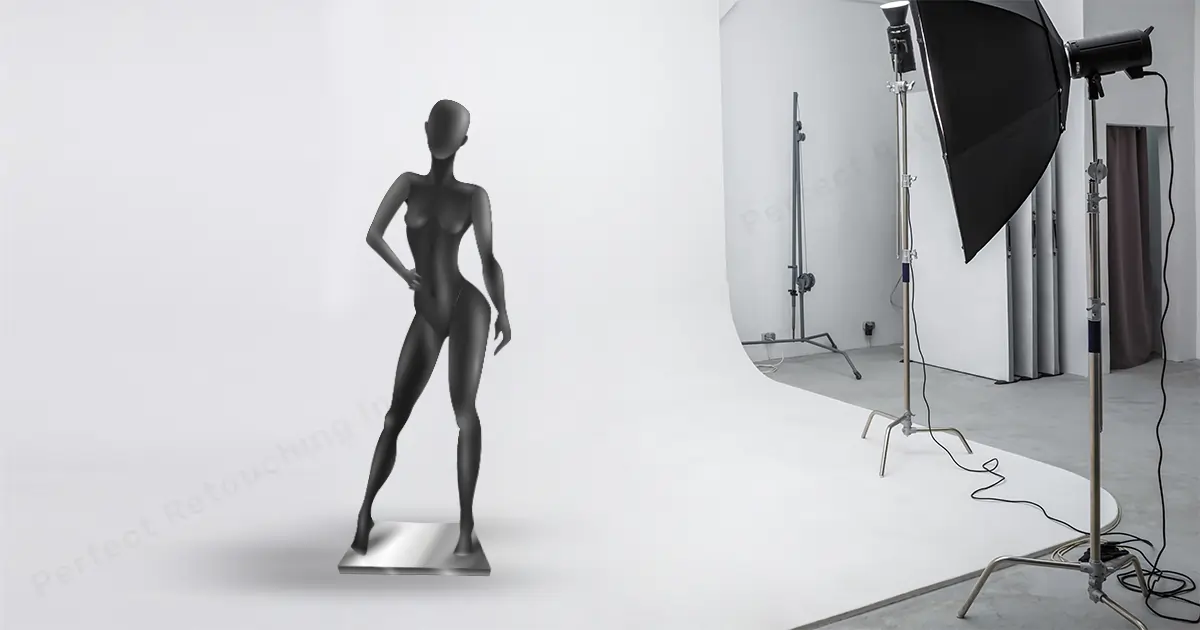
Prepare the Setting and Equipment
The Setting- Studio Lighting.
Equipment- Camera, lens, Soft Boxes, White Background, and a Reflector.
You need to set up proper studio lighting for mannequin photoshoots. How?
- Place a white background on the shooting area.
- Clean the mannequin and place it in front of the background. Though the mannequins are usually kept covered, they can have dust and dirt. If you use them as it is, the clothes also may get dirty.
- Place the soft boxes surrounding the mannequin. Make sure the ghost bust is well-lit from both sides.
- Any camera that is good for product photography will do. For example, I use Canon EOS 5D Mark III because of its ability to capture bright yet natural color photos.
- Use a good 50 mm lens to avoid distortion and to take nicely detailed shots.
- Check for the reflections. If you see harsh reflections falling on one side, place a reflector on that side. It will create a soft shadow.
Prepare and Place the Clothing on the Mannequin
After setting up the equipment, you need to prepare the clothes for photography.
- Place the clothing piece on the mannequin. To put it easily, remove the arms. However, make sure, it does not catch or stretch on anything. Look out for fabric while attaching the arms.
- Stream the apparel on the mannequin to remove any wrinkles. If any part of the cloth is more wrinkly, stream that place for a longer time. You can also iron it but streaming is a better option for apparel photography as you can do it on the ghost bust.
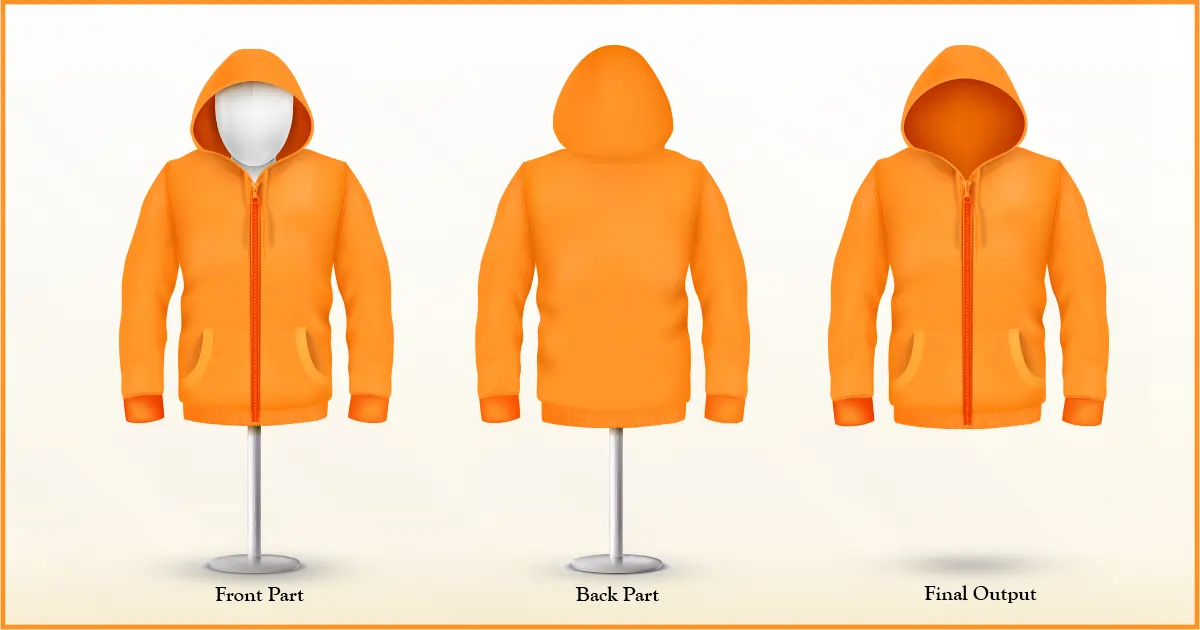
- Depending on your clothing, remove the pieces from the mannequin. For example, if you are photographing a hoodie, remove the headpiece to show as much as the hoodie. It is a crucial part of the clothing.
- If the clothes look bigger on the mannequin, clip it from behind. Try to make it look like it is fitted to the mannequin. And if they are smaller, use tissue paper to fill the area or tape it up from beneath. Tapping it will strengthen the area and it will look the same as the rest of the clothing parts.
- Remember you need to give the apparel as real shape as possible on the mannequin.

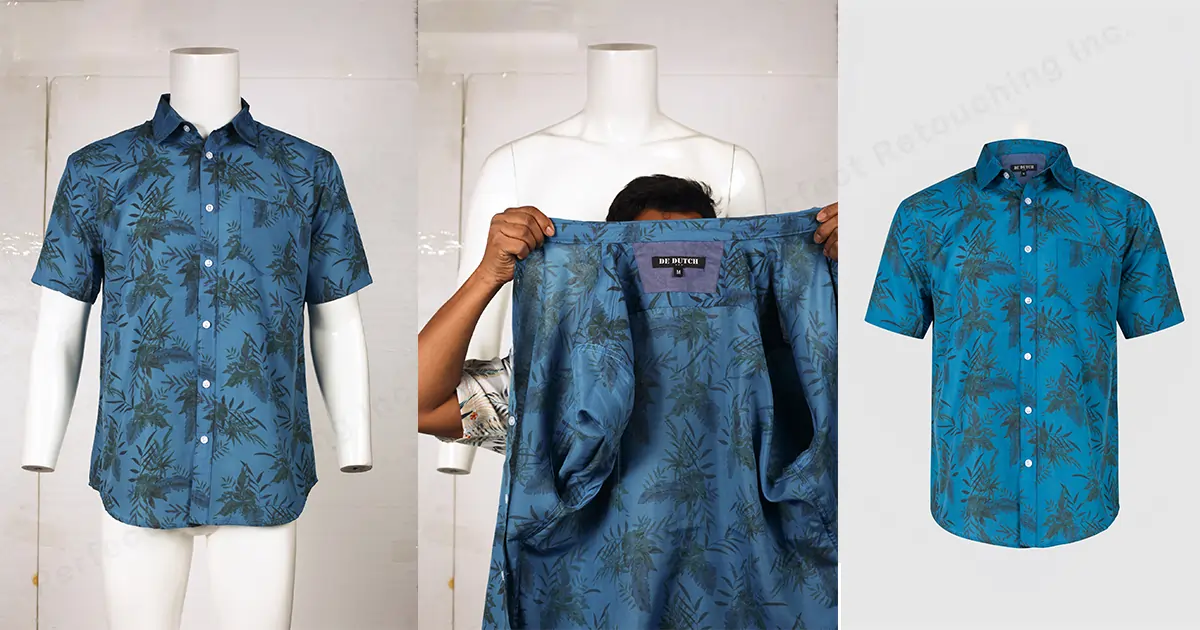
Capture Apparel Images from Front and Inside Out
When I said that taking clothing product photos on ghost mannequins is a bit tricky, I meant you have to capture the images in multiple poses to have an easier time in mannequin product editing.
- First, take a photo from the front.
- Take a photo of the back design.
- There are two ways you can take inside-out pictures. First- have someone hold the apparel in front of the mannequin and take the image. Second- take the apparel off and turn it around. Place it on the mannequin just like before and shoot the back of the cloth. Focus on the neck and tag.
- Take all the shots from the same distance. If the range is different, you will not be able to position edited pieces later in Photoshop.
- Take at least 3-5 photos from all angles to avoid common mistakes in product photography. Post at least photos from three angles so that the customers can get the best outlook of the product.
Remember to Take Measurement
While taking photos, measure the clothes to attach the height, width, and necessary information in the image description. Provide as many details as you can for customers better understanding of the apparel. Add the details in the descriptions so that the customer can order easily. Also, do not have your email/contact will not be bombarded with customer questions.

Create 3D Effect in Post-production
Now, it is time to give a realistic touch to your product photos by retouching. You can do it easily in a short time in Adobe Photoshop.
Step 1: Drag the Images and go to the Toolbar
- Click and drag the front image, back of the image & inside-out image in Photoshop.
- Go to the Toolbar and select “Pen Tool” to select the clothes.
- Select Paths and Layers from the windows because both will be needed to separate the cloth from the mannequin.
- Zoom in (Ctrl+) with the Zoom tool to mark the cloth properly.
After clipping the cloth, click on Path to make a selection. From the pop-up dialogue box, select feature radius.
Step 2: Go to the Layers and choose “Quick Selection Tool”
Now, select the background in the layers and the quick selection tool from the toolbar. Select the cloth and zoom in to see if all areas are selected properly.
Step 3: Make a background copy and “Color Fill” it
- Copy the background by dragging the layer in the “Create a new layer” section.
- Again choose the “Background Layer” and click on the adjustment layer. From the box, select “Solid Color”.
- A solid color dialog box will pop up. Choose a white color from there. Click “OK” and the mannequin is removed with the background turned white. However, now we need to attach the neck joint to give it a realistic look.
Step 4: Select the neck joint with the Marquee Tool
- Mark the collar and tag area with the Marquee Tool.
- Copy the neck joint and paste it on the front side photo.
- Select “Move Tool” and move it to the neck area.
- Hold “Shift+Alt” to increase or decrease the size neck joint. Adjust it with the neck.
Step 5: Copy the Paths and attach the neck joint with the “Pen Tool”
- Go to Paths and Copy it by dragging it to the “Create a new path section”.
- Select the attached neck joint.
- Again, click on the “Copied Path”, select “Make a Selection” and write the feature radius.
Step 6: Select “Inverse” and a 3D effect photo is created
As the cloth is already selected, Go to Select>Inverse> Ctrl+Backspace, and the background is inversed. The post-production process of making a ghost mannequin effect is perfectly done.
Some More Ideas to Do Invisible Ghost Mannequin Photography
There are more ways to take photos using a mannequin for clothing photography.
360° Rotating Video
Nowadays it is a very popular method to showcase clothes in online stores and e-commerce. And taking the video with a mannequin is even easier because it does not weigh much.
You just style the mannequin and place it on a turntable. Use a white background, plug the turntable, properly light the mannequin with 2 soft box lights beside it, and take the video. In ghost mannequin editing, remember to edit the turntable as well. Only the product should rotate 360° angle. The benefit of this method is that it showcases the product’s features, shape, and size from all angles. It provides clear details and increases the selling rate. So, if you have the budget to invest in 360° rotating videos, try it for your brand.
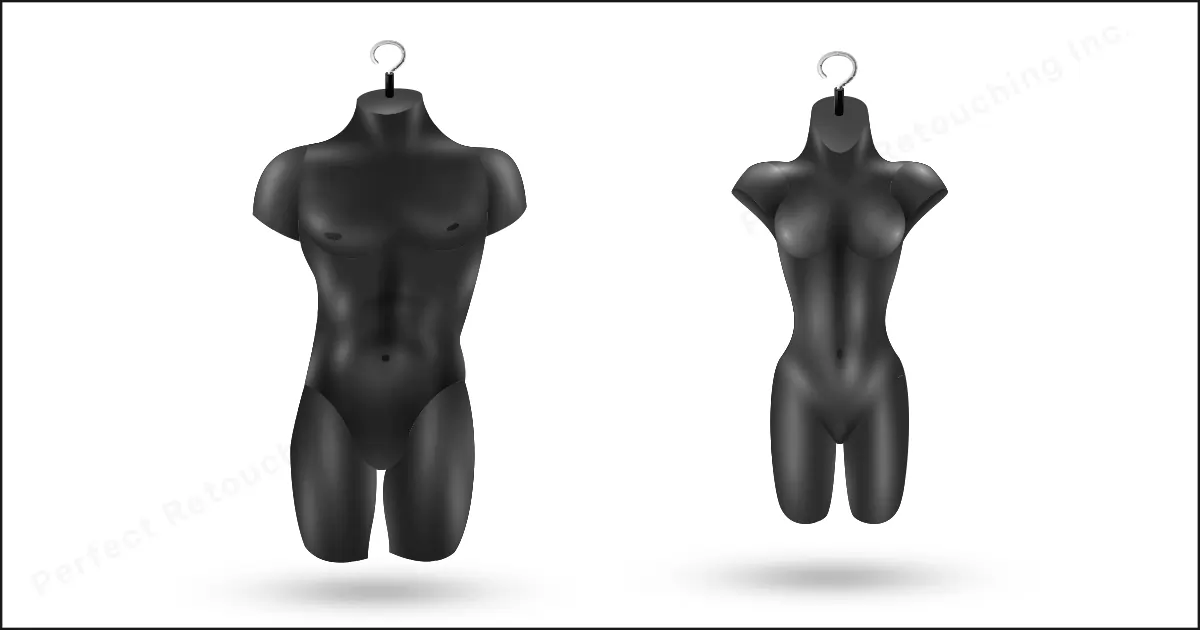
Hanging Mannequin Photography
Hanging mannequins work like a hanger. It comes with an upper body and a lower body separately but how to take pictures with it? Put the cloth in the mannequin, stream it, and hang it on the attached stand. You can change the direction of the hanger to take front and back images. After using it for taking photos, you can also use it in your store to display the clothes.
Using Real-Life Models as Mannequins
Models may be costly for apparel photography but if you use them as mannequins, they will not be costly. Why? Because you will edit them later in post-processing a normal human being will do just fine. Or you can also pose in the clothes as well.
Now the question arises, How do you take the images? It is easy. You just have to stand still and straight in front of the camera. Follow the same method as previously but just differently. Prepare the equipment, use a white background, iron/stream the clothes, wear them carefully, and take the image from the front and back. However, for the inside-out picture, take off the cloth, clip it with a whiteboard, and capture the image focusing on the collar area. Later, edit the human mannequin and attach the collar area picture and front picture together to make it look like a ghost is wearing the clothes.
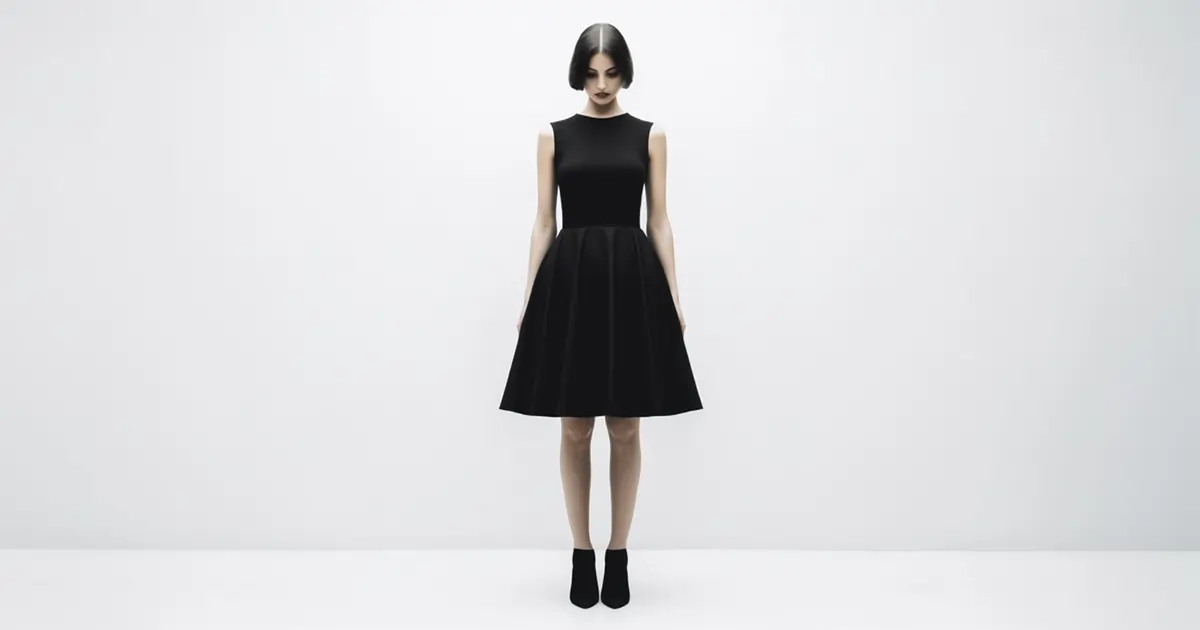
The benefit of this style is that you can photograph any size clothes. For example, if you want to shoot double Excel size, choose a person based on that size and photograph them. The customers will be able to understand the features, shape, and size appropriately from the image.
Take Our Professional Neck Joint Service
Perfect Retouching retouches apparel photos. Our professional retouchers remove the mannequin, wrinkles, and spots. They also attach the neck joint accurately to create a 3D Effect and make the apparel alive and flawless.
Though it is not mentioned in our product editing service, we provide Ghost Mannequin Service for our clients. So, take a free trial to check the quality of the images then decide.
Try Retouching Services For Free and you'll love it!
If you need to check our retouching output, don’t miss the chance of getting quality services.Final Verdict
Ghost mannequin photography may seem tricky at first, but if you can do it once, you will be able to understand the methods and redo it over and over. Also, take notes of the process to remember the photography methods.


