 English
 Arabic
 Danish
 Dutch
Dutch
 Finnish
 French
 German
 Hebrew
 Italian
 Japanese
 Norwegian
 Polish
 Portuguese
 Spanish
 Swedish
 Russian
How to Photograph Earrings for E-commerce: Increase Sales!

In terms of jewelry photography, earring photography is one of the hardest because of its small yet complex designs. And as jewelry photographer, we need to capture those earring designs with different styles and present them to our customers in top-notch condition.
If the customers can see high-quality earring images in the online store, they will check out those images, roam around the website for more images, and eventually press the “Order Now” Button. So, read this article to learn how to photograph earrings like a pro to boost your sales online
How to Photograph Earrings in 7 Easy Techniques
There are various types of earrings like studs, dangles, hoops, drops, threaders, clusters, and chandeliers. No matter the type, when it comes to styling earrings for e-commerce photos, the sky is the limit. You can use anything to make your earrings look beautiful and stand out in the crowd. So, without further ado, let’s see how you can prepare and take pictures of earrings uniquely for your jewelry online store.
Ensure Your Equipment Availability
The equipment you will need for earrings photography is the same as any jewelry photography.
- Natural light
- A camera with a macro lens
- A tripod
- Microfiber cloth
- White background or other background colors
- A table
- Earrings holder
- A reflector
- Props depending on your visualization and availability
- Photoshop for retouching the imperfections of the images.
If you have the equipment ready, let’s see how you can use them to take earring images.
Choose Natural Lighting As Your Light Sources
If used right, natural light is the best option for earring photography. With some techniques, you can easily capture its highly reflective gems.
- Select Noon time to take the images.
- Find the brightest and largest window in your house.
- Place the table beside that window.
- However, do not take it directly under the sun. Use a curtain/cloth to use it indirectly.
Note: If you are using natural lighting, do not use any other lighting. Mixing colors will create different light.
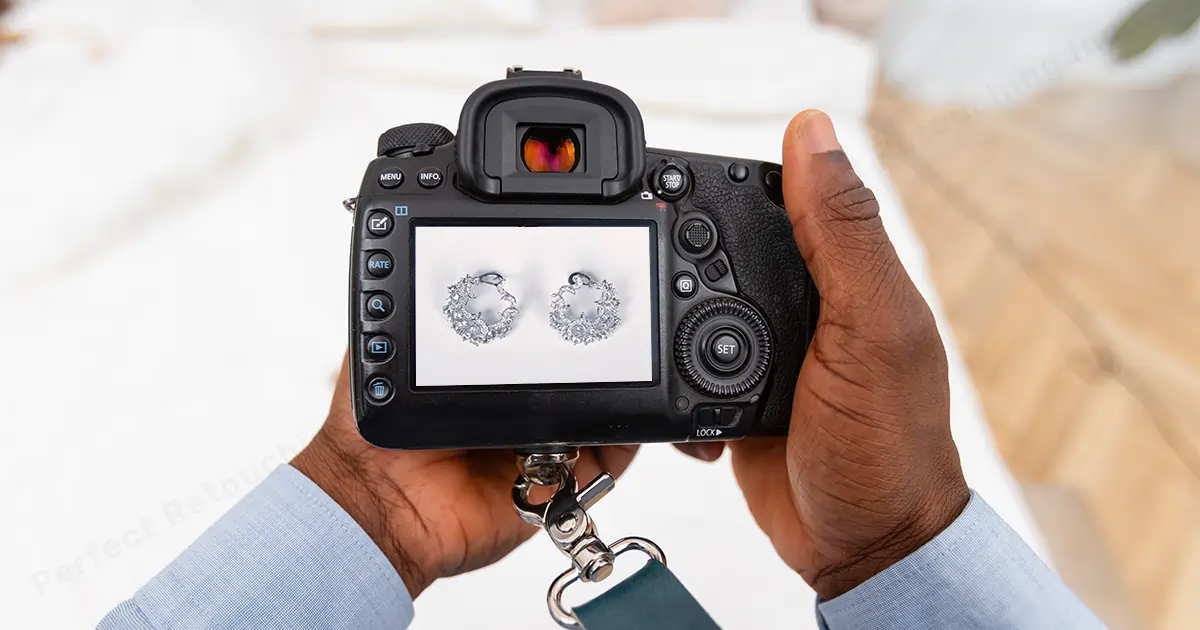
A Camera with a Macro Lens
For earring product photography, you need to use a camera with a 50mm 1:1 ratio macro lens to get life-size magnification. These are the settings I use for earring shoots. However, adjust them according to your settings and distance.
ISO- As low as possible like 100 or 200. The natural light is already harsh so if you use a higher ISO, it will capture noises in the photo and make the image whiter.
Aperture- Use F/7/8 or higher to capture the earring designs in sharp focus.
Shutter Speed- Start from 1/60 to get a perfectly detailed still image and adjust it as you proceed with the earring photo session.
White Balance- white balance usually stays in auto mode. If you notice that the images have cast in them, preset the white balance from the settings. Make sure to adjust it with the lighting to work less in product photo editing.
Zoom- Avoid zooming in to get broken images. Instead of zooming, place the camera close to the earrings.
Manual Mode- Change the setting to manual mode to get studio-quality images. If you are a newbie, it will be a little hard for you to control your exposures manually. But it is a very good practice for taking high-quality images.
Raw Mode- Use raw mode to capture all the color and gem information of the earrings without losing quality.
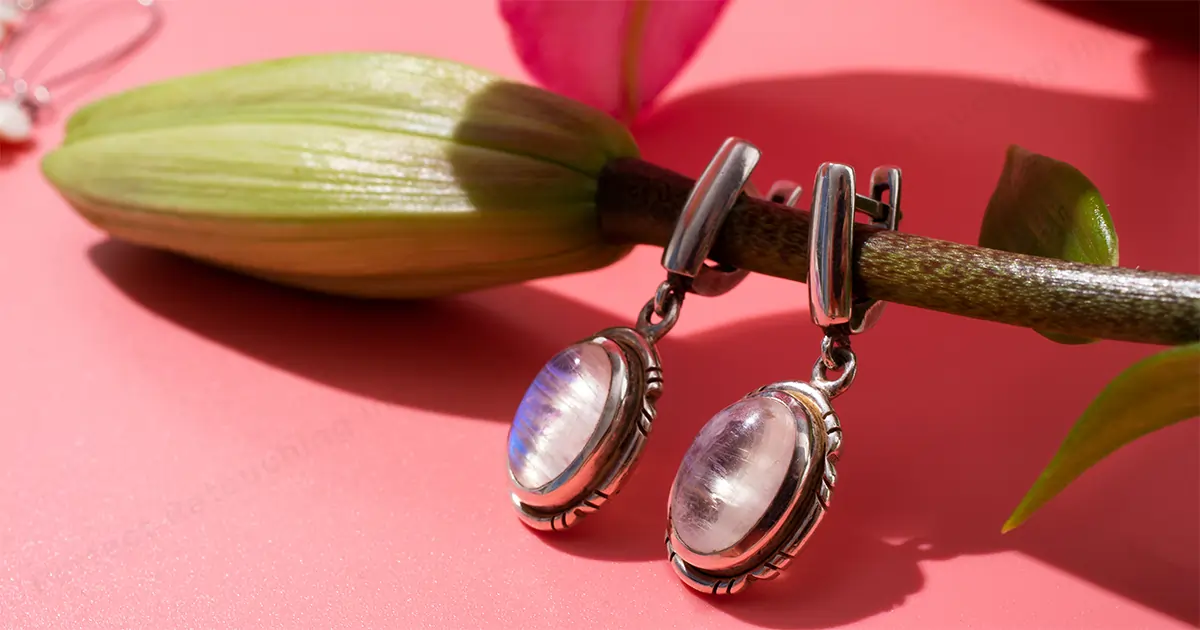
Choose Background Color Based on Client Instructions
You can use any background color you want for earring photography. While E-commerce companies prefer a white background for jewelry photography, you can use any background color for earring photography. As long as you can make it attractive and relevant to the jewelry.
For example, if your earring's color is green and a green background will highlight the jewelry, use it. However, listen to the client’s order first before choosing the background color. If they want the images on a plain white background use that to take images.
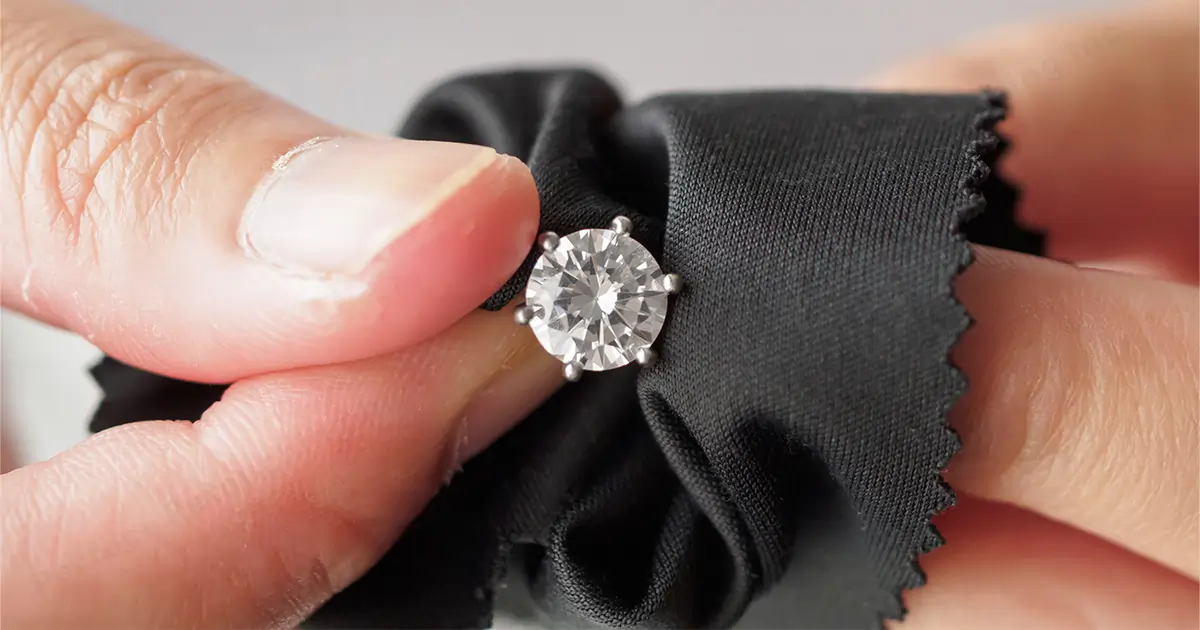
Keep the Earrings Clean
Our eyes can not capture everything in the jewelry. So, no matter how clean the jewelry looks, you have to polish it before the photoshoot. Wear cloth gloves and clean the jewelry with microfiber clothes.
Remove dust, dirt, and fingerprints with a microfiber cloth. Do not worry, it does not damage the earrings. It keeps its delicate features nice and perfect. Keep wearing gloves throughout the photo shoot to avoid putting fingerprints again.
Set the Equipment and Take the Photo
Now, place the equipment beside the window to take pictures of jewelry.
- Place the table directly beside the window.
- Organize the props. You can use any props to make the earrings visually appealing to the customers. For example, you can use glass reflections, designed paper cut shadows, fake flowers, tiles, clothes, etc. anything that you think will be relevant to beautify your earrings. However, keep it minimal. It should not look crowded or distracting.
- Set the camera on a tripod close to the setting to avoid zoom-in. As earrings are small, it does not take much place to capture the images. So, placing it close will be helpful for you.
- Place the reflector behind the earrings. First, check which side is casting long and hard shadows, and place the whiteboard/reflector on that side. The light will bounce and create natural shadows.
Finally, Take The Image from different angles and select the best ones for uploading on the website.
Make Your Photo Flawless by Retouching
among all the product retouching, Jewelry retouching is the most complex. You need to check every single earring gem properly and closely to correct any flaws.
- Correct the Color: Jewelry needs color correction. Why? Because of using a macro lens. It changes the color of the photo like it becomes yellowish. So, you need to retouch it to give it its real and natural color. Also, if the colors look faded or inaccurate, correct that as well.
- Dirt and Dust: Though you have cleaned it before, it can get any dust and dirt in the process. And the macro lenses capture every little thing so retouch it.
- Remove Distractions: If the props are diverting the customer's attention from the earrings, remove them. You can edit the background and props and just place it in a simple white background.
- Correct White Balance: If you have already corrected the white balance while setting the camera, it’s fine. However, if you haven’t, then correct it to give it a natural color.
- Check for Reflections: The lighting may reflect on the earring's gems. So, edit those reflections and make them even with all the other parts of the earrings.
- Make it Look Real: If you have searched on Google, you may have noticed that some jewelry images look different from their real body. Why? Because of too much retouching. So, do not make the same mistake and retouch it to give it a as real look as possible. The customer needs to say, yes this is what I saw in the photo. Make the earring's color and gems color as real as possible with your retouching.
How to Photograph Earrings with the GemLightbox
In the upper sections, you organized the equipment and then did the photography. However, with a gemstone lightbox, you will get it all in one to photograph your earrings such as a photography table, light, white background, reflector, and a turn table. First, install the Gemstone Lightbox from the Google Play Store or Apple App Store. Then connect it to your phone to take the earrings images.
Now the Process:
Place the Earrings in the Gemstone Lightbox
- Plug the Gemstone Lightbox’s power adapter and activate it.
- Place the magnetic stand in the center of the lightbox.
- Now, Clean the earrings with a microfiber cloth.
- Put the earrings in the earrings stand that comes with the Gemstone Lightbox.
- Position it on the magnetic stand. and place the reflector in front to bounce off the lights.
Decide on the Lighting.
- If you are taking images of the diamonds, use sparkles. It is a unique feature of the lightbox that brings natural sparkle to the diamond. It does not damage the nature of the stone. You can activate it from the box.
- If you are taking photos of the rubies, emeralds, spheres, and gold, use the natural daylight feature from the lightbox. It creates a natural daylight environment surrounding the earrings and brings out their natural colors.
It is time to set up the smartphone.
- Place the phone in the phone stand that comes with the gemstone lightbox. It is adjustable. Just open the phone stand and place the legs at your desired angle.
- As it is already connected to the lightbox, start taking the images.
- You can move the earrings to your desired angle with your phone. As you are photographing earrings, you do not need to show the back. Just take images from multiple angles and focus on the gemstones to highlight them.You can also take 360° videos with Gemstone Lightbox. The more you can provide the customers, the more they will be satisfied with your service. So, if you have the option to upload a video with your multi-angle images. Do it. How?
- Place the turntable on the magnetic stand and then the photography table over it. Like before, position the earrings and switch on the turntable. Keep the phone on the phone stand and start taking the video.
Though the Gemstone Lightbox comes with many facilities, remember to retouch the earring's images before uploading them to your websites.
The benefit of buying the Gemstone Lightbox: It is a bit costly but you can use and reuse it over and over. It will also increase your productivity and speed up your work.
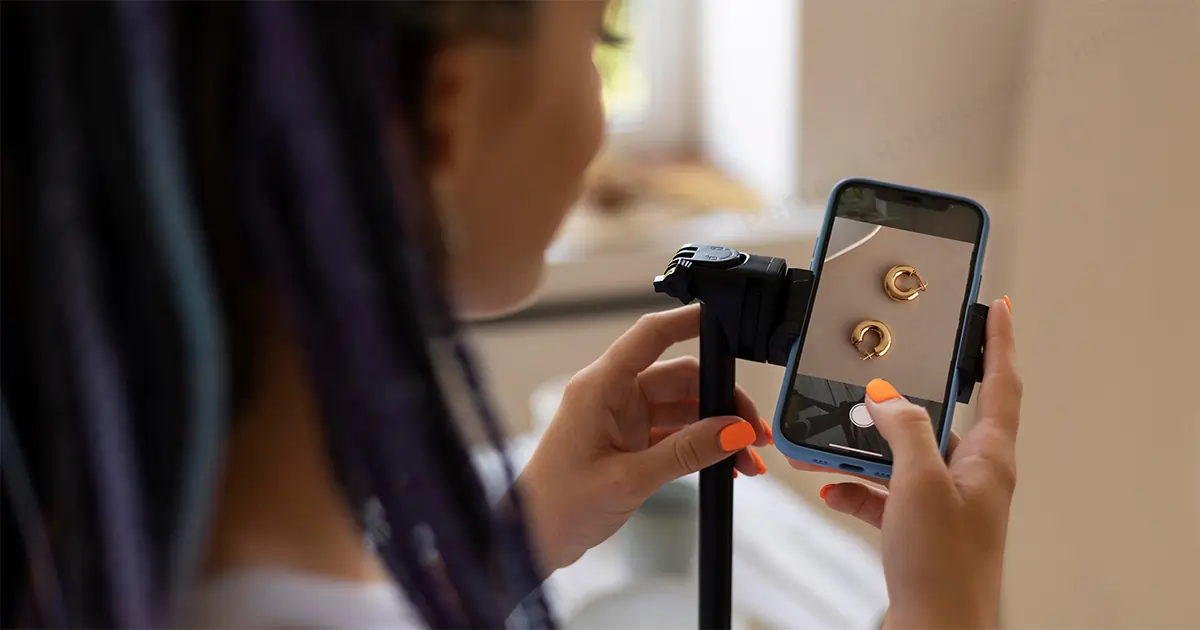
How to Do Earrings Photography at Home with a Phone
Even if you can not afford studio lighting, expensive props, or a Gemstone Lightbox, you can still take amazing earring photos easily at home with some photography tips. It will be cheap, easy, and creative.
- Use natural light for earring photography. Position the table in front of the brightest window.
- Clean the earrings with a microfiber cloth so as to not damage the gemstones and position them.
- Decorate the setting with props that you can find in your house. Visualize the final image. Try different earring photography ideas with props to beautify and tell the purpose of your earrings. For example, you can create amazing shadows with glasses, fake plants, paper cuts, paper birds or flowers, etc.
- Natural lighting is harsh so use a reflector to create a nice soft light and remove enormous shadows. Use a foam board as a reflector. Clip it with a jewelry clamp to stabilize it.
- You need a macro lens to photograph earrings. If your phone has the macro lens options, select it. However, if it does not have it, you can also buy the extra lens from eBay to connect to the camera of your phone.
- So, set your phone to microlens and place the phone on the tripod. Set ISO to 100 and shutter speed to 1/125 ( Modify it as you proceed with the shoot).
- Preset your white balance. As you are taking photos in sunlight, it can show different colors of the jewelry. So, to avoid that preset the white balance to make the photo as natural as possible.
- Use a 5 or 10-second timer. Because of the shutter speed, your camera shakes upon clicking on the image. So, set the timer, click, and leave it. It will auto-click a perfectly balanced photo.
- Do post-production afterward and Edit your jewelry photos in Photoshop. Retouch any blemishes, reflections, and lighting issues and make the photo flawless.
Some Helpful Tips For Your Earring Photography
- Be creative with your decoration. Take ideas from Google and Pinterest to take your images to the next level.
- Keep the images consistent with themes. If you are using a white background, use only white background for your website. And if you are using a colorful background, then use those. The audience should not feel distracted upon visiting your website.
- Do not take multiple earring photos in one frame. The customers may get confused thinking about which one to buy. So, one pair should be in one photo not four or five to show variety.
- Do not hesitate to take images. If you need to take 20 images for one earring, take it then choose the best one from there. Take it from different angles.
- Use models if you can. If you can hire a professional model, that’s fine but if you can’t, you can also become the model as well. Customers love to see how the outlook comes after wearing the earrings. It is a great strategy to attract customers.
- Have a place for everyone in your brand. There are all skin color people among us. If you use different skin color models to showcase your jewelry, everyone will feel like you have something for every person.
- Add GIFs. GIFs can bring variety to your images. Tell a story with short GIFs like unwrapping and taking the earrings out from a jewelry box. A model is wearing an earring in their ear. Use your creative ideas to promote your earrings.
- Promote your images in all social media differently. For example, if you use Facebook, wear the earrings, take images in different poses, and give them a real-life visual.
Closure
Taking earring photos is a bit tricky because of their complexity, however, if you can master it, your sales will increase overnight. Take and retouch your images so flawlessly that customers say, “ How I would look with this earring or Oh! This earring is perfect for my party”. Make them feel that they need to buy the earrings.
Lastly, if you are interested in hiring a professional jewelry photographer, read this article to know how much they charge.


