 English
 Arabic
 Danish
 Dutch
Dutch
 Finnish
 French
 German
 Hebrew
 Italian
 Japanese
 Norwegian
 Polish
 Portuguese
 Spanish
 Swedish
 Russian
Furniture Product Photography: Shoot Large Product Perfectly
Furniture photography is challenging because of its shape, size, and designs. They take up a lot of space and moving them around in locations is quite a hard task. At the same time, you need to focus on perfect camera settings and proper lighting to get the details of the furniture.
Though it is a bit tricky, if done right, you can attract many customers to both online and offline stores. So, to boost your furniture sales, read this article now!
6 Ways to Do High-Quality Furniture Product Photography
As furniture is heavy and hard to shoot because of taking large areas, a furniture photographer needs to use some techniques to take images easily and sharply. Here are the methods to take furniture Photos.
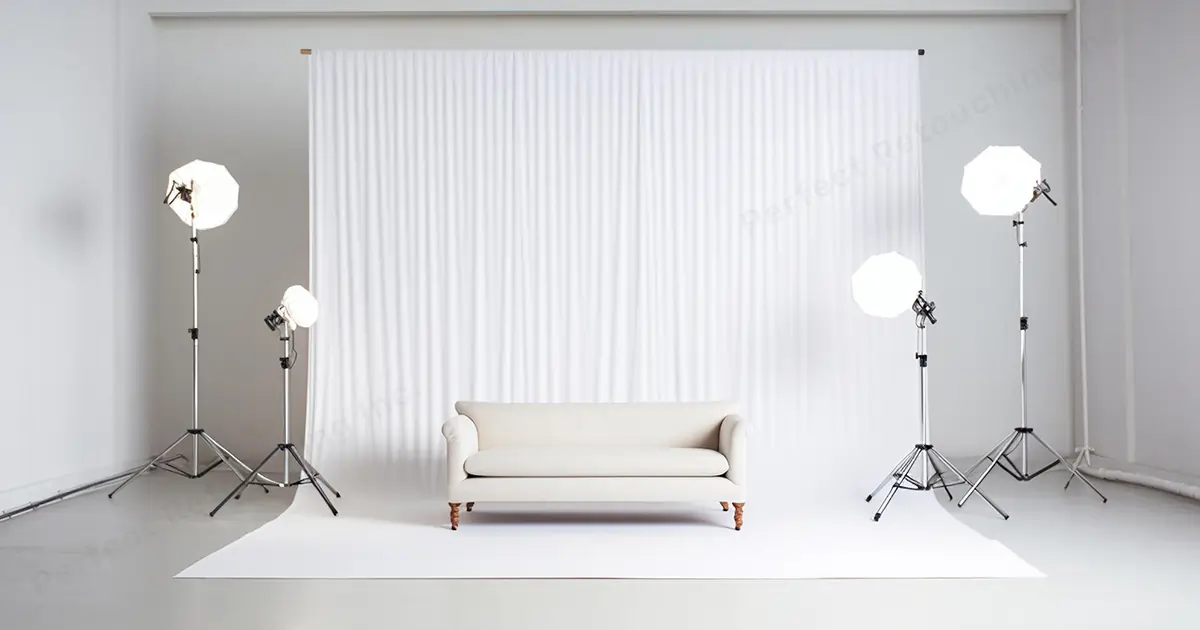
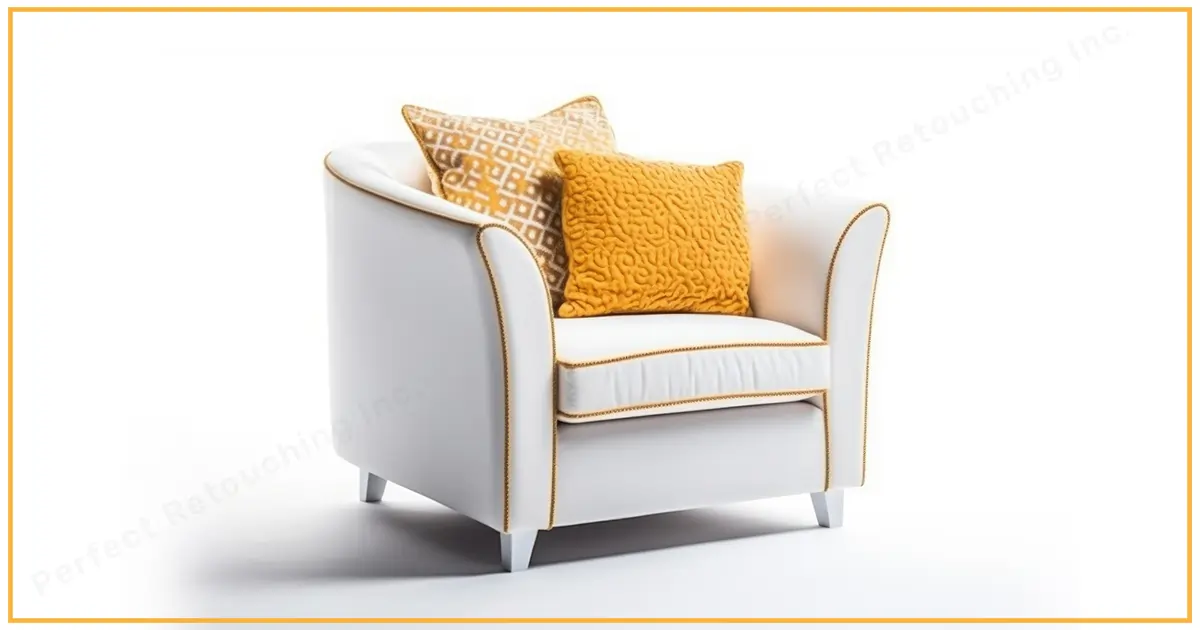
White Background/White Sheet
Choose a large room with white walls. There, place a white stand background kit/Seamless paper which comes with a stand. However, if you have a white color curtain, just place a white paper or cloth on the floor.
Note: Depending on the size of the furniture, the sheet size will vary. The background should cover the surroundings of the product as well.
Clean & Prepare the Furniture
- Carefully place the furniture over the white background. If it is a bed or any other furniture that you need to assemble, assemble them there or you will have a hard time moving them later. While moving, just make sure that the paper/cloth does not get torn.
- Remove the furniture tag or hide it.
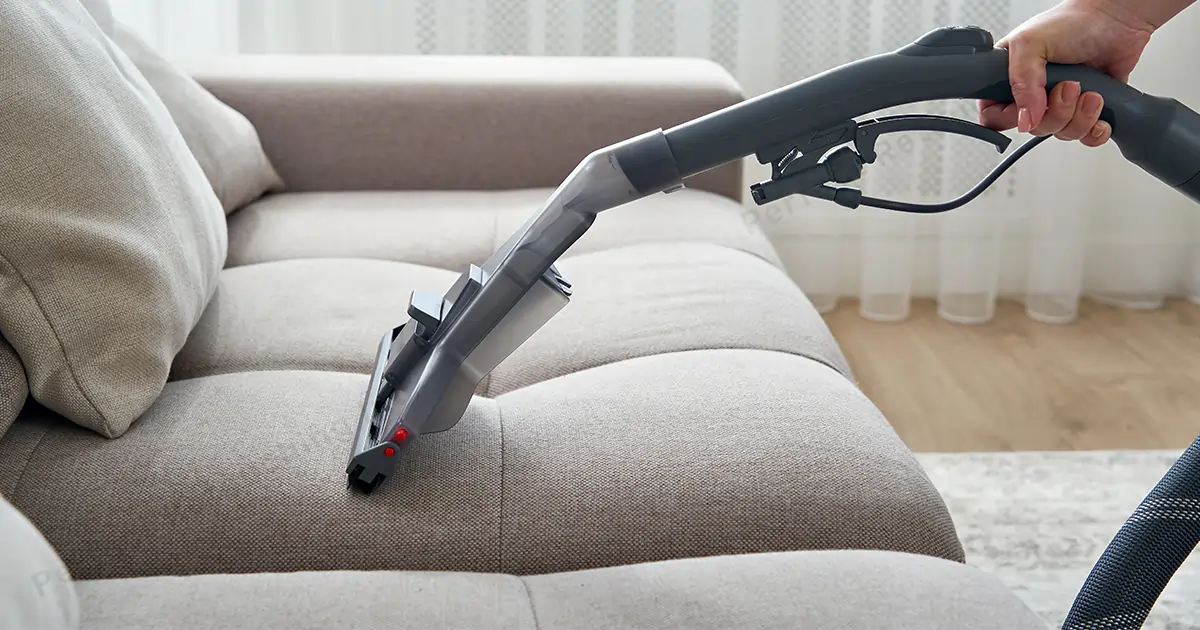
- Clean/polish them. There might be dust and dirt on the furniture so clean the cracks, crevices, and all sides of the furniture thoroughly. For cleaning the fabric, check the care tag if it can be cleaned with water, vacuum, or dry clean. And if it needs to be professionally cleaned, you can vacuum it. But First, brush the fabric then use a vacuum.
- Polish the wood, metal, or plastic properly. Make them spotless.
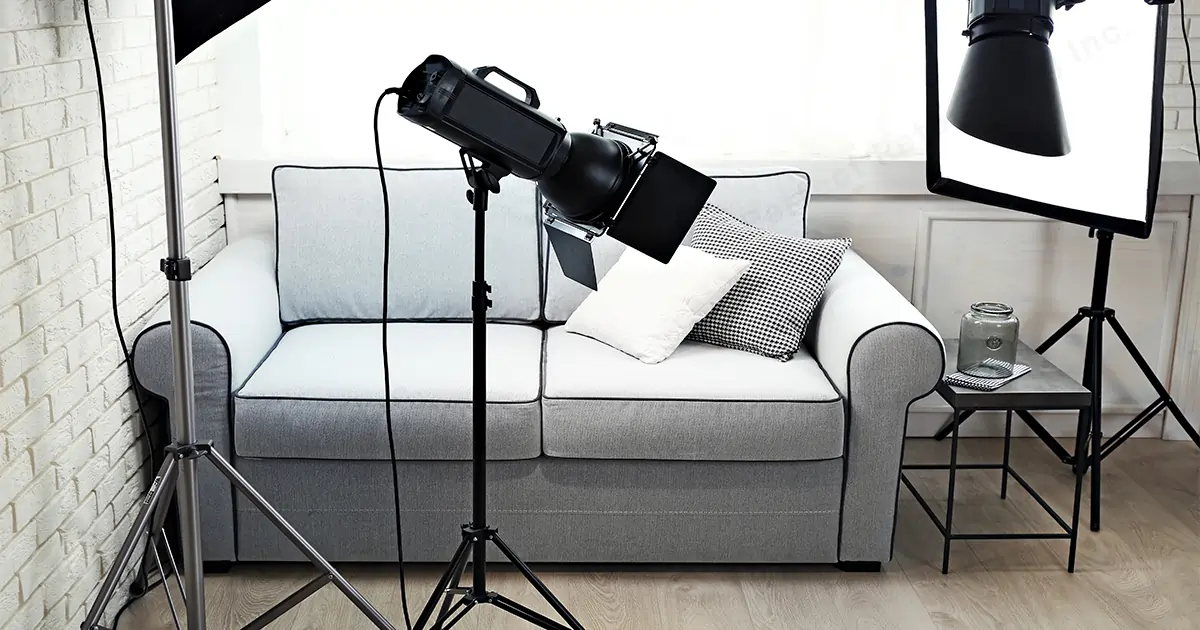
Artificial Lighting
Lighting plays a key role in capturing furniture photos with details. Hence, use artificial lighting to light the product in any way you want and experiment with it till you get the best results.
The behind and underneath of the furniture do not need to be photographed. So place the softboxes surrounding the furniture. Place one big soft overhead light over the furniture to light the furniture from up. Why is it necessary? When you put the light above, it creates a nice, and soft gradient and shape on the furniture.
Then place two more soft boxes on two sides of the furniture. Make sure all sides are properly lit.
There is another method to take high-quality furniture photos with studio lighting. If you have a white ceiling, face the softboxes to the ceiling. It will create a nice reflection over the furniture and area. Also, put more softboxes to light the surrounding furniture.
Do not forget a Reflector. Though furniture are big product, it can also cast harsh shadows. Place the reflector on the opposite side of the lights to get the nice & soft shadows.
Camera Setting, Lens & Tripod
Camera settings are another factor that you need to keep in mind. You can use both DSLR and Mirrorless cameras for furniture product photography. Use a wide-angle lens for photography.
Place the camera on a tripod for image stabilization and now set the settings.
- Focal length- Use a 50mm lens to take nice detailed shots. It will capture the furniture properly while avoiding distracting background.
- ISO- As low as possible like 100 for detailed picture & noise reduction.
- Aperture- F/10-16 to capture everything on focus. Start from F/10 to see what works best for you.
- Shutter Speed- 1/125 to above. Do not go faster than 1/125 to avoid blackness in the photo. If you take photos with fast shutter speed, you will have flash sync issues which will result in getting black photos.
- White Balance- Flash.
- Manual Mode- Use it to change camera settings freely like aperture.
- Raw Mode- Use raw mode to capture as much information as you can. Though image editing will cost some time, it’s worth it because of the raw information.
Note: The camera settings I mentioned here can vary depending on the setting and situation. So experiment with settings as much as you want to get a nice detailed furniture photograph.
Style Your Furniture
If you have already followed the previous steps, here are the styles you can use to make your furniture photographs different from others. Whichever style you follow, take at least 5-6 images of one piece of furniture. If there is a specific design you want to emphasize, take a close-up shot of that.
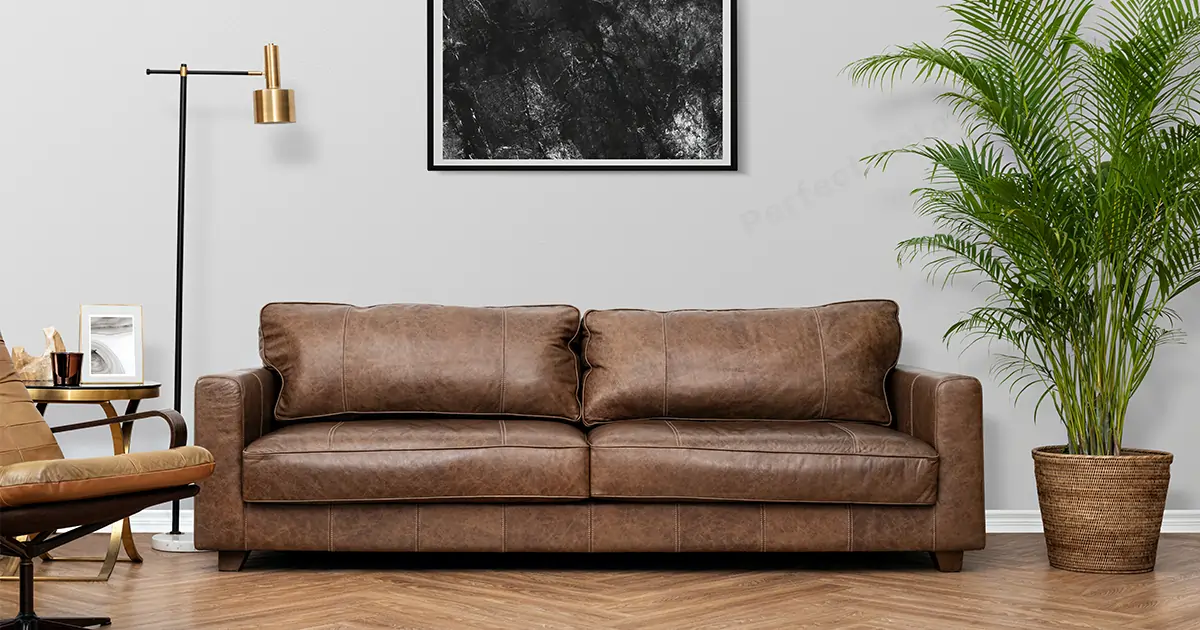
Simple White Background Photo
For E-commerce, many stores prefer simple white background photos with natural shadows. Furniture photography is no different. As you have already set up a white background, take the image following the lighting and camera settings. Take images from different angles and select the best one. Make sure all the features are portrayed perfectly in the image.
Note: Remember to remove the background in post-production if it does not look good.
Negative Space
For furniture product photography, simple is best. So, I highly recommend negative space style photography.
Why? Negative space means you simply place a product in a position and the surroundings are empty. Only the furniture pieces stay in focus. It is a very good way to attract customers as they will be able to simply see the elegance of the furniture in the photo.
Note: You do not particularly need to use a white background for negative space. As long as you can portray the beauty of the furniture simply any background will do.

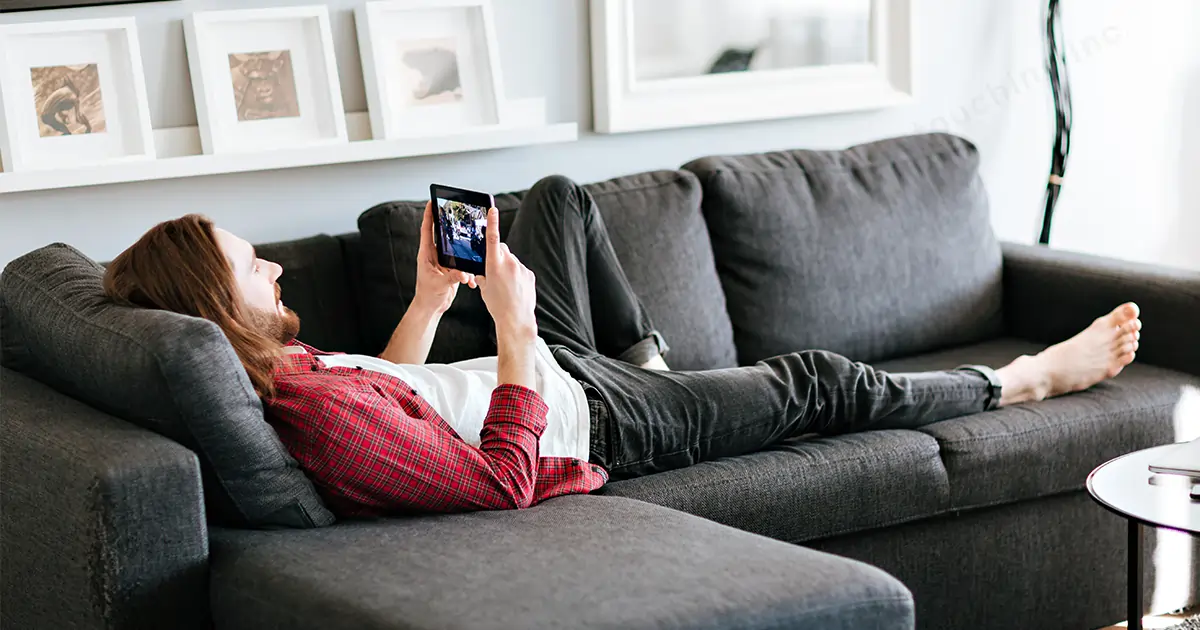
Present a Familiar Scenario
Every piece of furniture’s purpose is different. So, you can create a scenario by using models to show customers that purpose. For example, a girl is sitting in a chair and drinking coffee in the yard. We can understand that the chair can be used for sitting outside the house.
It will be a bit costly but model photography is a good method to help customers visualize the usage of the product. However, do not forget to take multiple-angle photos of the furniture. Make the furniture photo with the model the feature photo and take single furniture images to show the designs clearly.
Note: You can also use natural lighting to give a natural touch to the audience.
Deliver with Final Touch
Furniture pictures may seem perfect but they need product photo retouching before being uploaded on the platforms.
- Provide a realistic shape. If the edges look uneven and the shape looks different in any place, liquefy it. However, do not over liquify it that the size becomes unrecognizable from the main product.
- Make the colors even. Because of studio lighting and camera settings, the color may change in some places. So check for real color, clone the colors, and retouch it based on that. Keep in mind, that the image has to represent the actual piece.
- Dust, dirt, and distracting elements. Check-in Photoshop thoroughly for any flaws and retouch them. If you have used too many props and it is distracting the customer’s attention from the main product, remove them.
- Recolor the furniture. Taking furniture photos is time-consuming. So, if you have the same design furniture in different colors. Just take one furniture piece photo and recolor it in Photoshop.
- Make highlights and shadows realistic. Highlight the features properly and remove any harsh shadows to provide a realistic feeling to the customers.
- Add a description of the furniture. The customer may not understand everything from the photo. And as an online store seller, you need to present as much detail as possible. Hence, if you can, on one side of the image write important information like size, wood/metal material, etc. If you can’t add that in the description.
How to Sell Second-Hand Furniture
If you want to sell second-hand furniture easily without expensive studio lighting, follow these steps.
- Clean the furniture. If it has marks or damages, do not hide them. Let the customer have as accurate a view as possible.
- If you have a white wall in the house, place the furniture there and put a white sheet/board beside the furniture. The white sheet will work as a reflector.
- Arrange a 40/50 pound speedlight. As Speedlight lighting is harsh instead of directly pointing it toward the furniture, point it toward a white sheet/cloth/board to create a soft light and shadow.
- Or you can take the furniture images in natural lighting. When the room is filled with sunlight, place the furniture with a reflector beside it to reduce harsh shadows.
- Do not send raw images. Check for color correction, harsh shadows, and any flaws the picture may have. Make the furniture attractive with retouching.
- Present with real information. In the description, write accurate information such as how many days you have used it, and the damages including a care tag.
Note: Customers do not expect perfection when they look for second-hand furniture. So, without worry provide as much information as you can to convince a customer.
Final Verdict
I said it before and I will say it again, the hardest thing about furniture product photography is its size and space. However, if you make a plan and take notes of your methods, you can take furniture photographs over and over. So, capture the photos so perfectly that the customers click the purchase button immediately to give their places a new look.
Also, if you are interested in Hat Product Photography, check out this article to take flawless hat photos.


