 English
 Arabic
 Danish
 Dutch
Dutch
 Finnish
 French
 German
 Hebrew
 Italian
 Japanese
 Norwegian
 Polish
 Portuguese
 Spanish
 Swedish
 Russian
How to Do Adorable Newborn Frog Pose Professionally
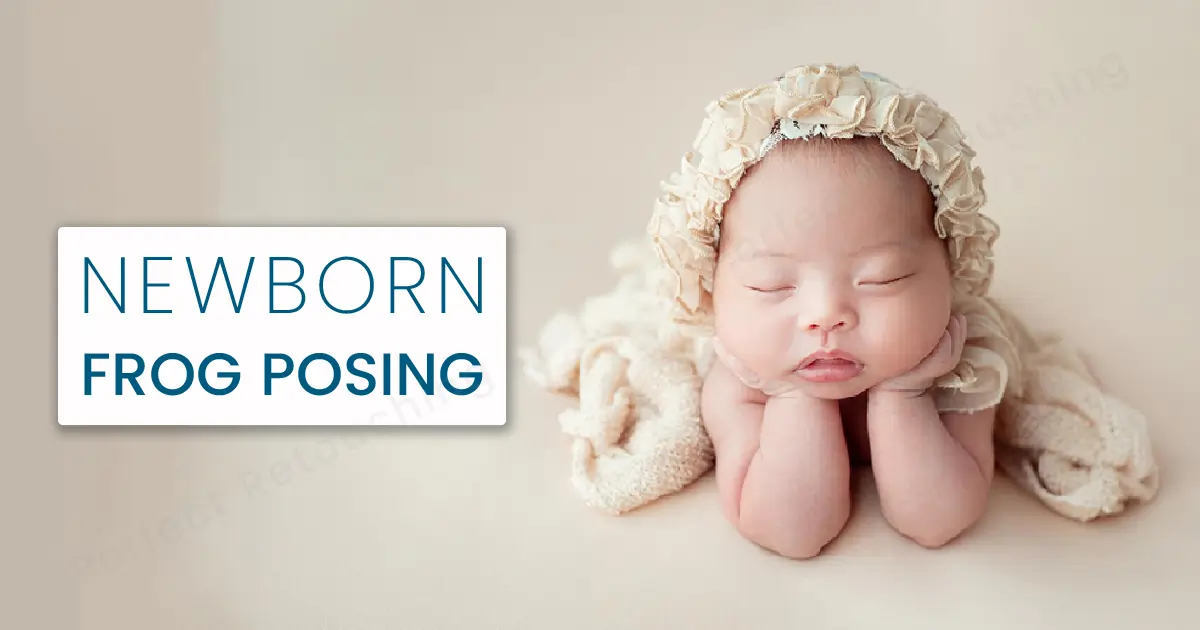
Newborn froggy pose photos are adorable but need to be taken with the utmost care. This pose constitutes a baby’s hand supporting his/her head. As they can not support themselves yet, any wrong movement during the photo shoot can harm the baby badly.
Therefore, you need to take extra preparation for photographing a newborn with this pose. So, we have created a complete guide on how to safely do a newborn frog pose and capture precious pictures for memories.
The Process of Doing Newborn Frog Pose
Though photographing newborns & twin newborns is a lengthy process, it is fun. At first, you may have a hard time settling the baby and taking the photos but once you get used to the process, you will be able to take images more relaxed. So, here’s how I do a newborn session with the froggy pose.
Prepare the Setting and Equipment
These are the equipment you need for newborn frog pose shoots.
Camera
For the camera, you can use both DSLR and mirrorless. It does not have to be the most updated camera. Any camera that you can buy within your budget will do fine for capturing newborn photos.
Lenses
Use a 35/50/100mm lens for newborn photography. However, if you want to capture every little detail of the baby, use a 100mm macro lens.
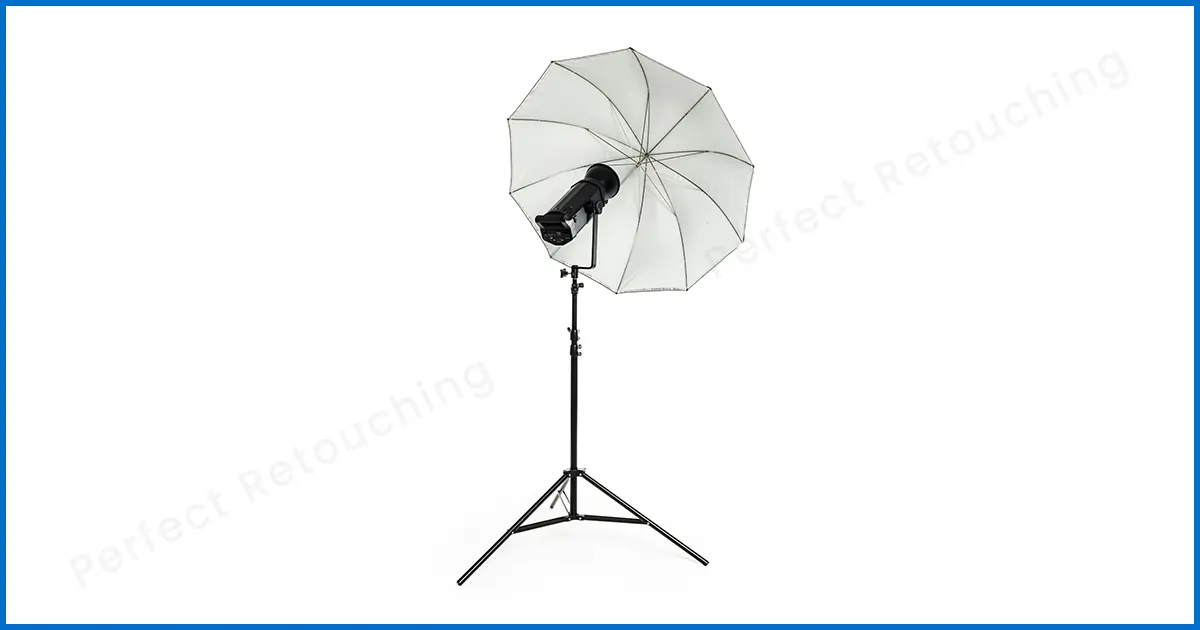
Window Lighting or Studio Lighting
You can take froggy photos in both studio lighting and natural lighting. If you choose to do the photoshoot in natural lighting, place the reflector on the opposite side to reduce the harsh shadow. On the other hand, if you want to shoot in studio lighting, use softbox/umbrella softbox to create a softer shadow.
Umbrella softbox/Softbox
For newborn photoshoots, I recommend an umbrella softbox because it creates a softer feel in the posing area and also, softens the shadows. However, you can use normal softboxes too.
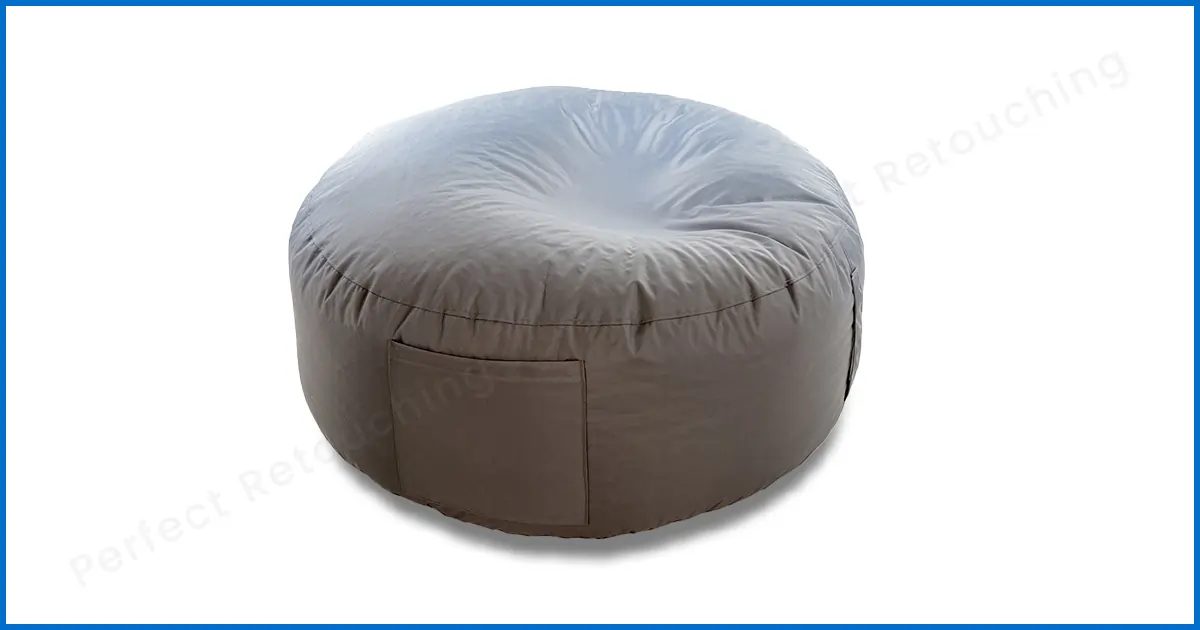
Bean Bag, Clamps & Bean Bag Stand
Bean bags are soft and comfortable. You can use it for newborn photography. Put some blanket or fabric over it. Position the bean bag stand behind the bean bag and clip the fabrics with the clamps. The fabrics will work as a reflector.
Note: you can use any color beanbag for the photoshoot. As you will be putting a blanket/fabric over the beanbag, the color will get hidden.
Pee Pads & Heat Pads
Put some pee pads under each layer of the beanbag blankets so that if the baby pees or poops during the photo shoot, you will not have to change the blankets immediately. You will still be able to reuse the blankets for later.
Also, place one or two heat pads under the blanket to keep the posing area warm.
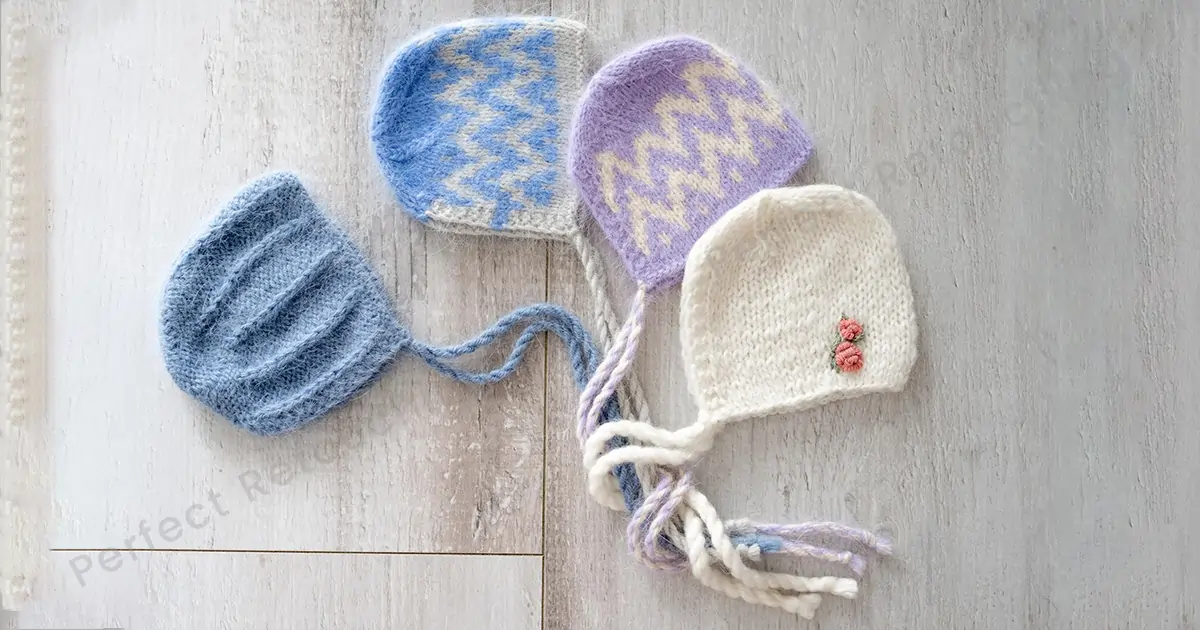
Headbands, Toys, Cute Hats, and Bonnets
You need to use cute props for the newborn photo shoot. Though simple frog pose pictures look amazing, the props just add some more beauty.
Camera Settings
Use a tripod for a stable newborn image.
- Set the ISO to 100 or 200. Try to keep it as low as possible for a noiseless crisp image.
- Set the Aperture to F/2.8 to 4. If you are just taking solo newborn photos, take them on F/2.8. It will help you capture every detail sharply. However, if you are taking a family portrait, set it to F/4.
- Since the froggy pose requires the baby to support their head with their hands, you need to capture the images as fast as possible. So, a faster shutter speed works better. Set it to 1/160 first and change it as you go forward with the photo shoot if you need to.
- Change the setting to RAW. You may need more time to retouch the raw images, however, you will be able to capture every small detail like lighting, baby’s features and surroundings, etc.
- Set the white balance before the photoshoot. There are many options, check those and select the one that naturalizes your photo. Fixing the white balance beforehand will make your work easier in post-processing.
Ensure baby is properly fed and asleep
After setting the equipment in the posing area, it is time to tend to the baby. Upon arrival, ask the parents if they have fed and burped the baby. If they have not or it has been quite a while, feed them and burp them. Then when they fall asleep, try the froggy position. It works best when the babies are asleep. Do not try this pose, when they are awake.
Take Assistance
You need to hire an assistant to hold the baby in froggie position. They need to hold the baby’s head and wrists carefully to keep the baby safe. If you already have a helping hand, teach them what to do during the photo session. You can also take the assistance of the parents however, teach them first. You need to be very careful with this pose because if anything goes wrong, the baby may get seriously injured.
How to do the Froggy Pose Successfully
First, make sure the baby is in deep sleep.
- Take the baby in your lap.
- Sit the baby on her bum by bringing the legs forward. If the baby awakes or starts making noise, rock them softly and make Shush sounds to calm them. Do not try anything before they fall asleep again.
- When the baby adjusts, put the baby in the beanbag slowly and sit her on her bottom by bending her forward.
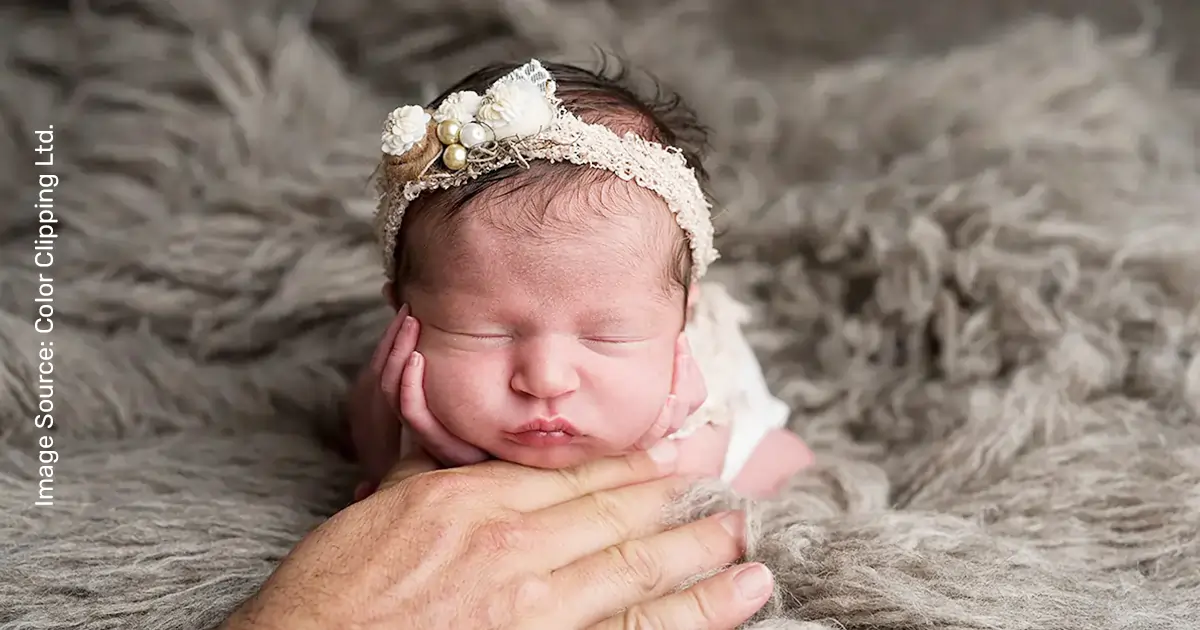
- Lay the baby to one side and place her hand on her chin again, do the same with the other hand. Position two hands on the baby’s chin but make sure the nails are not pinching the cheeks. Loosen the fingers.
- Let her adjust to the position then ask the assistant or parents to hold her. Now, you need to take two perfect shots in the same way and the same position to edit the newborn pictures perfectly and composite them into one later.
In the first image, place your hands on the baby’s wrist and squeeze it gently.
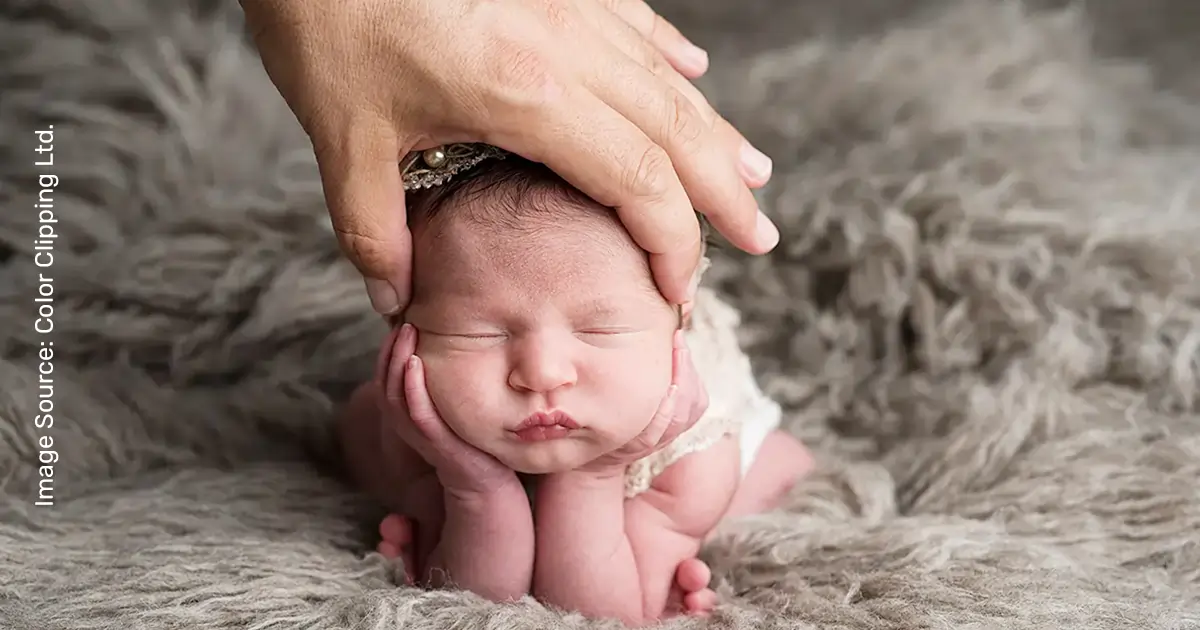
- For the second shot, while your hands are on her wrist, place your other hand on her head and slowly take your hands off her wrist. You just need to support her weight by holding their head. Now, click.
Note: Throughout the photography process, the person can not move or let go of their hands. The newborn safety is the biggest priority.
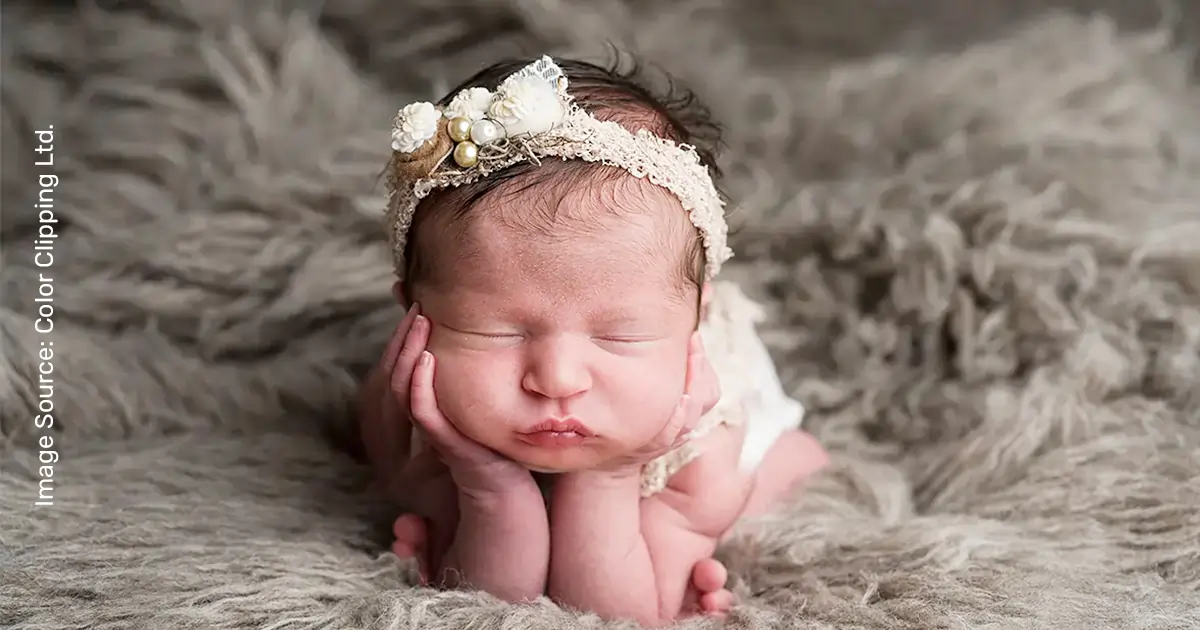
Composite Image Flawlessly
If you have gotten your desired shots, It is time to blend it perfectly.
- Take both images in Photoshop. Select the complete picture where you were holding the baby’s wrist with the Marquee Tool. Copy it and paste it over the other picture.
- Reduce the opacity to 50% to clearly see the elements of both pictures.
- Now, click Ctrl+T on PC or Commund+T on Mac to move the picture freely. If you can move the picture freely, position it on top of her head. You can rotate it or resize it to adjust it with the other picture. Click “Right Symbol” on the control panel to transform it. The images are merged.
Note: Remember to keep copies of both pictures. So, in case the pictures did not blend correctly, you can redo it again. - Again, increase the opacity to 100% percent to see if it was positioned perfectly.
- Now, create a mask. Check in the layers section, if the mask is white, click Ctrl+I or Commund+I to invert it. When the mask color turns black, choose the brush tool with a white color in the foreground and start moving it over the hand on the baby’s head. Edit the hand properly.
- Retouch the background and blend the top area nicely. The color of the background should look the same everywhere.
- Lastly. Do not forget to retouch and soften the skin. If the baby has any bumps on the head, use a liquify tool to shape it. Remove stray hairs and spots, and make the skin glow.
After you are done with the necessary retouching, look at the picture again, if it looks perfect with realistic features of the newborn, send it to the clients.
Take Our Professional Newborn Baby Photo Editing Service
Perfect Retouching provides flawless newborn photo editing services. We composite the froggy pose pictures flawlessly. Also, we retouch the baby's skin and provide a natural tone. Our retouched images look realistic, pleasant, and natural.
You do not have to believe our word, take a free trial from our fashion photo editing services and judge yourself. Providing high-quality images is our biggest priority.
Try Retouching Services For Free and you'll love it!
If you need to check our retouching output, don’t miss the chance of getting quality services.To Wrap Up
The newborn frog pose is one of the most demanded poses parents ask for. However, It is a very hard pose to do with a newborn. Ensure baby’s safety and prepare all the necessary equipment beforehand. You need to be very careful and patient during the photoshoot.
Hopefully, our tutorial on froggy poses was helpful. All the best for your upcoming newborn photoshoot.


