 English
 Arabic
 Danish
 Dutch
Dutch
 Finnish
 French
 German
 Hebrew
 Italian
 Japanese
 Norwegian
 Polish
 Portuguese
 Spanish
 Swedish
 Russian
How to Mask Hair in Photoshop to Bring Out Fantastic Details
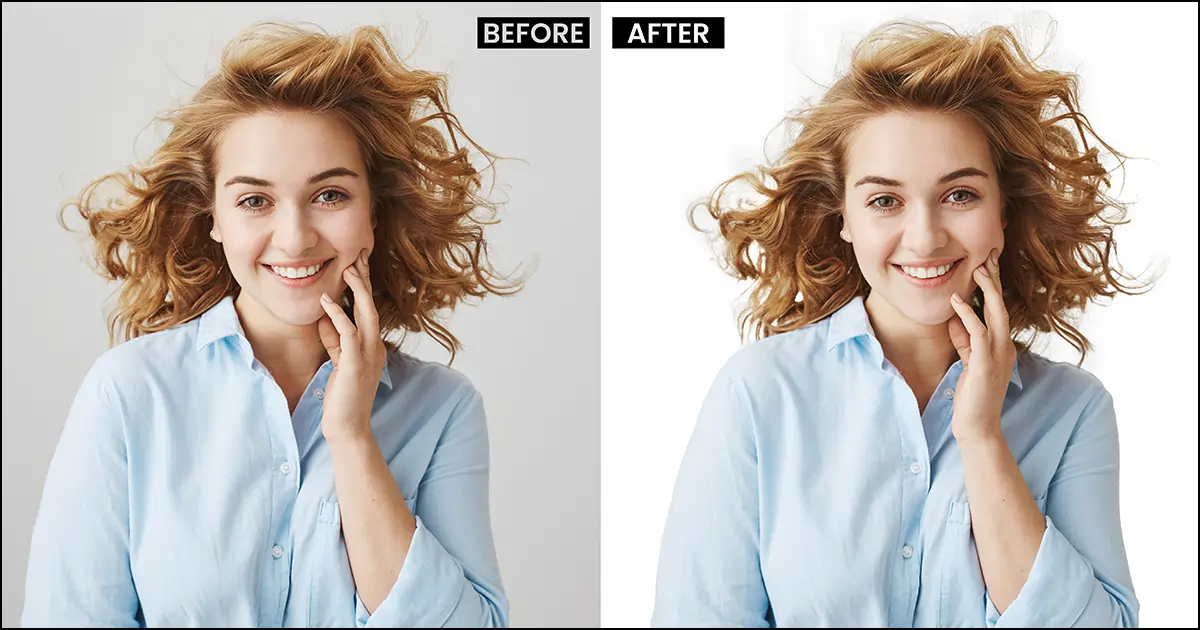
Want to provide your brand images with a more lively and realistic look? You are at the right place. Today I am going to show you an amazing masking hair technique that I use to make my images more lively.
This Photoshop refine hair tutorial is a bit tricky. So, at first, it may take 6-10 minutes to mask hair in an image. However, with practice and a few tries you will be able to master it and apply it within 2-3 minutes. So, my advice would be do not lose your patience as learning how to mask hair in Photoshop will help you forever to enhance your image quality. Let’s not waste any more time, start reading the process and mask hair following it.
Best Way How to Mask Hair in Photoshop
Masking hair in Photoshop is a bit tricky as you need to make many selections to retouch the hair details. However, do not get frightened, you can easily add hair details following these 4-step Photoshop hair tutorials. Let's begin!
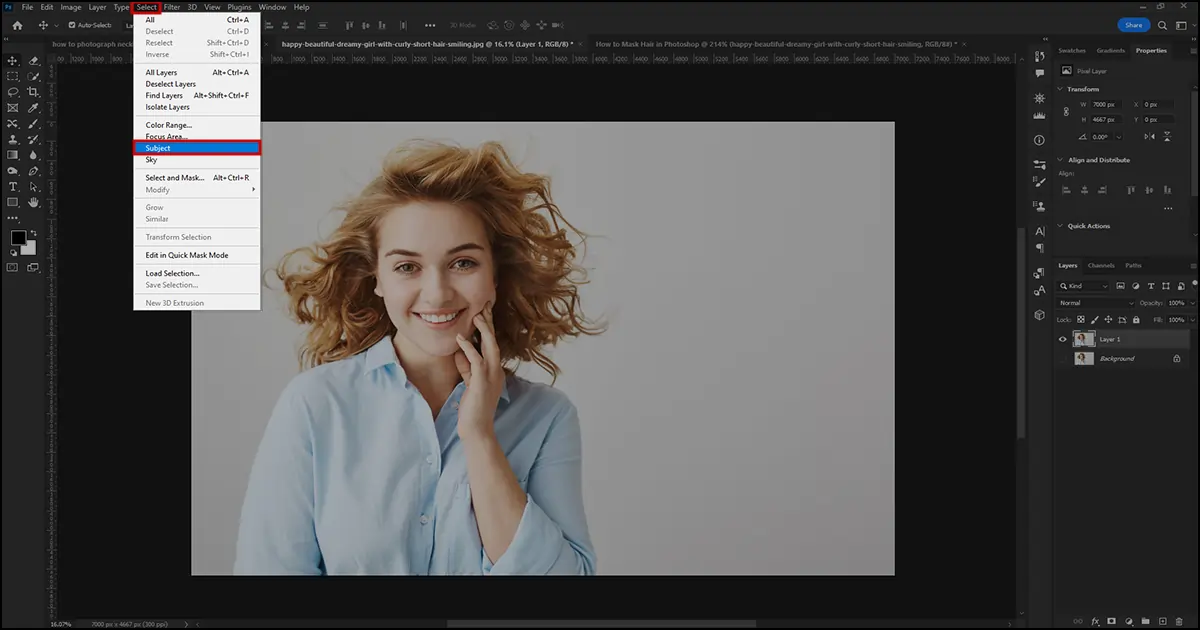
Step 1: Select Subject, Apply Layer Mask and Solid Color
First, you need to select the subject. You may have a question why do you need to select the whole subject when you’ll just refine hair in Photoshop? Selecting a subject will help you not only refine hair but also other parts of the image. So, I think it is a good way to start the masking hair process.
To select the subject- Choose Select>Subject. It will select your subject automatically.
Select layer mask from layers down below the options. It will create a layer mask and change the background into a transparent background.
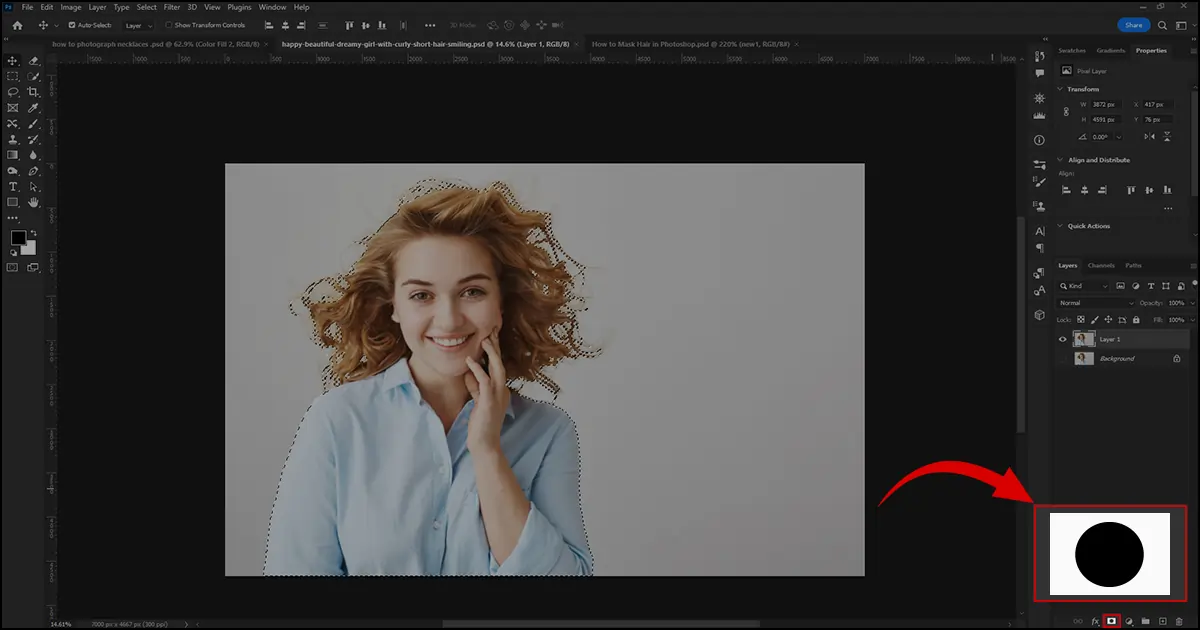
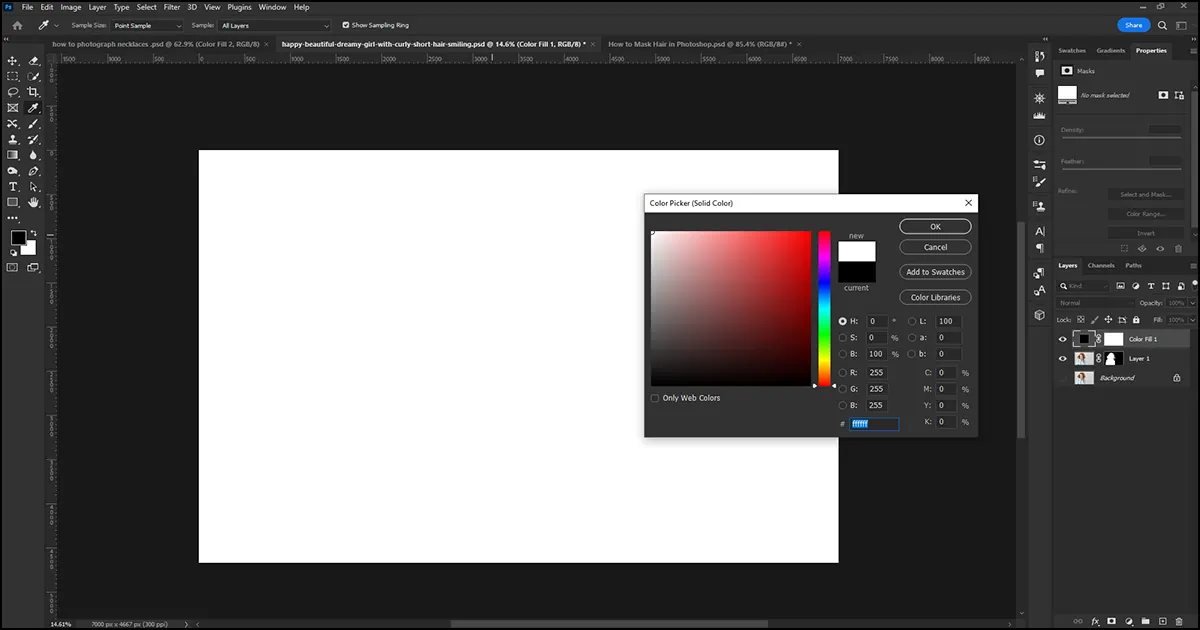
Since the background has turned transparent, you may have a hard time seeing the selection. So, to see the selection clearly, Go to create a new file or adjustment layer. It is right beside the layer mask icon. Click on the icon and select the solid color.
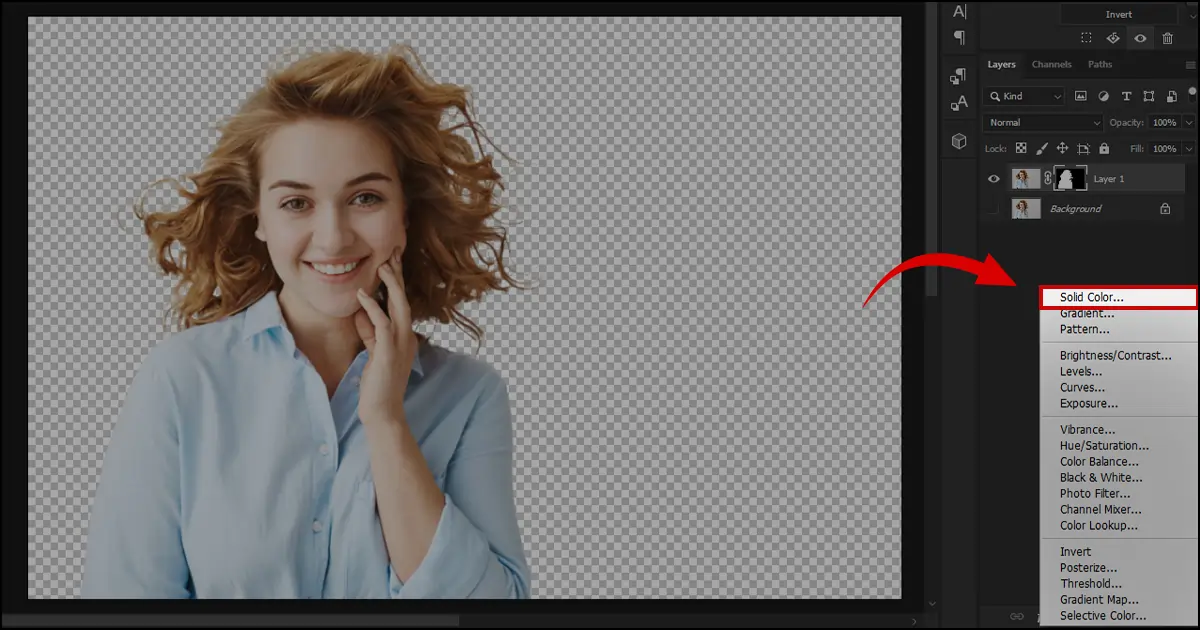
A color pick (Solid Color) dialog box will appear. Choose a white color to see the selection properly. The image has probably turned white, right? Click and drag the color fill layer underneath the masked layer and the subjects will be placed on the color fill layer.
Step 2: Select Channels
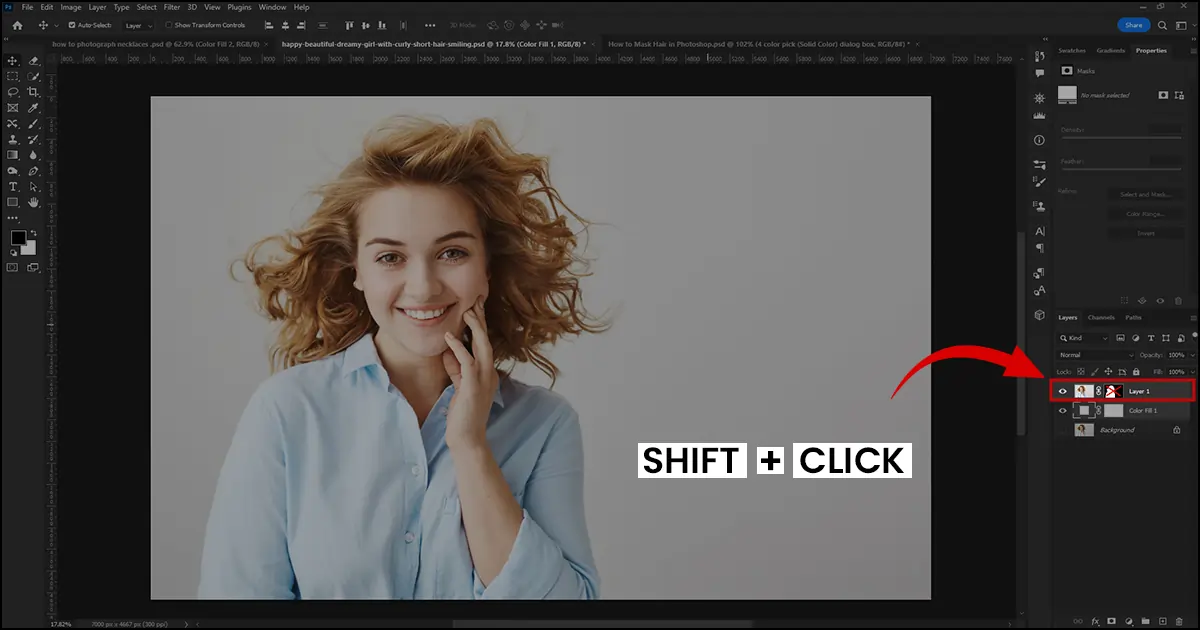
Before selecting Channels, you need to temporarily disable the layer mask to take the image back to its original look.
Click and hold the shift key and click on the layer mask. The layer mask will be disabled temporarily. If a red cross mark appears on the layer mask, it is successfully disabled.
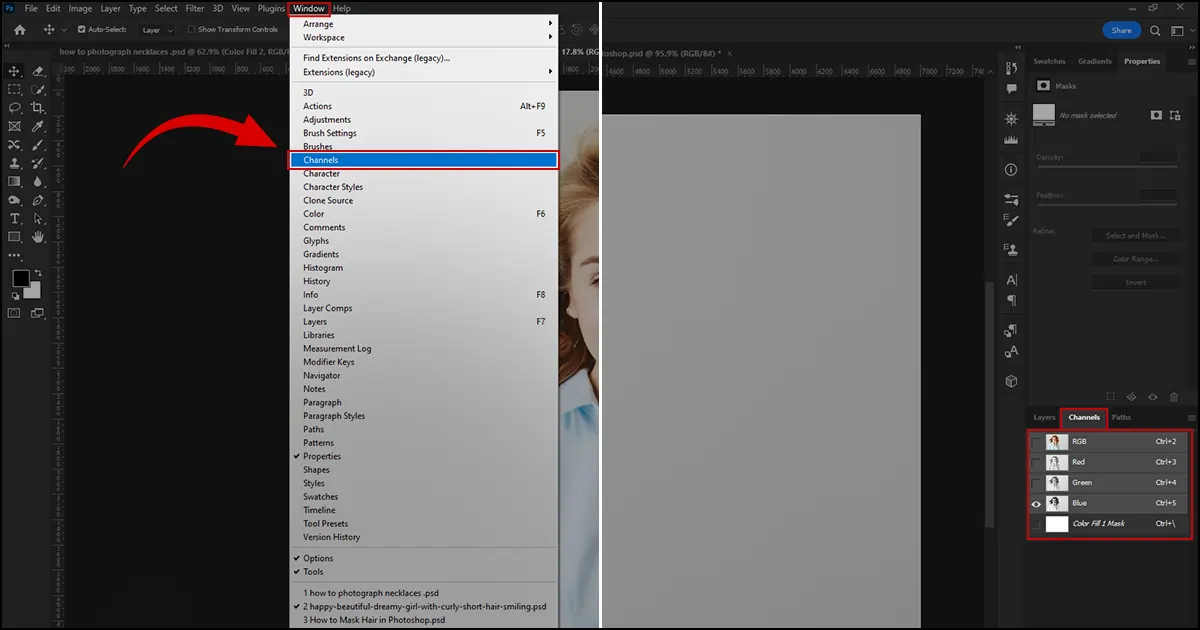
Now, you need to select channels. Go to the Menu Bar>Window>Channels. Some options like red, green, blue, and RGB will appear under Channels options. Or you can directly choose channels from the layers menu. You will find Channels right beside the layers.
From the Channels options, choose the one that most contrasts the subject and the background. It will help you make the hair selection Photoshop easier. If you are confused about which channel you should select, choose the blue channel, it creates the most dark and light contrast in the image.
Note: Choosing the channel will change the image color however, it is just for photo editing accurately.
Step 3: Accurate Subject Selection Using Channels & Invert
After the channel selection, let’s select the subject.
Click and drag the channel to the “create a new layer” option and duplicate the channel layer to refine hair.
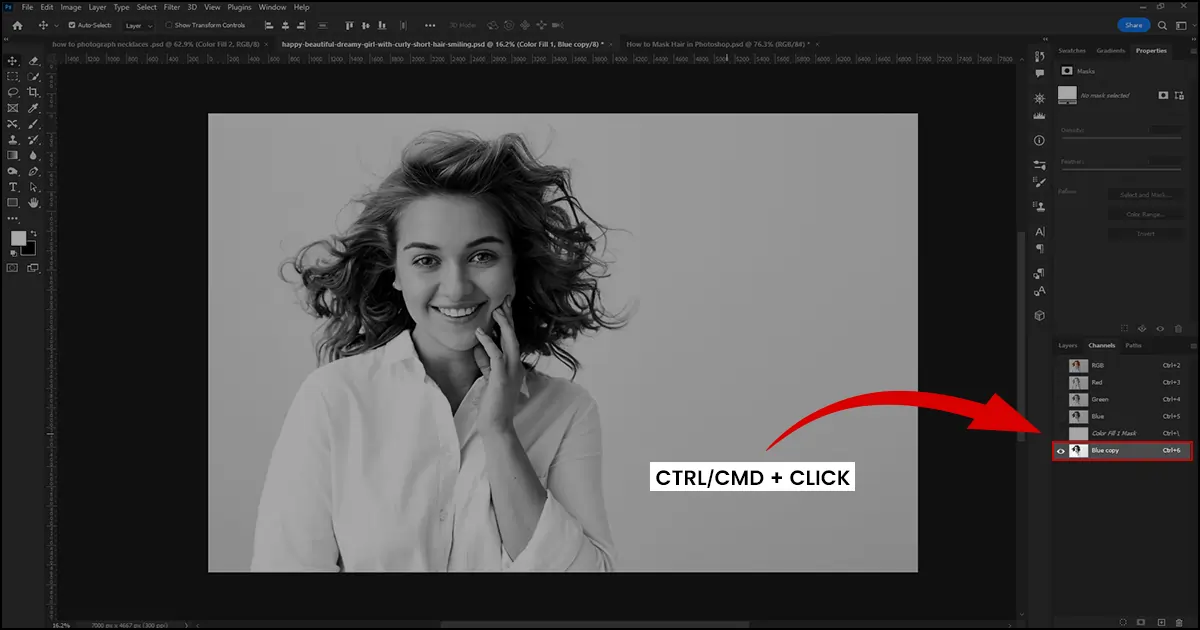
Click Ctrl/Cmd+L for the Level box. Drag the dark arrow to the right to darken the subject and drag the light arrow a little to the left to lighten the background. Make sure the subject is darker. It will increase the contrast and help you select the dark areas accurately. Click “OK”. The image will not look good after this process but it is just for selecting hair in Photoshop properly.

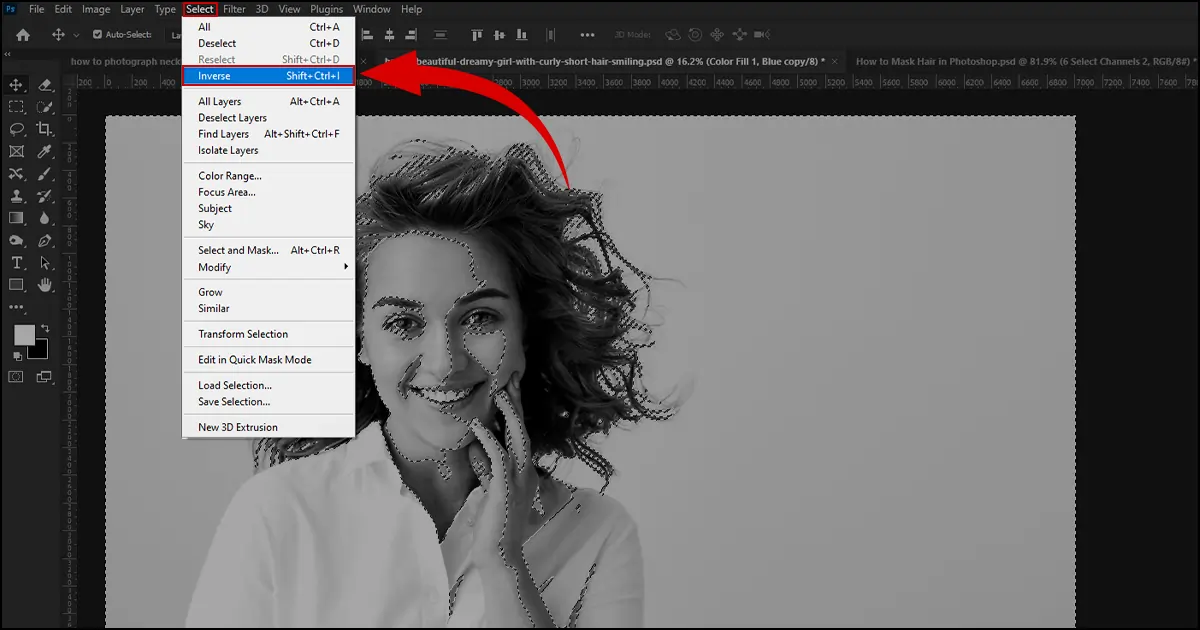
For selection- Ctrl/Cmd+Click on the channel copy image. All the lighter areas will be selected. So, you need to invert the selection to convert it to the darker areas.
To invert the selection- Choose Select>Inverse. The selection will be inverted to the dark areas resulting in selecting hair in Photoshop.
Step 4: Enable the Layer Mask & Paint the Details
It is time for the main part. Let’s do Photoshop mask hair.
- Go to Layers>Click on the layer mask and it will be enabled. The image has turned back to normal, correct? Now, let's mask the model hairs.
- Click Alt/Optn + layer mask and the dots will appear on the selection.
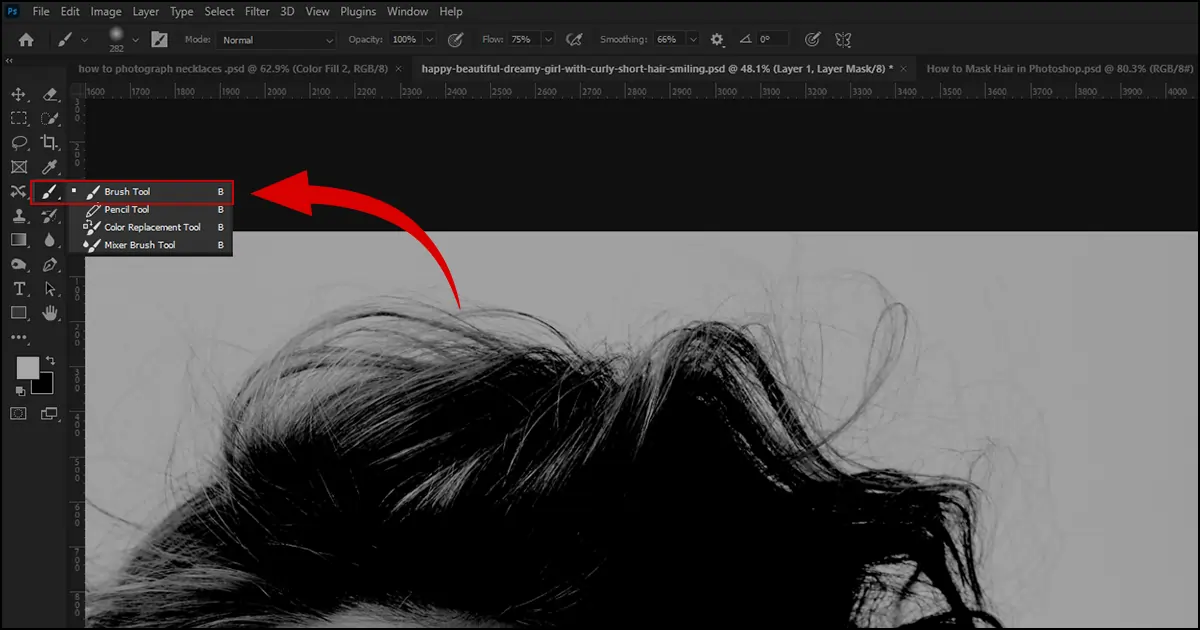
- Choose Brush Tool from the Toolbar. Increase brush size and select a soft round brush from the brush preset picker. You will find the brush preset picker from the tools options.
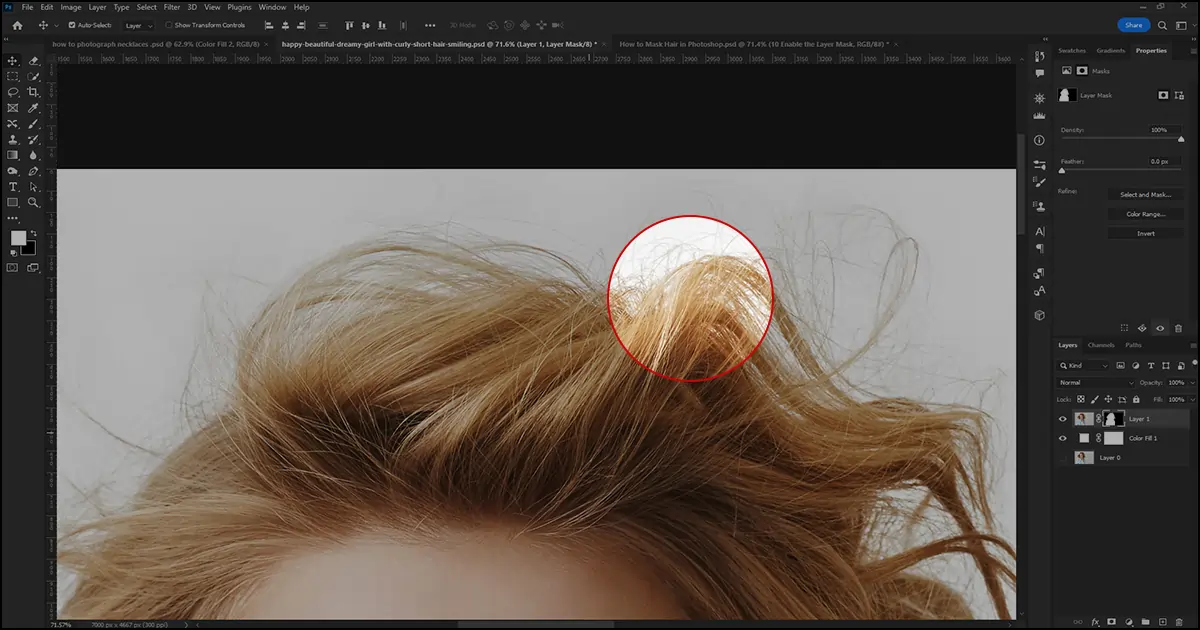
Now, Zoom in on the model’s hair and start painting over the hair. You will see the hairs are getting masked providing a realistic and natural look.
Again, click Alt/Optn+Layer mask to see the results in real time. If you see the masking hair looking fake or faint, paint over the areas and refine hair till it looks natural and detailed. Also, paint over the edges like clothes to smoothen clothes and other objects. It provides a realistic feeling.
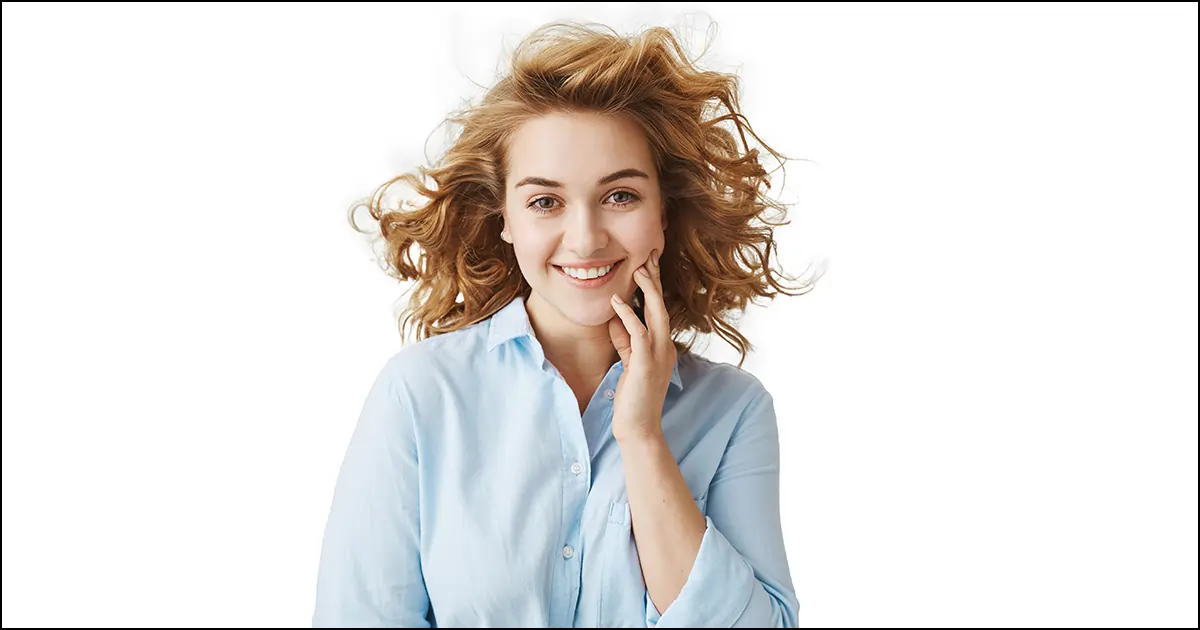
The final image with masking hair in model photo retouching.
Wrapping Up
Were you able to refine hair with my how to mask hair in Photoshop tutorial? Though it may seem hard and tricky at first, with little practice you will be able to master it within no time. So, follow the instructions sequentially and provide a detailed and smooth look to your models that captures the viewer's attention instantly.
Lastly, If you also want to learn how to retouch skin in Photoshop and provide a smooth look to your model, check out this article: How to Retouch Skin in Photoshop.


