 English
 Arabic
 Danish
 Dutch
Dutch
 Finnish
 French
 German
 Hebrew
 Italian
 Japanese
 Norwegian
 Polish
 Portuguese
 Spanish
 Swedish
 Russian
How to Zoom in Photoshop to Edit Photos Flawlessly
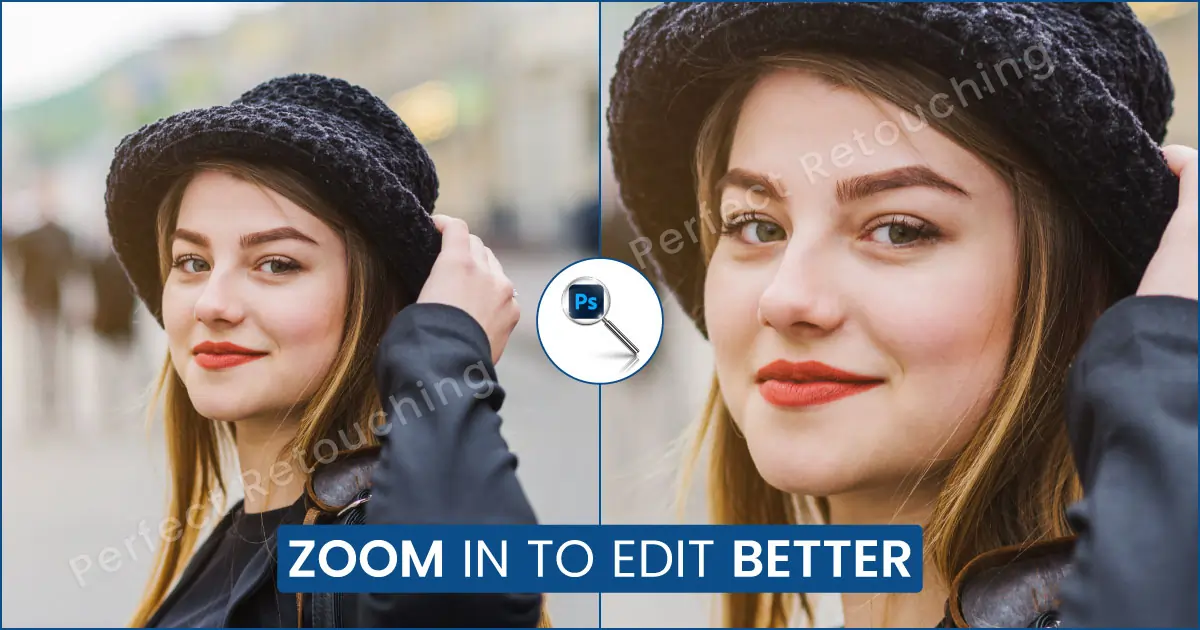
Are you here to learn how to zoom in on Photoshop? We have got you covered. To help you zoom in to specific areas and perfect your artwork, we have created this tutorial with 8 quick zoom-in techniques, as well as image fit screen techniques. Keep reading and utilize these techniques to edit your photos.
8 Ways on How to Zoom In on Photoshop
When you are retouching a photo, you need to zoom in on Photoshop to remove every flaw. These are the zoom-in techniques I use while working. Go through the eight methods and use them to enhance your images.
From the Photoshop Document
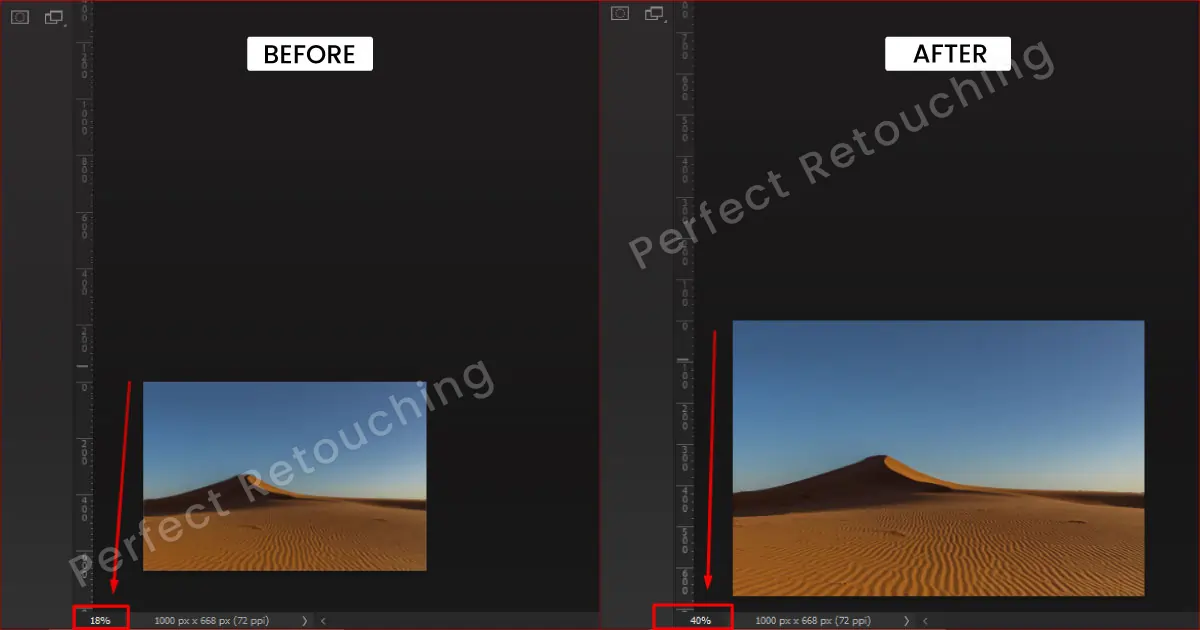
If you know what quantity you need to zoom in Photoshop, use this method. Look at the Photoshop document below. In the left corner, beside doc size, you’ll see a percentage. It is the zoom percentage. Click on it and increase the percentage. For example, If you want to zoom in 50%, 75%, or 90%, write the amount and hit Enter. The image will zoom in to that size.
However, if you want to zoom in on a specific area, do not use this method because you can not freely zoom in on different places in the image.
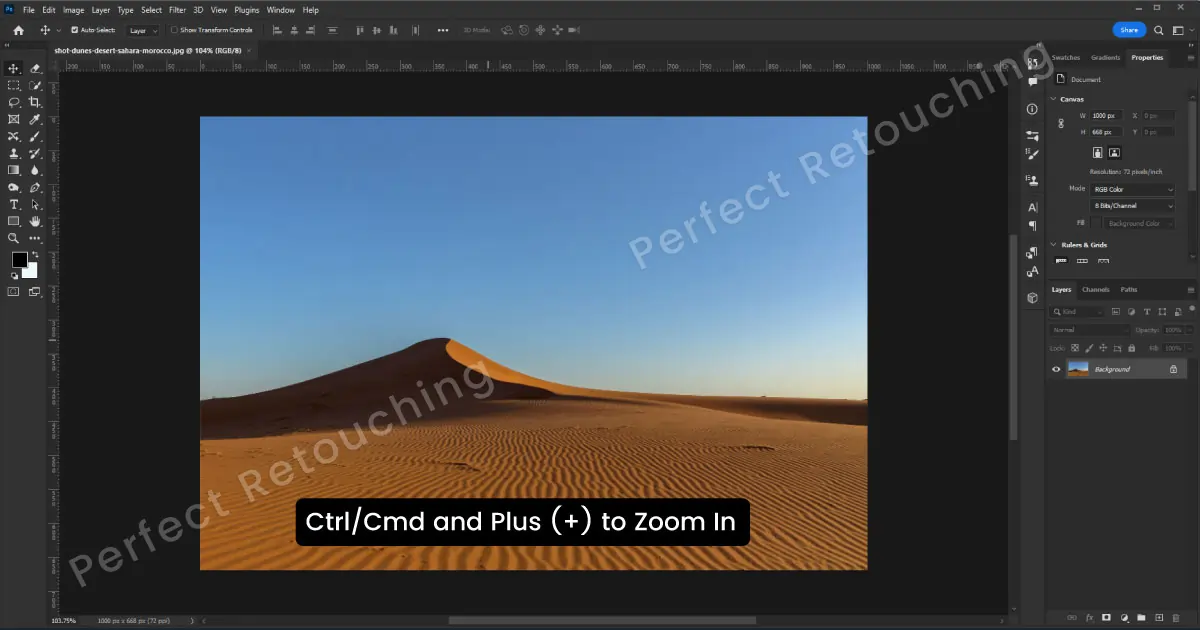
Zoom Shortcut Photoshop
You can also zoom in on Photoshop with keyboard shortcuts. Press and hold Ctrl/Cmd and (+) from the keyboard. The image will automatically zoom in for jewelry photo editing. You can zoom in on different increments like 100%, 200%, and more. You can check the image-specific area by scrolling up and down.
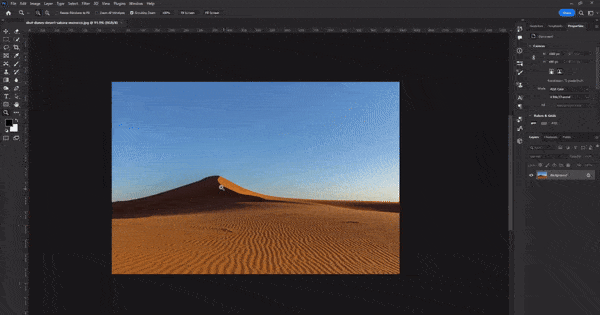
With Zoom Tool and Scrubby Zoom
Select the Zoom tool from the toolbar or press Z. Check mark Scrubby Zoom from the options bar. Click and hold on the image area and it will zoom in to that area. For example, If I want to zoom on Photoshop specific jewelry gem, I take the cursor on the gem and click and hold onto that location and it zooms in without breaking the image quality.
Scrubby Zoom is a handy tool in photo editing basics to quickly zoom in and out in Photoshop. You can click and drag to the right to zoom in and click and drag to the left to zoom out.
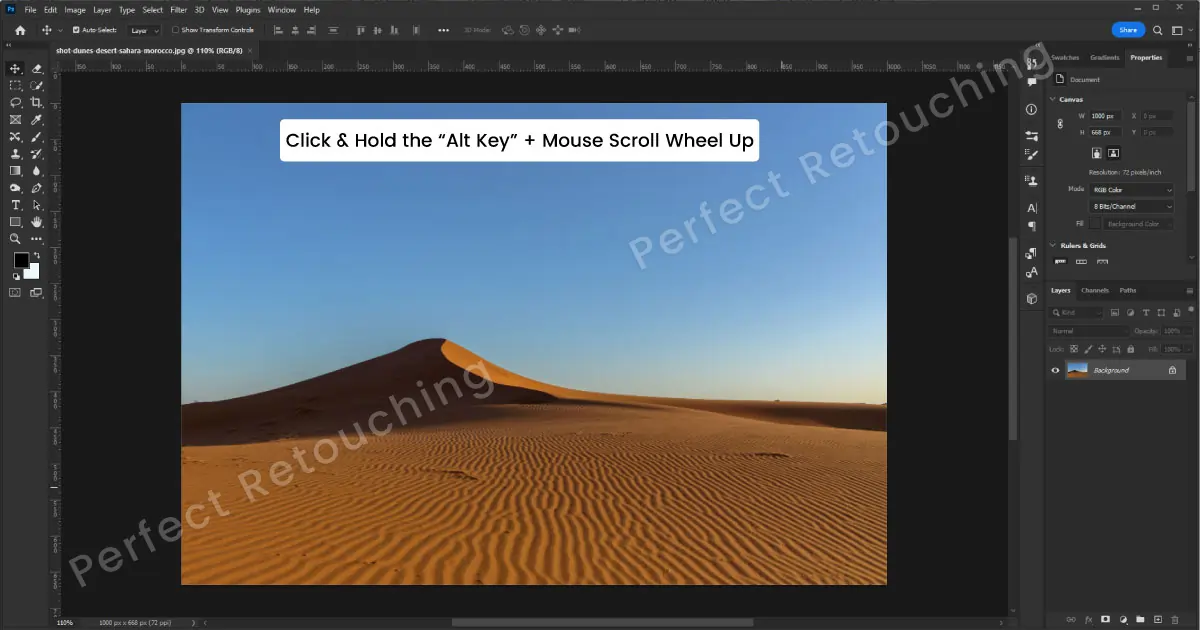
With the Mouse Scroll Wheel
Another amazing method of how to zoom in Photoshop is with a scrolling wheel. It is super easy if you can remember. Click and hold the Alt key and scroll forward to zoom in and scroll backward to zoom out.
If you have a specific area you want to zoom in on, keep the cursor there and click and hold the Alt key and scroll wheel, it will zoom in to that area. It is a good technique as you can zoom in anywhere the mouse cursor is on the screen.
Zoom Options View Menu
Another way to zoom in in Photoshop is from the menu bar. Go to View menu- choose Zoom in- Left click to zoom in on different increments and scroll up and down to check different parts of the image. You can zoom in up to 3200% so when you are done retouching the skin in Photoshop, right-click on the mouse and choose 100%, it will return to its original size.

Bird’s Eye View
If you want to edit a specific part of the image, this technique is for you. With this technique, you can mark a specific area and do product retouching services flawlessly. Here is the process:
- Press and hold “H-key” to temporarily select the Hand tool.
Click and hold the cursor in the image to make the image zoom out to fit into the window and display a rectangle overlay.
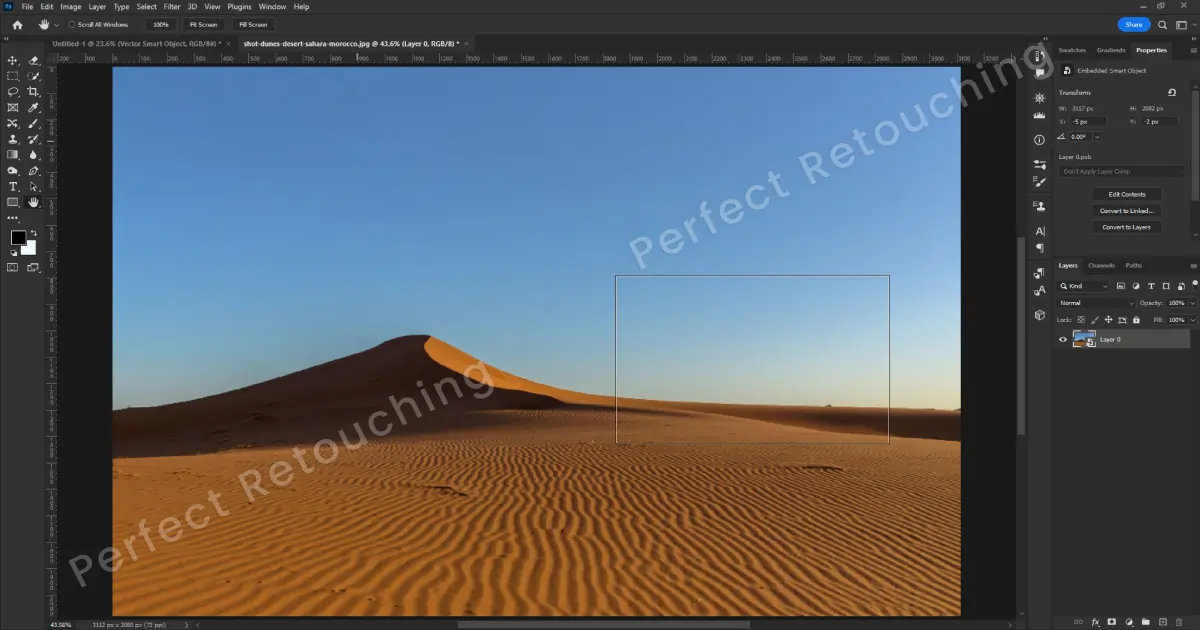
Now, click and drag the rectangle overlay to the area you want to zoom in on Photoshop.

Release the hold on the cursor and it will zoom into that part of the image. Lastly, release the H-key to deselect the hand tool.

Here is the zoomed-in area. Now, you can edit the image however you like. While editing the image do not let go of the “H-Key” or it will get deselected immediately. If you want to hire a professional for photo editing, check out our article on how much photo editing costs and know everything in detail.
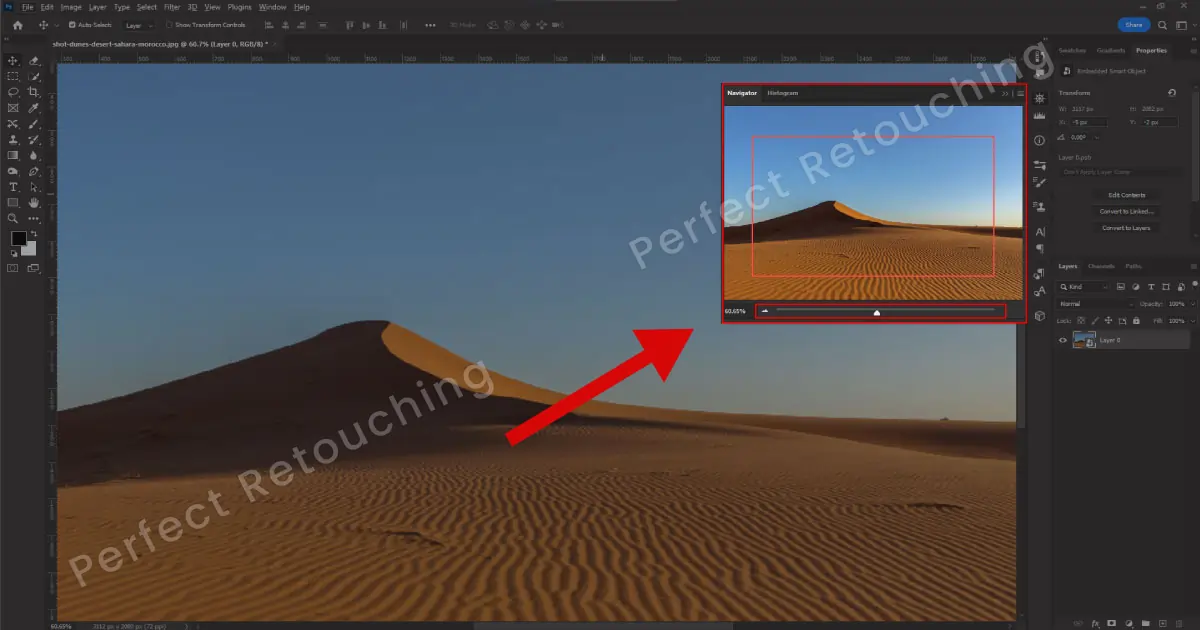
Zoom In with Navigator Tool
With this method, you can zoom in and navigate your image at the same time. Go to Window- Navigator. A navigator box will pop up. You can easily zoom in and zoom out in Photoshop with the mountain slider. If you want to zoom in, move the slider to the right, and if you want to zoom out in Photoshop, move the slider to the left.
You can also zoom in on any part of the image by moving the hand tool in the navigator box or clicking on any place, it will be selected.
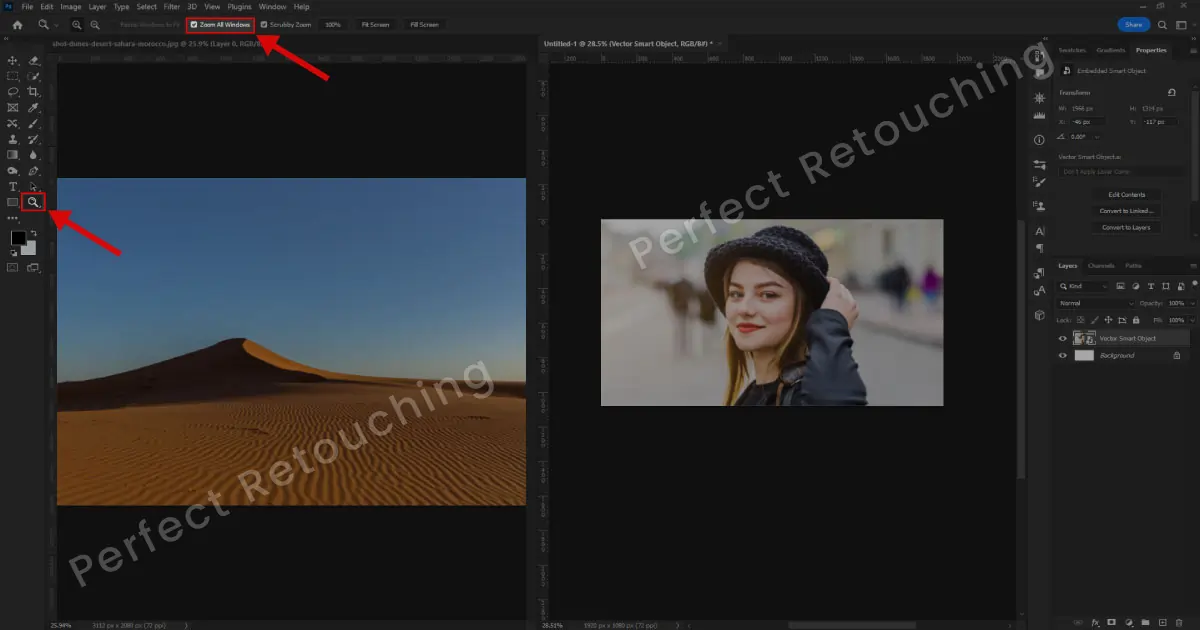
Zoom Multiple Windows at Once
If you are working on multiple images and need to zoom in on all the images at once, use this technique.
Go to Menu Bar- Window- Arrange- 2/3/4 up vertical/horizontal. All the images will be side by side evenly.
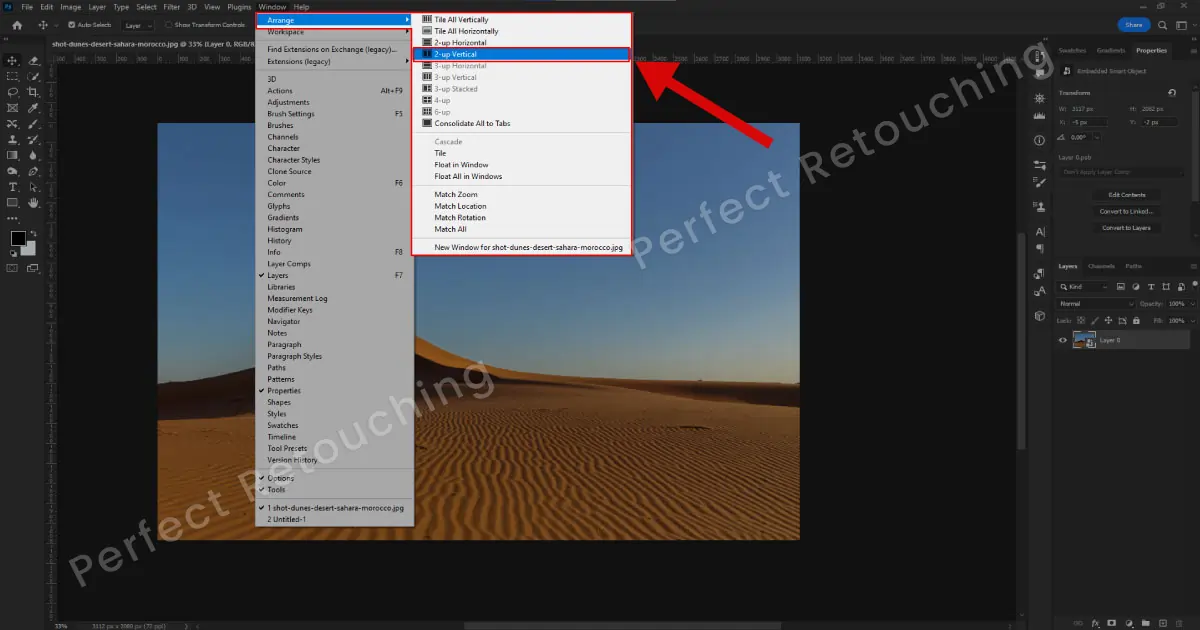
Select the Zoom tool and check mark Zoom All Windows. Left-click to zoom in on Photoshop. You will see all the images have zoomed in the same proportion.
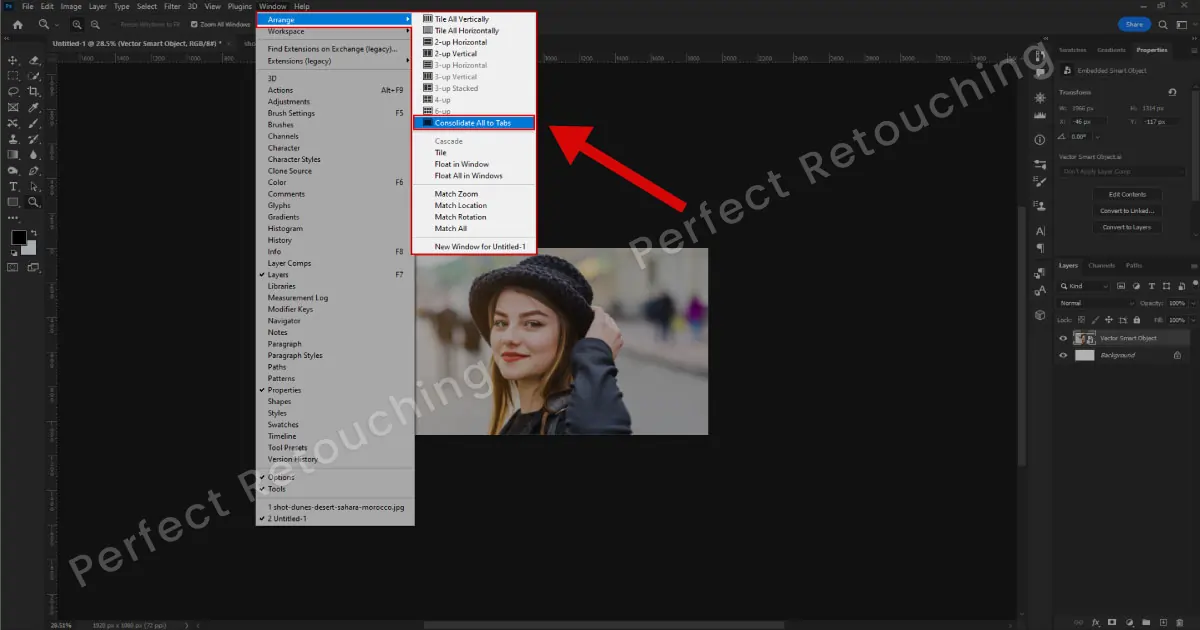
After you are done working on the images, again go to Window- Arrange- Consolidate All the Tabs to make them single tabs again.
You can also Zoom all the images with the Shift key. Deselect Zoom All Windows. Choose the Zoom Tool- Click and hold the Shift key- Choose Zoom In from the options bar at the top and click on the image to zoom in increments. When you are happy with the zoom, leave the shift key.
3 Ways to Fit the Image to the Window
Now that you are done working on the image with zooming in. How to fit the image to the window like before? Here are three easy ways to adjust the image size.
- Keyboard Shortcuts. Click Ctrl/Cmd+0 and the image size will be adjusted to the window.
- From View Menu. Go to the top Menu bar- View- Fit to screen or 100%. The image will fit into the window keeping the quality intact.
- Photoshop Document. Go to the lower-left corner of the Photoshop document- click on the zoom percentage and change it to 100%- click Enter and the image size will be adjusted.
Summing Up
Learning How to Zoom In on Photoshop is very helpful for editing images flawlessly and professionally. It will help you check the details thoroughly and make the necessary edits.
However, if you are busy taking amazing photos and do not have time to retouch the images, take our jewelry photo editing service. Our professional retouchers have years of experience editing images. We ensure all the images are QC-approved and look amazing and flawless. You do not have to believe our words, take our free trial and check the image quality yourself.


