 English
 Arabic
 Danish
 Dutch
Dutch
 Finnish
 French
 German
 Hebrew
 Italian
 Japanese
 Norwegian
 Polish
 Portuguese
 Spanish
 Swedish
 Russian
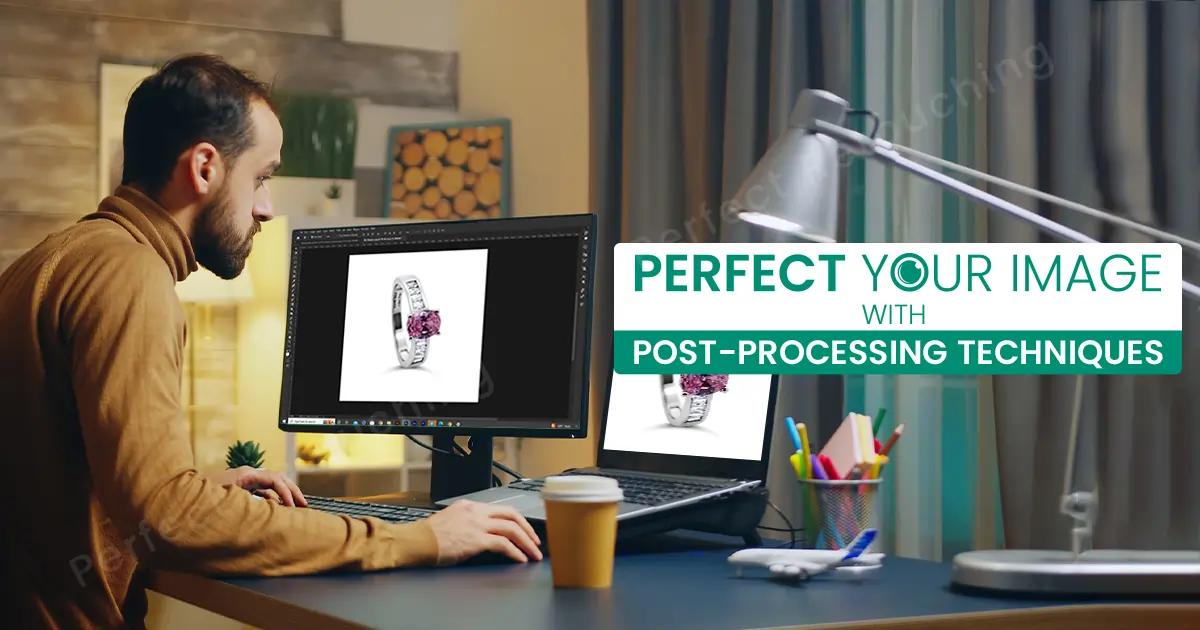
How to Do Post-Processing Photography in 11 Steps
What is post-processing in photography? It is an editing procedure to enhance raw pictures. After you capture the image, you take the raw file to editing programs like Photoshop and Lightroom and polish their flaws. Post-photo editing includes everything from color correction to sharpening the image.
So, if you have clicked here to learn how to do post-processing photography to edit your product/service images professionally, you are at the right place. In this article, you will learn how to make high-quality images using Photoshop. Without further ado, let's start!
Importance of Photography Post-Processing
21st-century cameras are amazing. You can set settings easily and take pictures all day long. Still, you need to do photo post-processing. Why? Here are the reasons:
- Camera limitations. No matter how updated your camera is, you can only control ISO, aperture, and shutter speed. It means you can only adjust brightness, depth of field, and motion. So, there might be more problems in the captured image. This is why you need to check the image thoroughly and remove every flaw the image may have.
- Edit Imperfections in Images. While you can control ISO, Aperture, and Shutter Speed to some extent, many more flaws can be captured in the photography process such as blemishes, harsh shadows, unwanted objects, etc. So, you can edit these flaws in photo post-processing and give your image a refined look.
- Take your images to the next level. Photo post-processing tools like Photoshop & Lightroom enhance your photograph quality. By fixing shadows, lighting, brightness, saturation, sharpness, and editing other flaws, you can increase image quality. Also, with your editing style, vision, and creative touch, you can create unique images and stand out.
- Help you achieve your vision in photographs. Every photographer has a vision while they capture an image. Suppose you want to capture a dreamy look of a girl sitting beside the beach. You can guide the model to pose but you can not control the weather, lighting, waves, etc. So, how do you get the desired image you envisioned? with post-production photo editing such as by editing the sky, you can create a golden hue effect in the image and also do other edits to get the expected results.
- Improve your photography skills. If you learn photo post-production, you will be able to take better photos. You will understand which angle is better for photography, the lighting, the setting, and the prop usage. All Together learning image post-production will help you master editing techniques and understand different photography angles.
11 Steps to Follow in Post-Processing Photography
In this photography post-processing tutorial, you will learn how to edit pictures like a pro using Photoshop. We will go from changing the image rotation to adding a watermark to your images in 11 steps. Before we get into the process, take the image to Photoshop and duplicate a layer. Always work on the copied layer to keep the raw file intact.
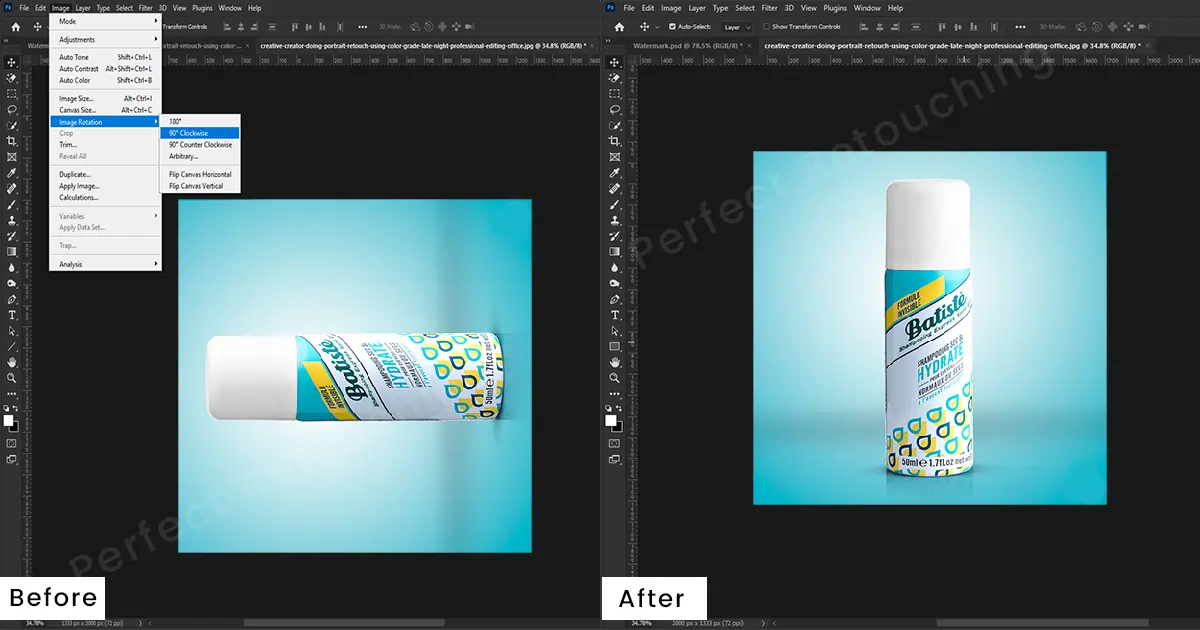
Change Image Rotation
Does it ever happen that you took the picture vertically but when you placed it in Photoshop, it automatically rotated horizontally? Well, it happens to me sometimes. So, if it also happens to you, continue reading the process to make your image straight.
From Menubar, select Image>Image Rotation. In the options, there are 180°, 90° Clockwise, and 90° Counter Clockwise. Choose “90° Counter Clockwise” to rotate it vertically. You can also try other options to see how your image rotation changes.
Correct the Camera Angle
The camera angle has a great influence on showing the main subject. For example, in low-angle photography, you can make your subject appear larger giving them a sense of power. However, any way you capture the image, it needs to look pleasing in the viewer's eyes. So, if your camera angle does not look straight from the viewer's perspective, fix it.
Go to Menubar and select Filter>Camera Raw Filter(Shift+Ctrl+A). From the appeared section, choose Geometry. Click on the drop-down of the Geometry tab and select the guided icon. Go to the image and draw 2 horizontal and 2 vertical lines over the place you want to straighten. Click “OK”.
Now, you may have noticed white areas have appeared because of straightening. Let’s fix it. Select the Polygonal lasso tool from the toolbar. Hold Shift and mark the white areas. Click right>Fill. A dialog box will appear. Choose content-aware from contents and click OK. Your image is corrected.

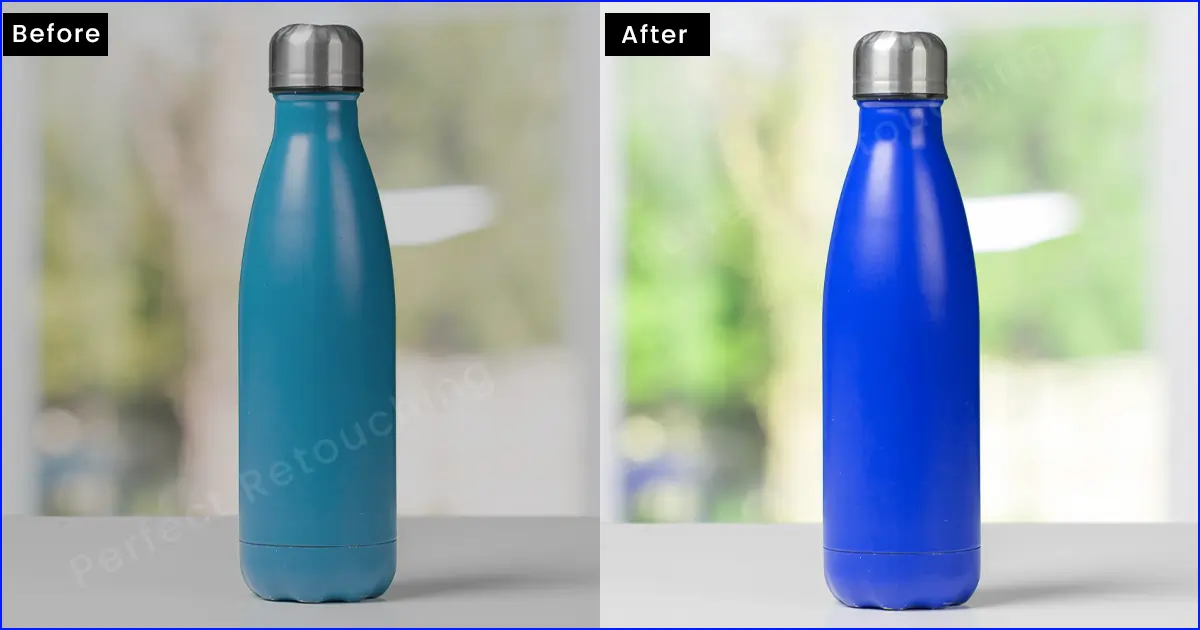
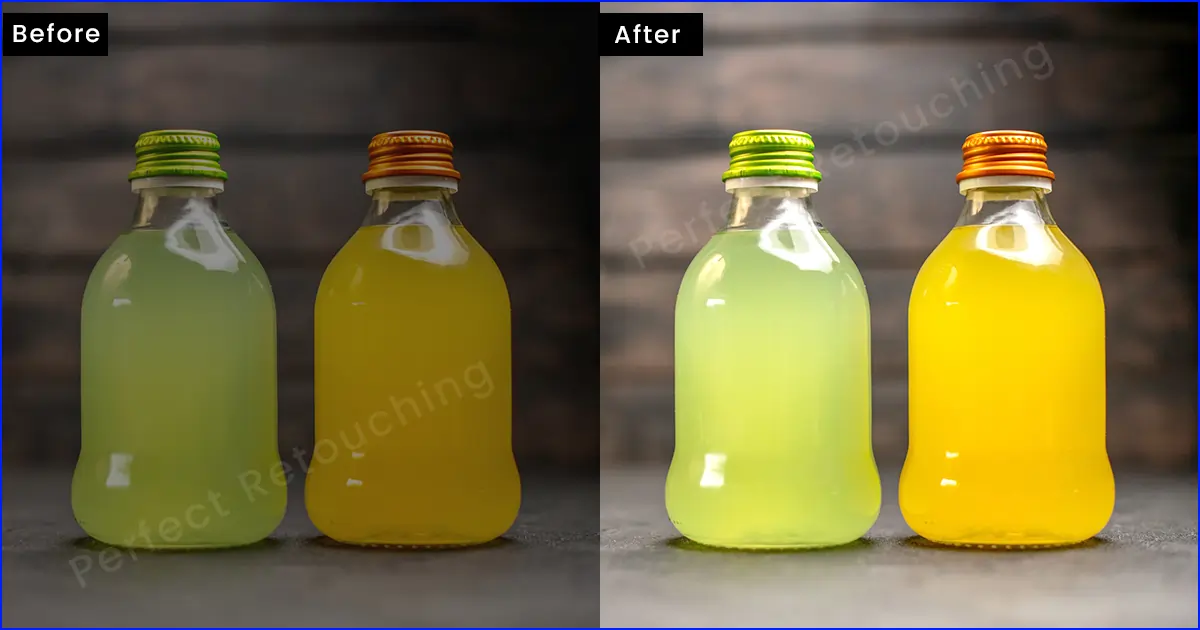
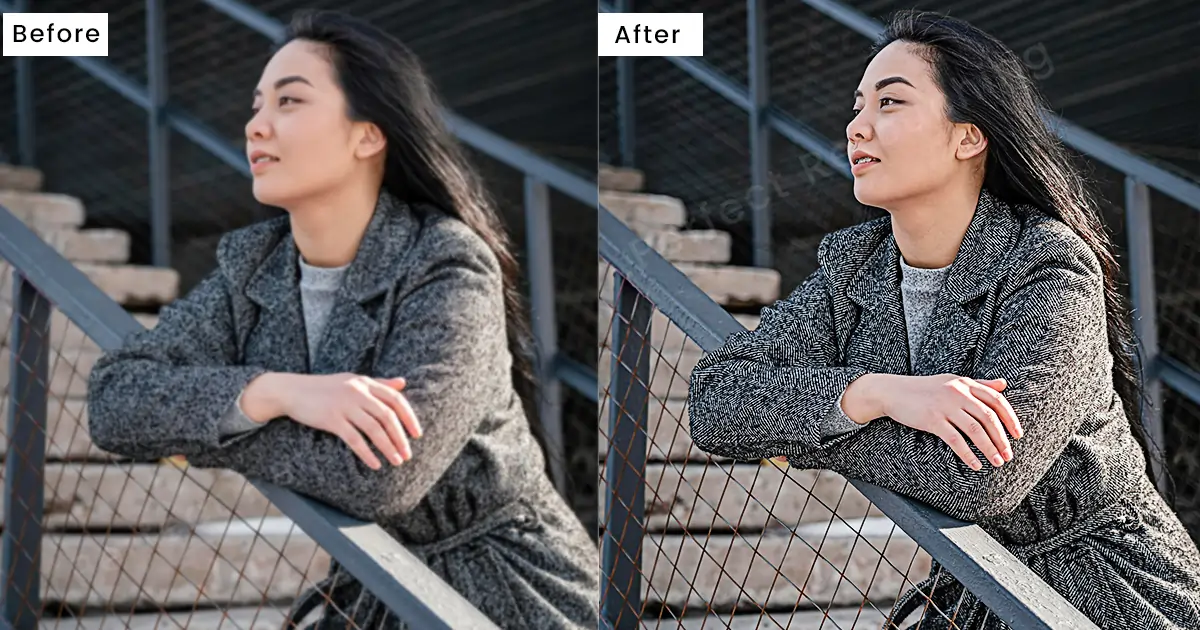
Do Color Correction
Correcting color is an important part of product photo editing. If the image does not display real color and appears too dark or bright, it will look unnatural. So, change the image color in Photoshop by hue and saturation adjustment.
From the Menubar, Select Image>Adjustments>Hue/Saturation. adjust hue/saturation from the appeared box. Click OK. If you only want to edit the image with its realistic color, adjust the saturation. However, if you want to change the shade of the color like turning blue to royal blue, adjust the hue.
Do Exposure Adjustment
Though you can control exposure in cameras, some areas of the image may get brighter or darker. It can be distracting for the audience and decrease the image quality. However, you can do exposure adjustments in Photoshop easily.
Go to adjustment layer>Exposure. The Properties dialog box will pop up. There are a few options you can see like Exposure, Offset, and Gamma Correction. Exposure helps you increase highlights, Offset helps you fix the dark areas, and Gamma Correction helps you keep mid-tones in the image.
Gamma correction is the most useful when it comes to fixing exposures. So, according to your need adjust these three slowly. When you get your desired results, click OK. Do not over-edit in post image processing or you may lose valuable details.
Note: Gamma Correction increase/decrease works differently. If you decrease it, it will brighten the image and if you increase it, it will darken the image.
Reduce Noise
Noise enters the camera for many reasons like high ISO, lighting, heat, long exposures, etc. It makes the image look unpleasant. From looking at the picture, you can clearly understand if there is noise or not. So, remove noise and make your image crisp in Production photography.
Select Filter>Noise>Reduce Noise. From the dialog box, Increase Strength to 10. If there is any color noise you notice in the picture, reduce it from the "Reduce color Noise" Slider. Zoom out to see if the image looks cleaner. Also, if the image's sharpness looks lost, adjust it from the "Sharpness Details" slider. If the image looks clear and noiseless, you are good to go!
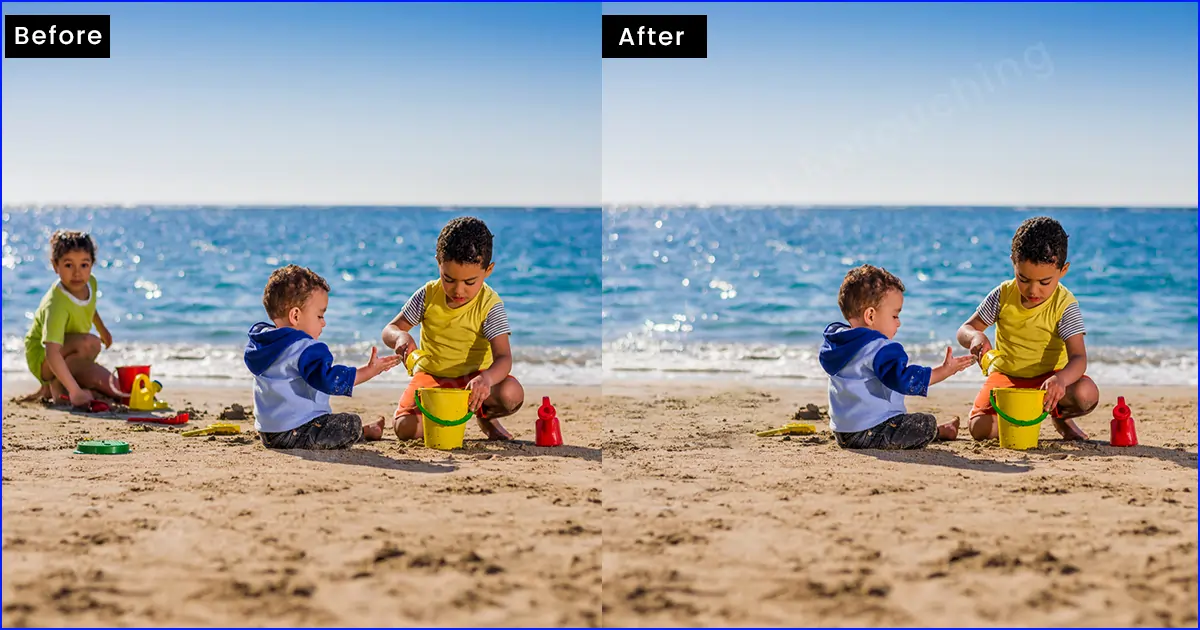
Remove Unnecessary Elements
Often the setting is amazing but there are people or some distracting objects that you cannot remove. So, what to do? Take the shot and remove unwanted elements with the Lasso Tool and Clone Stamp Tool in Photoshop. Here's how:
Select the object with the Lasso Tool. Go to Menubar, Click Edit>Fill>Contents: Content-aware>OK. You will see that the object has been removed. Click Ctrl+D to erase the object selection mark.
Now, the removed area looks a bit unnatural, correct? retouch the area with the Clone Stamp Tool to blend it with the setting. Select Clone Stamp Tool from the Toolbar. Select tones from the surrounding area and retouch them till the area looks natural.
Note: If the clone stamp tool is not working in your Photoshop software, check this article on How to Fix Clone Stamp Tool Not Working and fix it.
Detect and Erase Spots and Blemishes
Sometimes it is hard to find dust and blemishes in high-end jewelry retouching. So, to detect the spots and blemishes in Photoshop, create an adjustment layer- take the anchor point of the curve to the top. Create another anchor point, and drag it down completely. The curves will look like a “S” sign horizontally. Now, the spots and blemishes will be visible clearly.
It is time to remove them. Select “The Healing Brush Tool”- Take tones from a spotless area and remove the spots and blemishes. If retouching is done, turn down the adjustment layer or delete it. It will not affect the main image.

Sharpen The Image
If your subject does not look highlighted, you can increase their highlight by sharpening the image. Go to Menu>Filter>Other>High Pass. From the appeared dialog box, fix the radius like 3 or 4 pixels. Click OK. Now, go to the layers panel- choose Hard Light- Opacity 100%- Fill 100%. Again, Go to Filter>Sharpen>Smart Sharpen. A dialog box will pop up. From there, checkmark Basic, settings- default, amount- 80-90%, Remove- Gaussian Blur, checkmark More Accurate, and Click OK. Your image is sharpened. However, while post processing it, make sure to not over-sharpen and make the subject look like a cartoon.
Crop Image According to Social Media Format
If you do not meet the allocated social media image size format, it may get cropped or widened upon uploading it. So, it needs to have the perfect width and height ratio. However, even if the captured image has a different ratio, you can easily increase or decrease the canvas size and crop it in Photoshop.
Select Crop Tool>Increase or decrease Height & Width. If you are done editing canvas size, select Rectangular Marquee Tool and select the complete image. Go to Menu>Select>Inverse. The selection will be inversed to the expanded/decreased canvas. Again, go to Menu>Edit>Fill>Contents: Content-Aware>OK. The canvas will be filled with the original image and look natural.
Add Watermark Before Uploading
Unless you are working for a client, I recommend using your watermark before uploading your image to social media. Why? Firstly, you get credit for your work. Secondly, when someone else shares your image on their profile, the watermark will lead the viewers to your profile. Thirdly, it allows you to promote your work.
So, Place a watermark in the image post-processing following this technique. Take the logo to Photoshop. If your logo color is different, make it white. Right-click and choose color overlay. Select white color and click OK. Select "Drop Shadow" from the layer style, if you want to increase the depth of the logo. However, if you do not want to, you can also try other options to beautify it.
Now, go to Edit>Define Pattern>Write the pattern name>OK. Go to the original image file and click on adjustment layer>Pattern>Add Scale value to adjust the size>OK. The watermarks have appeared in your post-production photo. Decrease the opacity to make it transparent to 40% or lower.
Note: While placing the watermark, make sure it does not look distracting. It should be traceable but not too much highlighted.
Flatten The Image to Print it
You can flatten the image when you want to reduce the file size or print it. However, you can not do it directly in photo processing. Follow this process to keep the image quality intact after flattening it.
First, adjust the image size. From Menu, Image>Image Size. Adjust the height and width. If you are flattening the picture to print it, choose width- 35 Inches and height- 47 Inches. Save the adjusted image so that if you do not like something, you can edit it later.
Now, choose Layer>Flattened Image. Go to Files>Save As. Choose the format as Photoshop PDF and write your desired name in “Save As”. Click “Save” and Another dialog box will pop up. From there, Select "High-Quality Print" in Adobe PDF Preset and uncheck "Preserve Photoshop Editing Capabilities" Click "Save PDF" and your image file will be reduced with quality intact.
Some Useful Tips to Edit Your Images Flawlessly
- Select the best quality image. Take all images on your device and go through them one by one. Choose the one that is well executed. Remember, you can not fix a poor-quality image in post-processing. However, you can increase the quality of the well-executed picture.
- Take notes of the flaws. After selecting and taking the images for post-processing, zoom in and check all the flaws. Edit the imperfections one by one and make them flawless.
- Edit thinking of the final output. When you took the image, you had a final outcome in mind, right? just remember that and try to give it a form while editing. Do not hesitate to experiment to get the best output. Just keep a copy of the original image and try all the options.
- Think of your audience while post processing photos. Depending on the photography genre like landscape, product, beauty, headshot, real estate, etc. your audience will vary. So, when you edit an image always think of your target audience. For example, is the image attractive, or can it create emotion in your audience or make a sale?
- Keep consistency and portray your style. Everyone uses Photoshop to edit their picture but do all the pictures look the same? No. the reason is everyone's editing style is different in post-production. So, while editing, highlight images in your style and keep consistency in all pictures. This way your audience will be able to recognize your photography immediately.
Take Perfect Retouching’s Photo Editing Service in Affordable Price
Our expert retouching team always prioritizes our clients' needs. They follow the instructions of post-processing and satisfy customers with their flawless retouching in a fast turnaround. Our retouchers know what audiences like. They keep up with trends and engage with the audience with their attractive editing. Here are the services we provide in Perfect Retouching. Check them out.
Jewelry Retouching Service
From dust, spot, & reflection removal to shadow making and mirror effect, our creative jewelry retouching experts can do all. They go through the jewelry image and check flaws thoroughly. They polish the image to highlight all the details and ensure stones are shining. Our retouchers remove all the imperfections and make sure the clients get a ready high-quality image to upload to their websites. For more information, click here.
Product Photo Retouching Service
Our product photo services for e-commerce include adjusting lights, correcting colors, adding natural shadows, adjusting highlights, reshaping, liquifying, and making your product photos symmetrical. Our expert retouchers know what will catch the attention of the audience and ensure the final picture looks eye-catching and realistic. For more information, visit our product retouching service page.
Professional Beauty Retouching service
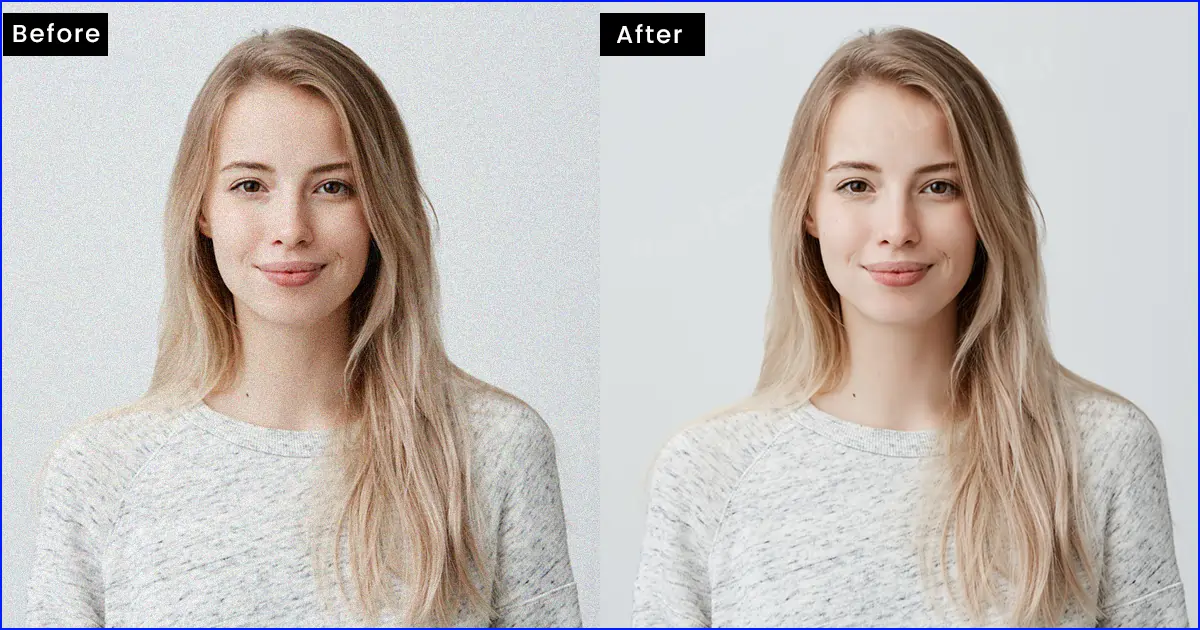
In this competitive era, your model images need to stand out to capture the audience's attention. Our retouchers ensure to portray your unique features and help you shine in the crowd. Our beauty retouching services include eyes and lips beautification, removing stray hair, wrinkles/spots/blemishes, and skin glow and softening. They highlight your unique look and create high-quality model images.
Professional Headshot Retouching Services
Our company also has expertise in retouching headshots. Our professional headshot retouchers make sure the image looks professional and approachable. They portray one's natural expression and show their character in the image. Our headshot photo editing services include removing stray hair, eye bags, and swat spots. sharpening eyes, whitening teeth, removing pimples, and wrinkles, face/body reshaping, and skin smoothening.
Summing Up
If you want to stand out in this online marketing era, you need to focus on post-processing photography. The more uniquely you can portray the features, the better it will capture the attention of the audience. So, shoot in raw and edit your images in a way that blows the minds of your audiences.
However, if you do not have enough time to post process images thoroughly, contact us. Our customers are 100% satisfied with our work because we provide high-quality images and maintain deadlines strictly. Also, our capable retouchers can edit high-quality images in a short time. So, take our free trial and see the results yourself.


